• Skip to primary navigation
  • Skip to main content
  • Skip to primary sidebar
  • Skip to footer

Sweet Love and Ginger

  • Home
  • About
  • Recipes
  • Garden
  • Work With Me

Crafts

12 mediums -12 projects -12 months

By Jessica

This post may contain affiliate links. I may receive commissions for purchases made through links in this post.

I love to craft, and subsequently have a lot of stuff
hanging around my house for crafting. This year in an attempt to clean out my stock
a bit, and get better at sharing my crafting adventures with you I’m going to
start a new project. I know this might seem a little crazy since I am also
planning a wedding this year, and just started house hunting but I’m doing it anyway, and I have tied a few of
the projects in with the wedding as well so it might make things a bit easier.

Here is my list of materials in no apparent order. Each month I
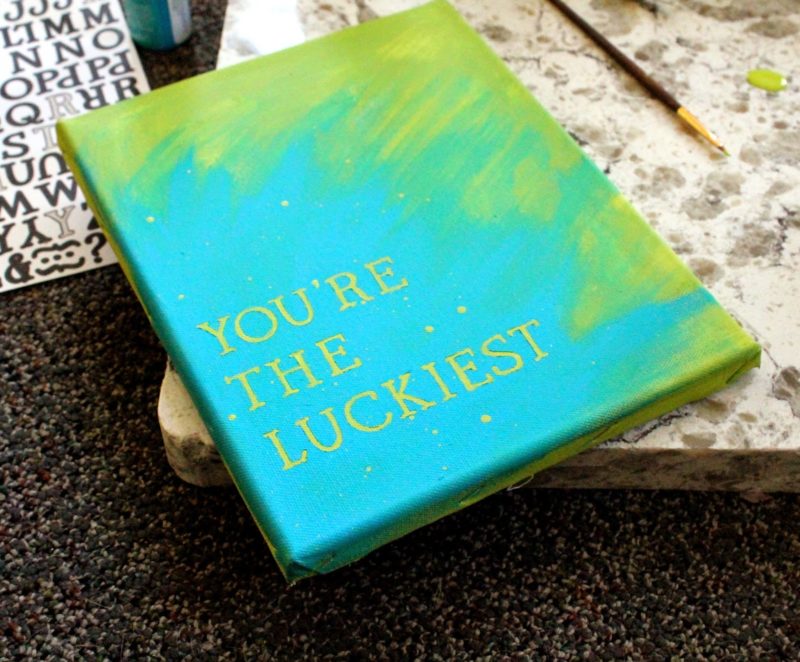
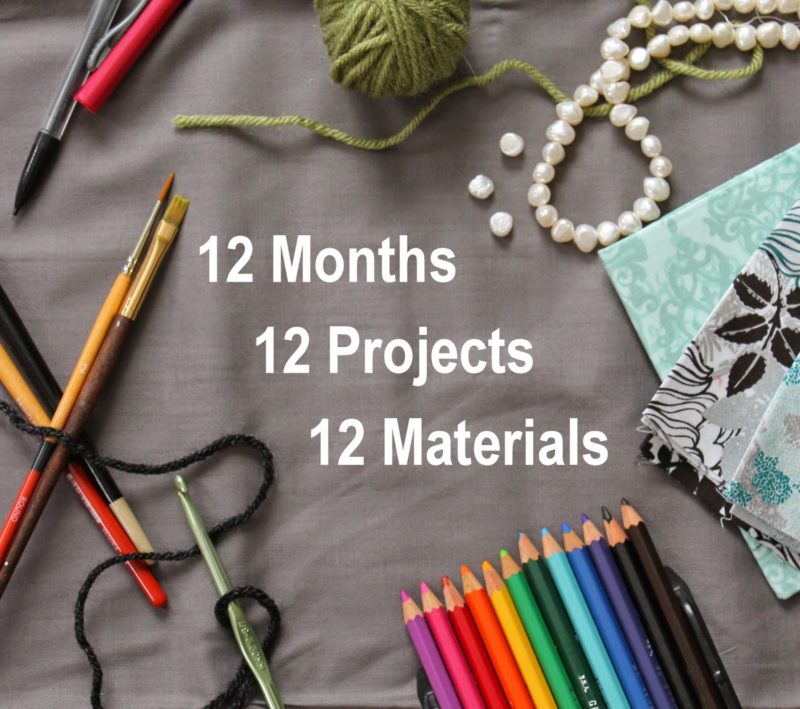
will create something using one of the mediums and post about it. I got the original idea here. I might do a
how to, a quick blurb about how it turned out or a link to the tutorial I used,
depending on the project. Notice that there are more than 12 mediums. I also reserve the right to change or add mediums to the list.


Yarn | Photo | Paint | Ink | Glass | Wood | Wax | Clay | Ribbon | Rope | Feather | Bead | Fabric |  Rubber | Paper | Wire | Felt | Stone | Dye

Yes this project description is broad, and has lots of easy outs. There are reasons for that. This is my first time tackling a large project like this, and I’m not sure what ideas I will come up with as the months go on. I want this project (like NaNoWriMo) to help me broaden and play with my creativity. I hope to learn a lot, and get into more creative habits. I’m super stoked about this project and have already started on a few of the bigger projects, mainly because I couldn’t contain myself. I cannot wait to share them all with you.

Something you may notice is that I’m starting this project in February, which is not the actual start of the year, but it’s my birthday month so I’m going to do this in my year, I hope to have all these projects finished by my birthday next year.

I think one small project a month is totally doable, and a
great way to carve out some alone/artistic time throughout the year. Wish me
luck and keep your eye out for Monday’s post with the very first project!

Do you have any crafting goals for this year? or anything you think that would interest me? I’m looking for ideas!!!!

February 13, 2015 January 29, 2018 Filed Under: 12-12-12, Crafts

Phrase Canvas DIY

By Jessica

This post may contain affiliate links. I may receive commissions for purchases made through links in this post.

I stated before that I want to put more effort into
decorating our little apartment and this is the first project that I am sharing
here on the blog for it.

It’s a pretty simple DIY. All you need is a canvas, some
letter stickers and the paint colors of your choice.
The phrase I had in mind is from a song that is very special
to both me and Chuck, and will be our first dance song when we get married in
10 months. Woah! 10 months seems like it’s so close I mean we got engaged over
a year ago already!

Anyway I really wanted to make something that was meaningful
to us and this just felt right. Here is the song FYI.


I started by painting the canvas my favorite green color and
letting it dry completely, overnight. Then I placed the letters and painted my
second color over it. I went back and added a bit more green to blend it a
little better, and give it a more abstract look.

Overall I’m pretty happy with how it came out. I love that
it gives me something new to look at every day also.

Some of you may have seen the same canvas before when I had
hand lettered a C.S. Lewis quote on it. Sometimes you just need a change.

Have you done anything to freshen up your home lately?

November 24, 2014 February 12, 2018 Filed Under: Crafts, Uncategorized Tagged With: Bits of Home

Tea Tin Turned Planter Tutorial

By Jessica

This post may contain affiliate links. I may receive commissions for purchases made through links in this post.

Big news over here kids! I finally took pictures of a craft I did, while I did it; like step by step pictures. I know its pretty earth shattering. Are you ready for a tutorial? I’ve had this project in my head for like ever and it feels good to finally get it out there for you guys. It’s super easy and can be done in less than 20 minutes if you have everything together. Perfect craft right?

It starts out with a need for a use for the million and one leftover tea tins that I have. I know I can just recycle them, but some of them are just so need looking that I want to keep them. For this project I started off with a basic tin, just in case I screwed it up. Luckily I didn’t, so I will get to work on my other tins soon enough.

Step 1: Gather supplies. Shouldn’t this always be step one? I usually skip it, get half way through a project and realize I need to go to the store. Then the project sits there for a few weeks until I get ambitious enough to get to the store and finish it. Just me? Oh well.
Tea Tin Turned Planter Tutorial

Step 2: Use the hammer and nail to poke a few holes into the bottom of the tin. Or call to your honey to do it for you while you make a cocktail.

Step 3: Place some stones and dirt in the bottom.

Step 4: Add your plant and fill in the edges with dirt.
Step 5: Water your plant, and add dirt where it has settled, if necessary.
Tea Tin Turned Planter Tutorial

Step 6: Clean up your inevitable mess of dirt, and toss the
tea tin top.

Don’t forget to have a few sips of said cocktail while you work, it’s important to stay hydrated, or hammered depending on your outlook.
What do you guys think? Do you want to see more things like this? Feel free to tell me that I’m an idiot and should just stick with food. I can take it, though I may not listen. I will be a Modern Age Martha if I want to.


June 16, 2014 December 5, 2017 Filed Under: Crafts, Garden

Easy Coaster Craft

By Jessica

This post may contain affiliate links. I may receive commissions for purchases made through links in this post.

I never thought I was a fan of coasters. They always felt a little
too fussy for me; however since living on my own I have noticed the craving for
them a little more often. It’s not like we have any kind of nice furniture that
needs protecting or anything, but a constant spot to place my mug while sitting
at my desk is a comfort. A simply placed one on a stool to let a guest know
that we are those hobos who use it as an actual table because a. we have no
room for real tables and b. we are cheap as hell and these were by the side of
the road.

Speaking of being cheap there is no way in hell I’m about to
pay more than a couple bucks for a coaster so of course I decided to make them
myself. I had some quark laying around anyway, but you can pick it up at most
hobby stores pretty cheap. I measured out the size I wanted and cut them with
regular old scissors.
I wanted a geometric design so I laid them out with painters
tape and used a stencil brush and craft paint to stamp out my patterns. This was
a great, cheap and easy afternoon project that I’m pretty sure is an awesome
idea for children of all ages, and not just because I’m posting it here.

The extra pieces of quark I up cycled for a quark liner over
my desk. The thriftier in me just can’t let anything go to waste. 

Has the holiday craft bug hit you yet?

November 25, 2013 December 4, 2017 Filed Under: Crafts

A Special Bracelet

By Jessica

This post may contain affiliate links. I may receive commissions for purchases made through links in this post.

Recently a friend of mine asked me to do a very special
piece for him.

His mother was having a hard time with the loss of her son,
my friend’s brother. In an attempt to memorialize him for her he asked me to
make a bracelet for her.

A few short conversations about his favorite things, colors,
and different types of bracelets I went to work. Finding the right beads and
charms was a little difficult but I really had a feeling that this piece was
important and I spent as much time choosing the parts as I did actually making
it. I had a sense of what I wanted to do in my mind, but not being 100% sure I actually
ordered each bead, and multiple types of beads in multiple colors and sizes so
that I could have more to work with.

Once everything finally arrived, it was as if my creative
spirit took over and I just began to create. I used a symmetric pattern so that
the central piece a Swarovski heart, in the son’s favorite color was the focal
point.

As soon as I was done I used a few of the leftover beads to
create a matching set of earrings. They are a very simple and basic design, but
I really love how the colors and beads just shine.

It’s amazing to me how much joy and feeling I put into this
piece. I can only hope that its recipient gets the same feeling.

Have you done any projects lately that really touched you?

October 30, 2013 December 4, 2017 Filed Under: Crafts Tagged With: jewelry

  • « Go to Previous Page
  • Page 1
  • Page 2
  • Page 3
  • Page 4

Primary Sidebar

  • Facebook
  • Instagram
  • Pinterest
  • Twitter
  • YouTube
Hi, I'm Jessica. I'm an herbalist living in the great northeast with my husband Chuck, our two little boys, our dog Brody and a flock of chickens. I'm all about real, good food and good times with awesome people. I spend a lot of time outside, in my garden, and concocting potions and helping people feel their best. I also like tea, reading, and about a million other hobbies. I'm so happy your here on this adventure with me.

Footer

Copyright © 2025 · Foodie Pro Theme On Genesis Framework · WordPress · Log in