• Skip to primary navigation
  • Skip to main content
  • Skip to primary sidebar
  • Skip to footer

Sweet Love and Ginger

  • Home
  • About
  • Recipes
  • Garden
  • Work With Me

Camping Recipe

Campfire Nachos

By Jessica

This post may contain affiliate links. I may receive commissions for purchases made through links in this post.

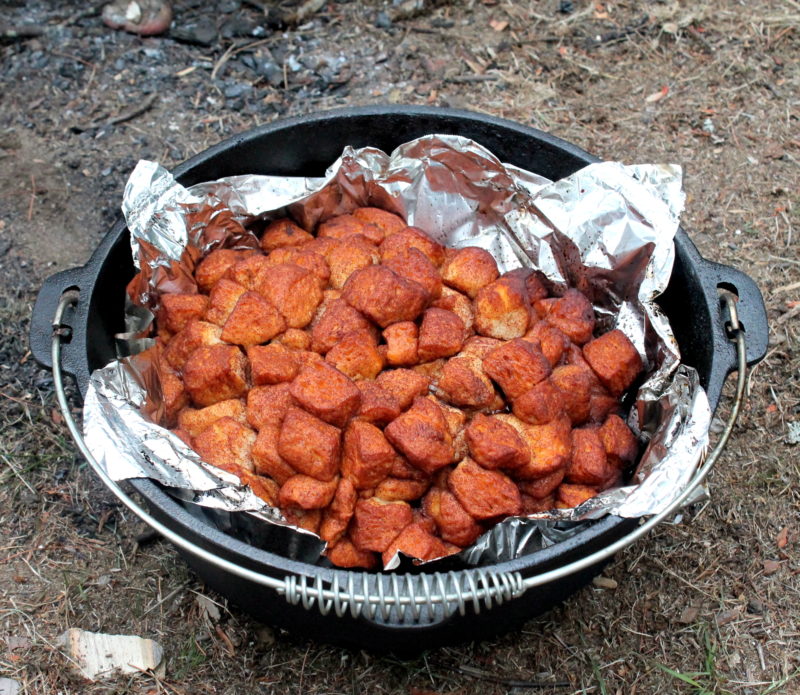
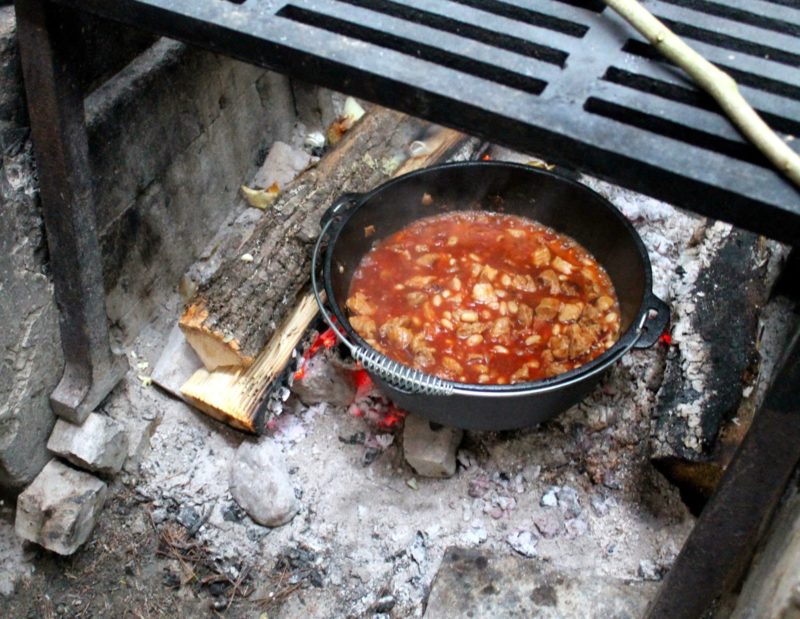
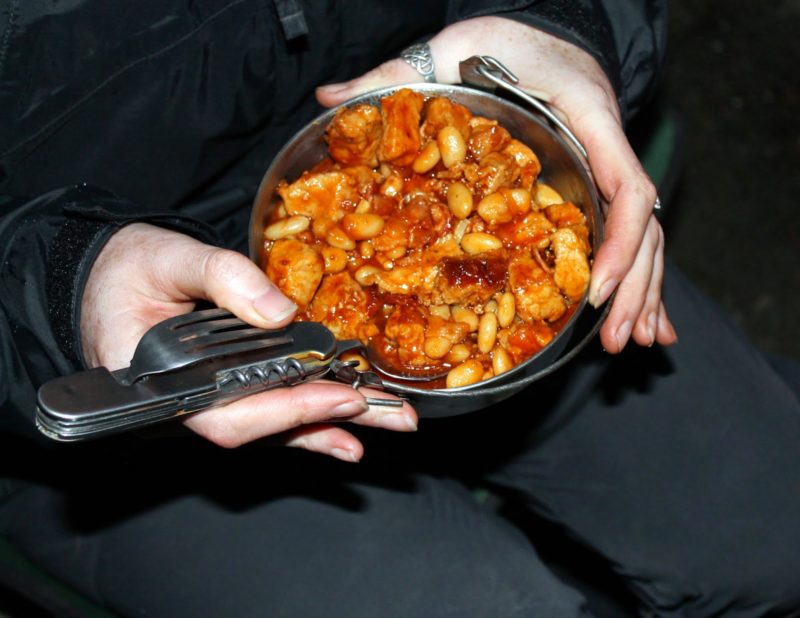
This has been one of those recipes that has been sitting in my post folder for a long time. It’s a good one, but getting a halfway decent picture of it has proved to be difficult. For some reason, we tend to enjoy this dish while camping at night, which means no good lighting. It’s in fact usually the worst lighting ever, but that’s life and we forget about it and enjoy the food, because that’s what it’s here for anyway.
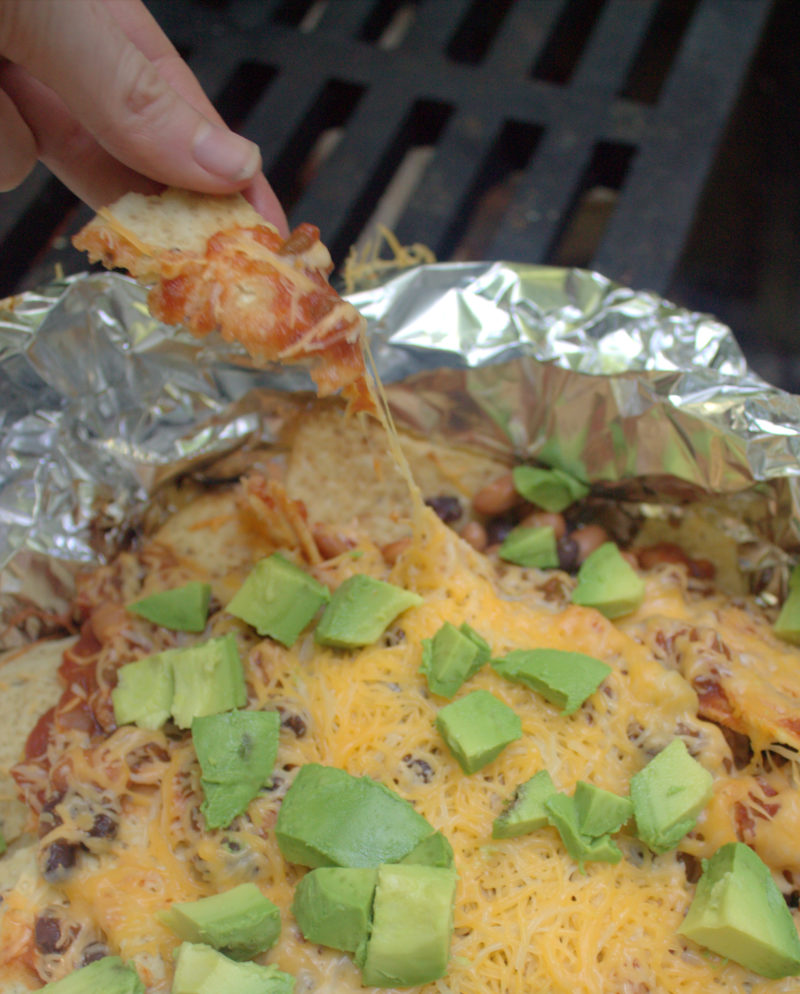
Campfire Nachos

Campfire Nachos

This past weekend Chuck, Brody and I met up with our friend Pat for a little camping in VT. It was a much needed break from reality. There was a lot of fishing, puppy dog swimming, and napping. Man, it’s nice to nap, I should do it more often. I mean really why did we ever stop napping?

I’m getting off track here.

I made these awesome nachos for lunch during this restorative little trip. It was the perfect easy lunch that was surprisingly filling. I had originally planned to have these with hot dogs, but the nachos were more than enough to fill the three of us heartily until dinner time.

IMG_1848.CR2

This recipe is pretty basic because getting too fancy when camping can be a drag. You are there to have fun, not slave over every meal right? However, you can make this same recipe just as easily at home in the oven or on a grill where the fancier toppings are more at hand.

Some notes about this recipe. I tend to prep the beans ahead of time at home and put them in a container or ziplock for camping. Again we are going for ease while we are in the woods. If you wanted to add some other veggies or meat you could also toss them in with the prepared beans. Also be very careful about putting the foil pack directly onto hot coals, the chips may burn with such direct heat. We are just looking to warm up the dish and melt the cheese here.

Campfire Nachos

Campfire Nachos


Campfire Nachos
Cook time: 10 mins
Total time: 10 mins
Serves: 6 SErvings
Ingredients
  • Several handfuls of tortilla chips
  • 1 can of beans, drained and rinsed
  • 1/2 cup salsa of choice
  • 1 cup shredded cheddar cheese
  • Additional toppings of choice (olives, cilantro, avocado, etc.)
Instructions
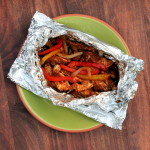
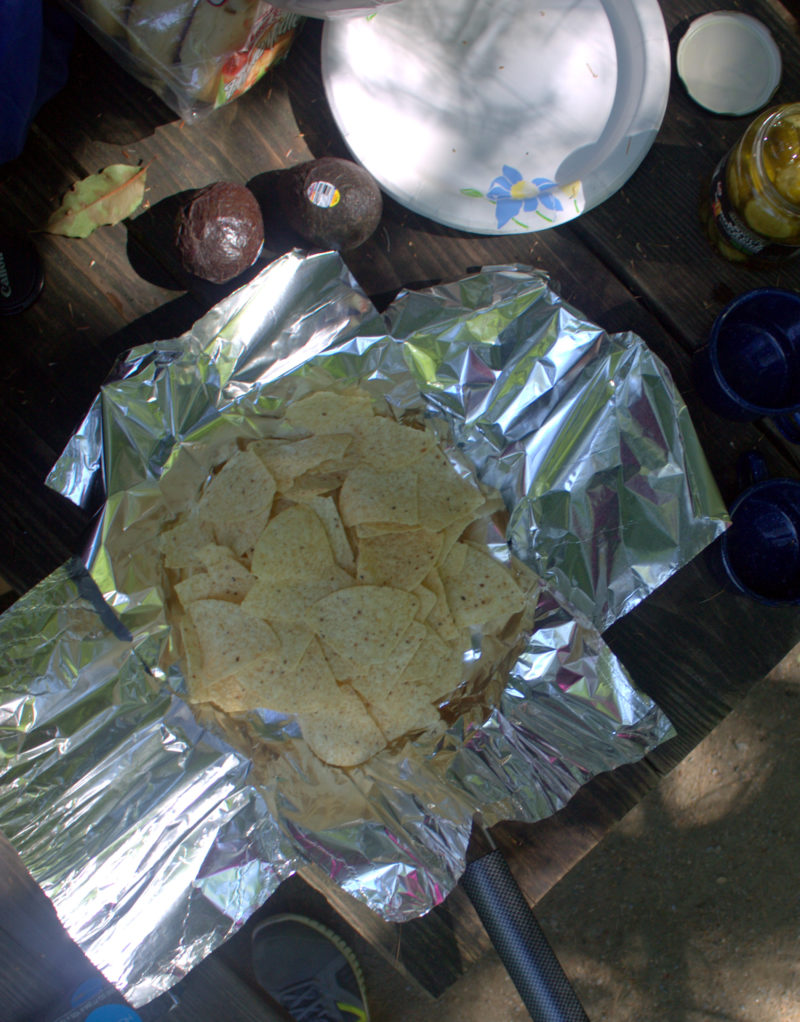
  1. Lay a large piece of foil out flat and top it with another piece of similar sized foil so that they make a cross.
  2. Spread half the tortilla chips in the center of the cross. Spread half the beans and half the salsa over the chips.
  3. Add the rest of the tortilla chips and top them with the rest of the beans, salsa and cheese.
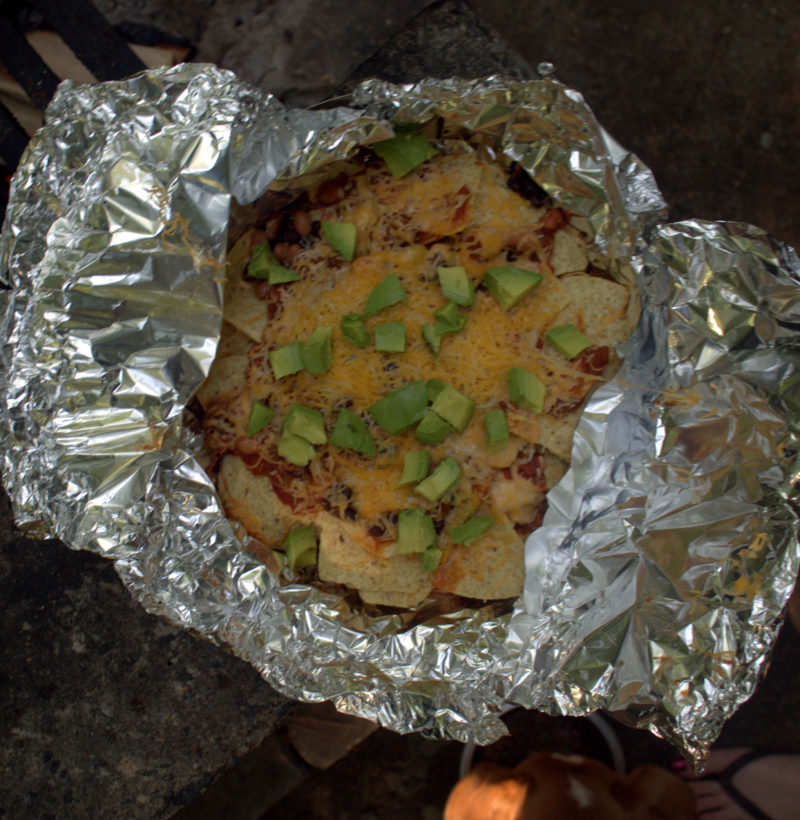
  4. Fold the edges of the foil up to enclose the nachos in a packet. Place on a grate over a fire and cook for 5 to 10 minutes, or until the cheese becomes melted.
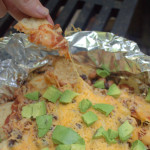
  5. Remove from heat and carefully open the foil packet.
  6. Top the nachos with any additional toppings and serve immediately.
3.5.3208


August 31, 2016 October 23, 2018 Filed Under: Appetizer, Camping Recipe, Recipe Tagged With: appetizer, Camp Food

Campfire Monkey Bread

By Jessica

This post may contain affiliate links. I may receive commissions for purchases made through links in this post.

IMG_7769

Monkey bread is a Chuck family staple, and something I had never heard of before I met him. You guys, I was so ill-prepared for the deliciousness. Now I look forward to it, and whenever I see a roll of those pre-made biscuits in Mama Chuck’s fridge I get excited.

During our recent trip to Laconia bike week we camped out at a local camp ground and I was in charge of all the food for our group of about 9 people, which with one Coleman Camping Stove, and a fire pit that had no grate on it was quite the challenge. I learned quite a lot about preparing the food quickly, as well as catering to a number of different preferences, so I think next year I will be much more prepared. There might be a post in there somewhere about cooking for large groups while camping.

For this trip I decided to try out a camping version that I saw online. The premise is pretty much the same except you cook it over the campfire in a Dutch oven.

IMG_7785

It came out great, though with a little smokier flavor than I was used to. I also found that in order to cook it evenly you really do need to place hot coals on top of the Dutch oven. Without even cooking you are likely to end up with a burnt bottom and a raw top. Yes, this comes from experience, so believe me!

Campfire Monkey Bread
Prep time: 10 mins
Cook time: 35 mins
Total time: 45 mins
Serves: 8-10 Servings
Ingredients
  • 2 rolls pre-made buttermilk biscuits
  • 1/3 cup white sugar
  • 1/3 cup brown sugar
  • 3 tablespoons cinnamon
  • 1 stick butter, melted
Instructions
  1. Get a good fire going and burn it until there are a number of hot coals.
  2. Meanwhile combine the sugars and cinnamon in a zip lock bag.
  3. Line a fire safe dutch oven with foil and spray with cooking spray.
  4. Cut the biscuits in to bite size pieces and drop each piece into the bag with the sugar. Toss to coat then drop the biscuit pieces into the prepared dutch oven.
  5. Pour the melted butter over the top for the mixture.
  6. Place the lid on top and put over hot coals. Carefully place a few of the hot coals on top of the lid and cook for 30 to 35 minutes, rotating regularly.
3.3.3077

So now tell me, what are your favorite camping treats?

What’s your favorite camping meal aside from the usual hot dog?

Similar Recipes:

Camping Meal Plan

Camp Clam Chowder

Campfire Nachos

July 23, 2015 May 2, 2019 Filed Under: Camping Recipe, Recipe Tagged With: Camp Food, Camping/hiking, Desert

Campfire Maple Chipotle Pork & Beans

By Jessica

This post may contain affiliate links. I may receive commissions for purchases made through links in this post.

So I may or may not have mentioned this recipe before. What
I haven’t told you is that I have made it before, more than once, and this my
friends was by far the best version I have ever made. The original recipe can
be found here. Man Barry knows where it’s at when we are talking maple and
chipotle. I am however convinced that the smoky campfire flavor that gets added
in when you cook it over a fire adds something that just sends it over the top,
over the moon in fact.
I probably could have eaten the entire thing myself, had it
not been for our other camping pals who were standing around hungrily with their
collapsible silverware. I think it was well received since it had cooled off
quite a bit and we sat huddled around the fire. There was just enough spice to
warm us up heart and soul so we could make it through the final wet and rainy
night at our camp ground. Chuck even said it was his favorite version yet.
Seriously give it a try.

Campfire Maple Chipotle Pork & Beans (Serves 4-6)
2 lbs lean pork, cut into 1 inch cubes
1 tsp black pepper
1.2 tsp cumin
1 tsp chipotle powder
½ cup brown sugar
½ tsp salt
½ lb apple smoked Bacon, diced
1 large onion, peeled & diced
3 cloves of garlic, minced
½ cup beer (or water)
2 tsp chipotle powder
1 tsp salt
½ cup apple cider vinegar
1 tsp dried thyme
1 cup maple syrup
3 large bay leaves
1 (14oz) can pureed tomatoes
2 (14oz ) Cans navy beans, drained & rinsed

In a large bowl (or ziplock bag) combine black pepper,
cumin, chipotle powder, salt, and brown sugar, stirring well to combine. Add
pork and toss to coat. In a large Dutch oven sauté bacon over medium heat until
it is crispy. Drain the grease and add butter and onion to the pan. Cook the
onion until it begins to turn translucent 2-3 minutes, and add the garlic. Cook
for an additional minute before adding the cubed pork. Once the pork is cooked
through, about 5-7 minutes add in the beer, chipotle powder, salt, vinegar,
thyme, syrup and bay leaves. Allow the mixture to simmer and the liquid to
reduce  to about ½ before adding in the
pureed tomatoes and beans. Stir well to combine and cook for an additional 2-3
minutes before serving.
Camping tip 1: Prep everything ahead of time, combining the
pork with its spices in a ziplock bag, and the chipotle powder, salt, vinegar,
thyme, syrup and bay leaves in a reusable container to be added at once. It
also helps to drain and rinse the beans then place them in a container as well.
This all helps cut down on the waist while you are camping and the amount of
stuff you have to bring/remember.
Camping tip 2: Get a large fire burning for a few hours
until you have a strong bed of coals. Place your cast iron dutch oven right
over the coals and place some smaller pieces of wood around the edges to keep
burning. This will work for your medium high heat.
Camping tip 3: Don’t drain the grease, and don’t add the
butter. The grease will work as your butter, and add a bit more flavor. Besides
you don’t need animals sneaking around liking up your grease.
Camping tip 4: Final cooking time will depend on the heat of
your fire, but if you want the flavors blend you can allow it to cook all day,
adding water to keep it from getting to thick.

September 29, 2014 January 29, 2018 Filed Under: Camping Recipe, Recipe Tagged With: Camp Food, Pork

Camping & Craziness

By Jessica

This post may contain affiliate links. I may receive commissions for purchases made through links in this post.

Today I’m taking part in a link up that Chrystina is running on her blog today. The basic idea is to share the best and worst part of your week this week. Then link up to see what is going on in everyone else’s week.

One Up

Last weekend we got in some camping, with friends before it
gets super cold. We went to this same spot last year, except this year we were
able to get a spot right on the lake. The boy’s did a lot of fishing while I cuddled
up for some good reading in front of the fire, one of my absolute favorite
things to do ever. It did rain on us, but we made it work, and my plan to make
Maple Chipotle Pulled Pork & Beans was a perfect choice to warm us up. I’ll be
posting an over the fire version of this recipe soon enough. 

In the mean time, let’s talk about Pat’s Red Neck Hollandaise Sauce. I mean that kind of decadence while camping is unheard of for us, but it was so good, it may have to be repeated. It’s good to have friends with a similar interest in food.

Pat’s Red Neck Hollandaise Sauce (serves
4-6)

½ cup sour cream
½ cup mayonnaise
1 tsp lemon juice (more if necessary)
½ tsp plain mustard
½ tsp fresh chopped rosemary

Combine all ingredients in a pan and heat over hot coals
until the mixture becomes smooth and creamy. Serve Warm.
One Down
This week was/is a little hectic just like the last few
months have been. I can feel my energy waning, I desperately need to find time
to heal, and detox a bit. I know that Chuck is feeling the same, we have just a
few more weeks of craziness ahead and then hopefully we can dial it back again
and recoup.

Even though my schedule has been a bit of a whirl wind my
mind has been exploding with new ideas and project and I can hardly contain
myself. This busy schedule means I haven’t had a chance to work on anything and
I can feel it starting to tear me at the seams. I cannot wait to have a moment
to flush out some of these ideas. 

PS: Check out my interview over on If Found, Make Today. 

September 19, 2014 February 12, 2018 Filed Under: Camping Recipe, Recipe Tagged With: Brunch, Camp Food, Camping/hiking, Condiment

Backpack Tuna Mac

By Jessica

This post may contain affiliate links. I may receive commissions for purchases made through links in this post.

This might very well be one of the best things to bring on a hike
ever. I love that they make tuna in a pouch with flavoring already! I mean does
it get easier than that?
You could basically just spoon it out of the package with crackers
and call it a meal, but I decided to up it a notch by cooking pasta for it. I
also chopped up some cucumbers, and carrots, but those are totally optional.
For this recipe I used the classic deli style tuna, but Ranch is
also a great option.
If you have a fireplace with a grate just
cook the pasta in a pan over the open fire. If you just have a fire pit without
a good grate it may be a bit more complicated. In order to cook the pasta you need
to get a pretty big fire going and then let it burn down to coals. You can
place the pot right on the coals, depending on your equipment or you can place
it on a rock in the middle (you may want to get that in place ahead of time).

The water may not actually boil like it would on the stove, but it
will get hot, and cook the pasta. Be sure to stir the pasta often and test it
to see when it’s done. Cooking times will vary based on the temperature of the
fire, but it should take anywhere from 10-25 minutes. If it is taking a while
feel free to build up the fire around the pot using small sticks, just make
sure you can still access the handles, and that they are not in danger of
melting. Note: It’s important to have the right gear for cooking over a fire. I
am working on a camping gear page now, but in the mean time, this pot is a
great example of the type that we use. 
Once the pasta is done, just drain it and stir in the tuna, and
any other ingredients. I mean how easy is that?
Another note: If you are backpacking water is a precious commodity,
I suggests saving the drained water for other uses. You could use it with
bisquick in the morning for pancakes, or stir simply in hot cocoa.

August 27, 2014 February 12, 2018 Filed Under: Camping Recipe, Recipe Tagged With: Camp Food

  • Page 1
  • Page 2
  • Go to Next Page »

Primary Sidebar

  • Facebook
  • Instagram
  • Pinterest
  • Twitter
  • YouTube
Hi, I'm Jessica. I'm an herbalist living in the great northeast with my husband Chuck, our two little boys, our dog Brody and a flock of chickens. I'm all about real, good food and good times with awesome people. I spend a lot of time outside, in my garden, and concocting potions and helping people feel their best. I also like tea, reading, and about a million other hobbies. I'm so happy your here on this adventure with me.

Footer

Copyright © 2025 · Foodie Pro Theme On Genesis Framework · WordPress · Log in