• Skip to primary navigation
  • Skip to main content
  • Skip to primary sidebar
  • Skip to footer

Sweet Love and Ginger

  • Home
  • About
  • Recipes
  • Garden
  • Work With Me

Cooking Lessons

4 Ways to Cook an Egg

By Jessica

This post may contain affiliate links. I may receive commissions for purchases made through links in this post.

4 Ways to Cook an Egg

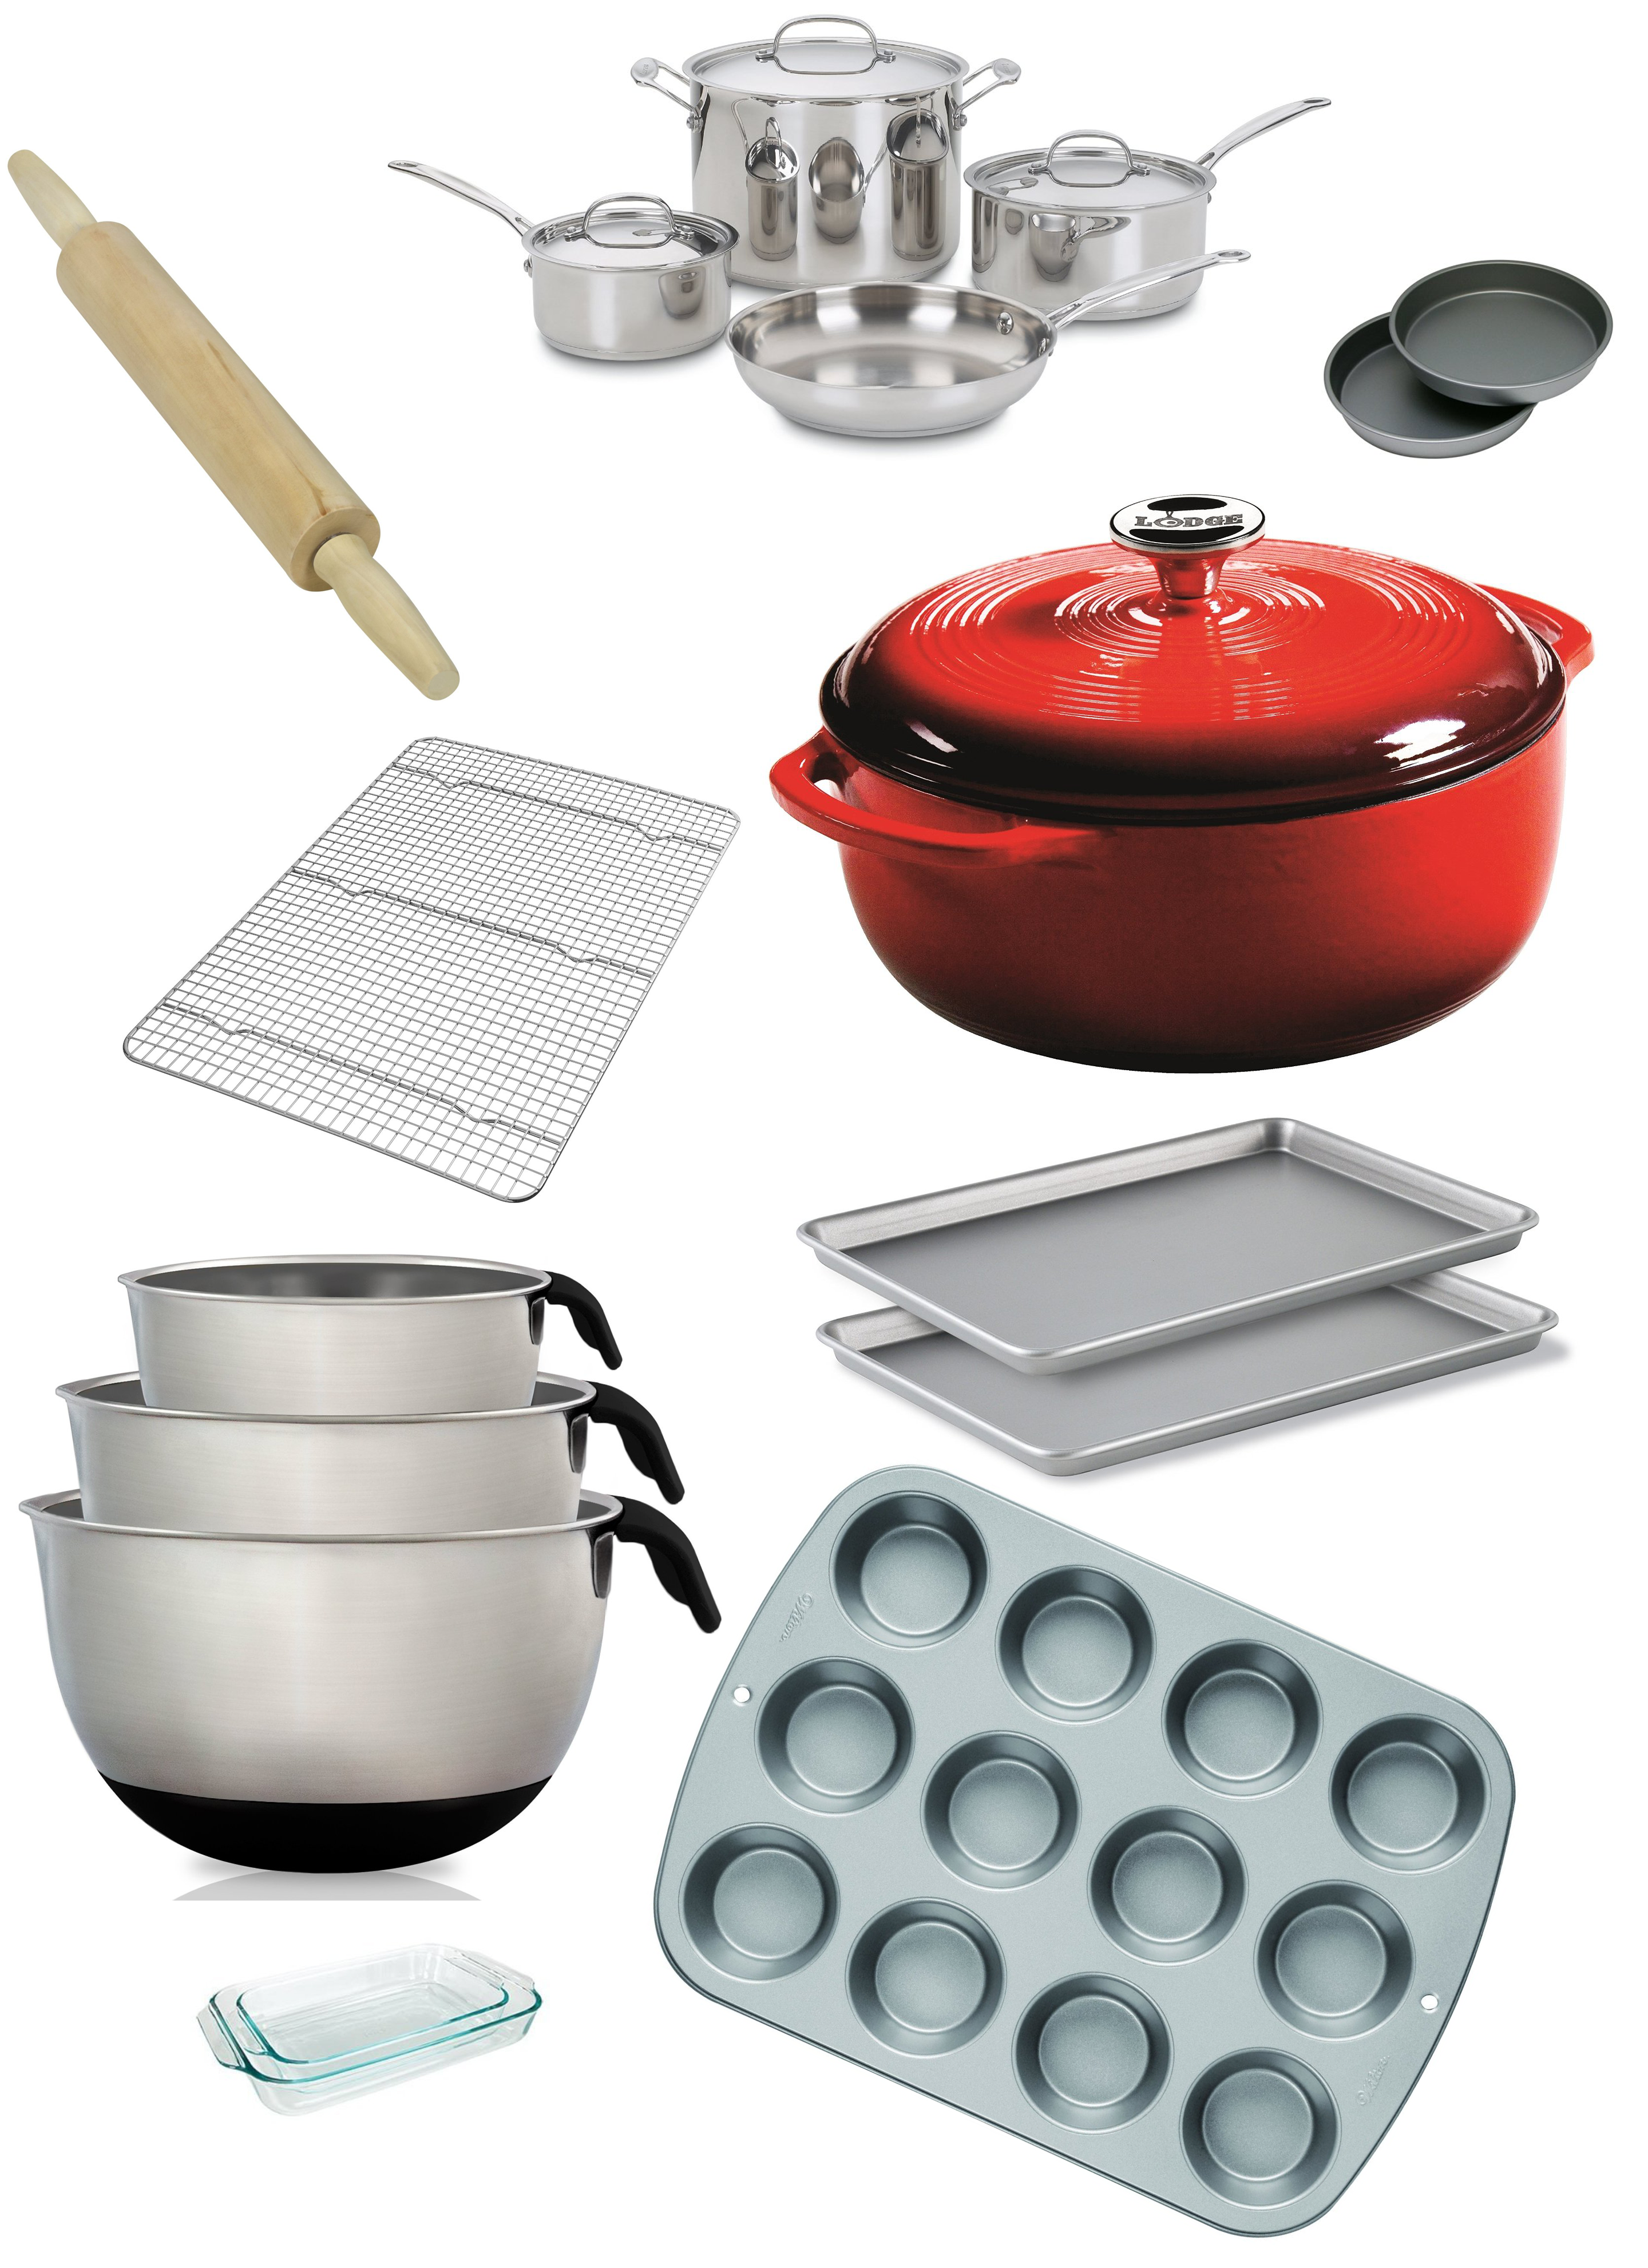
So far in this cooking series I’ve gone over terms, gadgets, knifes & cuts, and while there are a lot more fundamentals to discuss I decided to jump ahead a bit and talk about some actual cooking. Your ready aren’t you? I think so.

There is a lot to be learned from cooking something as simple as cooking an egg and there are about a million ways to actually do it. In this post I’ll talk about a few standard methods.

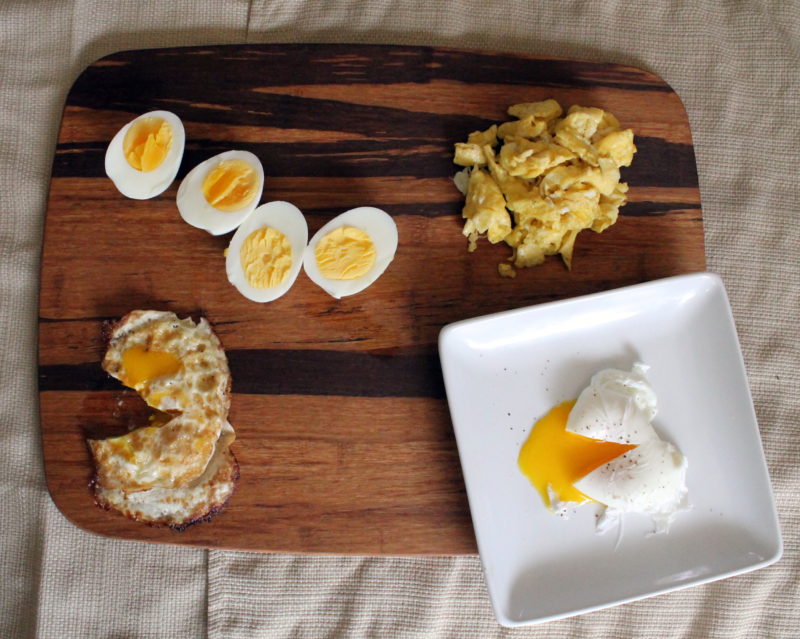
First up is scrambled. Personally I think Scrambled eggs are the easiest way to cook an egg, though they may use up a few more dishes than some of the other options. However this is my proffered method when feeding a crowd.

IMG_9750

Step 1: Crack an egg into a small bowl. Using a fork proceed to “beat” the egg (essentially whisking it) until it is well blended and set aside.

Step 2:  Heat 1 tablespoon of butter in a non stick skillet over medium high heat.

Step 3: Gently pour the beaten egg into the center of the pan. All the egg to rest for a bout 30 seconds, you will see the egg begin to become opaque.

Step 4: With a spatula lift one side of the egg and fold it over. Continue to cook and fold the eggs until they have become completely opaque, thickened and mostly dry looking.

Step 5: Remove from heat and serve.

Next is Pan Fried. This is my favorite method because I really love a good runny yolk and crispy brown edges. There are a couple ways to pan fry and egg. Sunny side up is when the egg is only cooked from one side, resulting in a very uncooked yolk. Over easy is when the egg is flipped once but only cooked long enough to produce completely cooked whites and an runny yolk. Over hard is when the egg is flipped and cooked until there is no liquid left in the egg.

IMG_9735

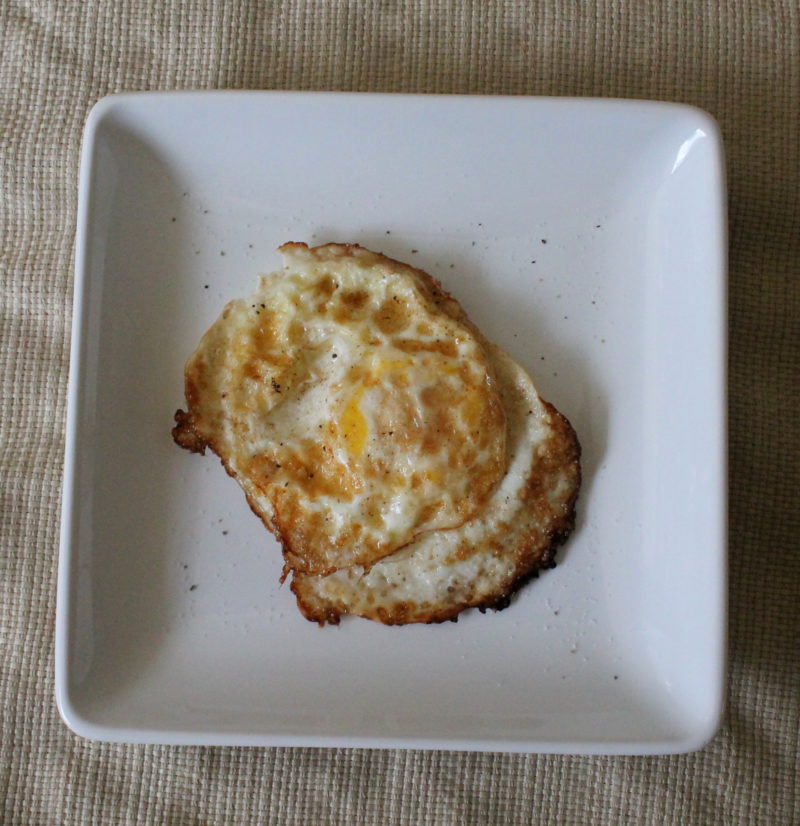
Step 1: Heat 1 tablespoon of butter over medium high heat until melted and foamy.

Step 2: Crack the egg and gently open it over the pan so that the yolk stays in tact Then reduce the heat to medium low.

Step 3: Let the egg cook until the whites are opaque and firm. The yolk should begin to thicken, but not become opaque (this is sunny side up).

Step 4: Using a spatula carefully left the edges of the egg to be sure they are free from the pan. Slide the spatula under the egg and flip it over. Allow it to cook to desired doneness. For over easy the yolk should move when lightly prodded with the spatula, while over hard til be firm throughout.

Hard Boiled eggs are another pretty easy method to cook eggs, though you are then forced to take the time to peel the eggs, which is why it’s not my favorite. Similarly to pan fried there are many different ways to hard boil an egg. Soft boiled eggs are still runny on the inside (and super messy to eat).  The Kitchn has a great example of a soft boiled egg. Hard boiled eggs can also be boiled medium or hard, resulting in different yolk colors and textures.

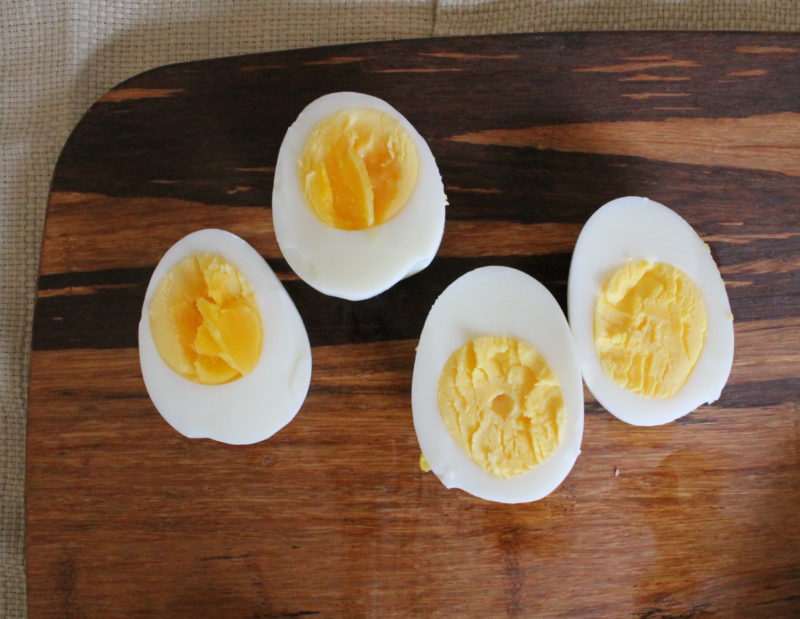
(right: Hard Boiled egg Left: Medium boiled)


Step 1: Place eggs in a pot and cover with cold water by 1 inch.

Step 2: Place the pot on the stove and bring it to a boil over high heat. As soon as a rolling boil is reached cover and remove the pot from the heat.

Step 3: Let the pan rest (6 to 7 minutes for Medium, 8 to 10 for hard). Once desired doneness is reached drain the eggs and cool them in ice water.

Step 4: Remove the eggs from water, dry, peel and serve.

The final method of cooking that we are going to talk about today is poached egg. Poached eggs are some of my favorite to eat, but they can be a pain to cook, and many people struggle with cooking a perfect poached egg. The key to a perfect poached egg is pillow-y whites that are completely cooked and a runny yolk.

Poached Egg

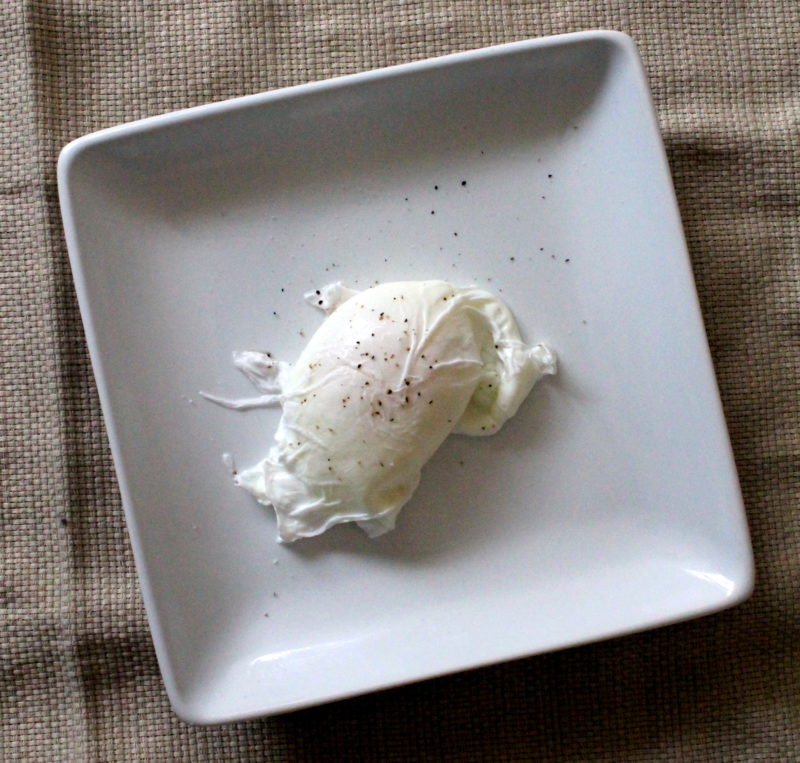
Step 1: Fill a pot up to about 3/4 full and add about 1 tablespoon of vinegar. Bring it up to a boil and then reduce it to a brisk simmer.

Step 2: Crack an egg into a small bowl or measuring cup. Carefully sure the bowl to lower the egg into the water and then tip it out. The egg should kind of roll out of the cup into the water.

Step 3: Allow the egg to cook for roughly 4 minutes. Be sure the water is simmering for the entire cooking time.

Step 4: Very carefully remove the egg using a slotted spoon. Be sure it is well drained and serve.

Again these are just the 4 basic methods for cooking eggs, there are many more methods and variations, but this is enough to get you started. Now go practice!

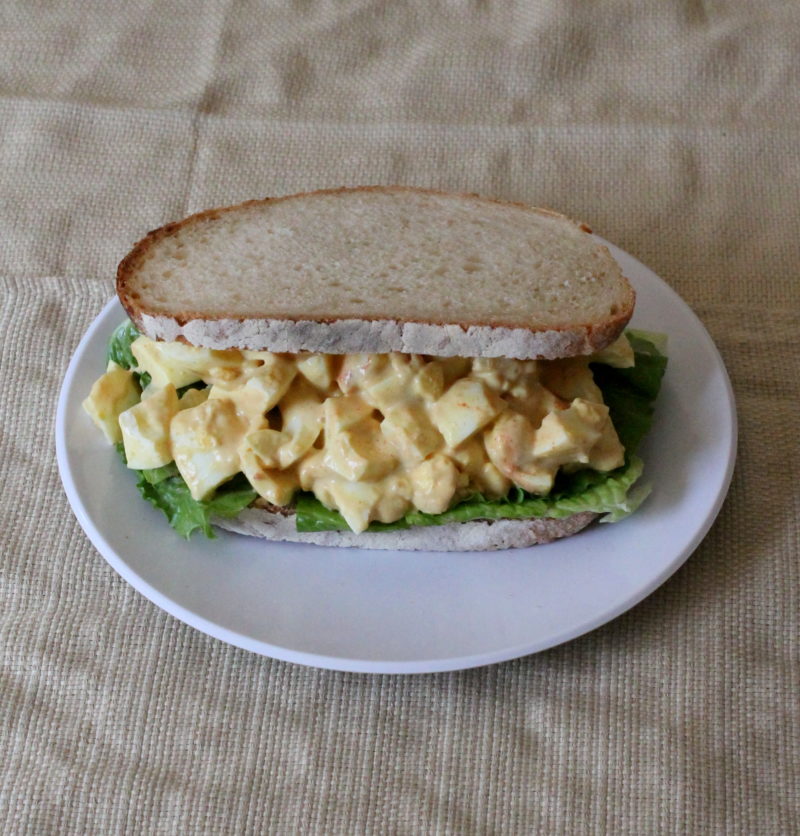
The leftovers from this experiment

Here’s my recipe for Curried Egg Salad.

April 12, 2016 April 30, 2018 Filed Under: Cooking Lessons

Learning Knife Skills

By Jessica

This post may contain affiliate links. I may receive commissions for purchases made through links in this post.

One of the most important things to know in the kitchen is how to use and be comfortable with a knife. You will need to use a knife every single time that you cook so get a good one. The knife you choose to be your go to knife should be comfortable in your hand, solid, and sharp. This is similar to the one that I use.

Once you’ve selected a knife learn how to hold it. The Kitchn has a wonderful tutorial on how to hold a knife properly.

Lastly you should also learn how to care for it properly. Read the instructions that come with the knife for care, and be sure to sharpen it at least yearly, more if it becomes dull earlier. Never put it in the dishwaser and allow it to dry on a flat surface, dishwashers and standing it up in a drain can cause damage to the knife edge and tip.

Once you have a preferred knife and understand how to care for it, learning to use it is equally as important. Knowing how to execute a number of different cuts is an important part of following recipes and cooking in general. The 3 most basic cuts (chip, dice, and mince) are outlined in the photograph below. Additionally you might see matchstick, or julienne as well, but for this post we are going to stick to basics.

Chop, dice, mince

from wellprepped.com

The type of cut is dependent on the size of the final pieces. Chopped cuts refer to large uniform pieces, with no specific size, just use your judgement. A diced cut refers to a uniform size between ¾ to ¼ of an inch. A mince is considered to be the smallest cut and should be less than 1/8th of an inch in size.

Since I am not a professional chef I thought I would add a video from a professional chef that reviews these skills. This video uses an onion, but the skills are transferable to most other vegetables.

Getting comfortable with knifes and cutting in the kitchen really comes down to practice. Even professional chefs have slip ups and cut themselves or miss-chop a carrot. The beauty of cooking is that nothing needs to be perfectly cut to taste great, just start practicing and the comfort will come in time.

March 8, 2016 March 7, 2016 Filed Under: Cooking Lessons

Basic Kitchen Tools Every Home Cook Needs

By Jessica

This post may contain affiliate links. I may receive commissions for purchases made through links in this post.

Now that we have run down the list of cooking terms that are important for understanding recipes and cooking , I thought it would be good to give an overview of the tools necessary for a basic kitchen.

There is a lot of variance in this list because not everyone cooks the same or has the same environmental outlook. For example where I would use a spoon as a juicer you might really love a hand juicer. How you set up your kitchen is totally and completely up to you, but this list in my opinion covers the basics.

Kitchen Tools

Small tools & Utensils: Wooden Spoons, Metal Spatula, Ladle, Slotted spoon, Tongs, Whisk, Rubber Spatula, Basic Knife Set(all you really need is a chefs knife, a paring knife, and some kitchen scissors to get by), Mandoline Slicer (you could probably do without one, but they are awesome), Can Opener, Vegetable Peeler, Simple Grater, Measuring Spoons & Cups Set, Colander, Fine Mesh Strainer, Cutting Board Set (you’ll need more than one)

Cooking & Bake Ware

Cook & Bake ware: Sauce Pan Set, Dutch Oven, a Skillet (2 set, I like cast iron, but stainless is cool too), Rolling Pin (only if you like to bake but a wine bottle works in a pinch), Baking Sheets(at least 2), Mixing Bowls, Cooling Rack, Baking Dishes, Round baking pan (even if you don’t bake, they are good for fritatas, gratans and the like), Muffin Pan


Appliances: Toaster, microwave (if that’s your thing, I know not everyone needs a microwave, I am one of those people), blender, Coffee machine (again if that’s your thing, I don’t use one), electric mixer (if you like to bake this makes all the difference), Food processor (though I did without one for years, I love it now)

Obviously eating utensils, plates, bowls and cups are also necessary, but that’s not really the focus of this post or series. We are all about setting up a proper kitchen to cook with. Obviously this is a pretty big list of stuff, but it’s pretty easy to find just about everything on this list for cheap at garage sales, good wills and even dollar stores. Start with some good pans and some utensils and work your way up, sometimes whipping the cream yourself instead of using the electric mixer can feel good.


February 9, 2016 February 8, 2016 Filed Under: Cooking Lessons

Cooking Terms to know

By Jessica

This post may contain affiliate links. I may receive commissions for purchases made through links in this post.

Cooking Terms

Before we dive into actual cooking I think it’s important for people who are new to the kitchen to learn some basic terms. This way we can all start on the same page and you always have this post as a resource to look back on as we move through this series. Understanding many of these terms will hopefully help you to feel more comfortable reading recipes, and trying new things. A number of the things on this list are the names of actual skills that every new cook should learn (like sauté). We will go over these skills in more detail later on.

Al dente:  An Italian term meaning “To the tooth”. It requires the food to be cooked so that it has a slight resistance when biting into it, but should be hard in the center, conversely it should also not be completely soft in the center.

Bechamel: A rich white sauce infused with milk, herbs and butter.

Braise: To sauté meat or vegetables, and then slowly cooked with liquid over low heat.

Broth: A flavorful liquid like substance  made as a result of boiling bones, vegetables, and herbs in water. Typically it uses less meat part and is lighter in color than stock (see below).

Charcuterie: A French term for the cooked meats ranging from bacon to cured meats and sausage (think salami and pepperoni).

Chiffonade: A French term for a particular knife cut where herbs and leafy greens are cut into thin strips and typically used to garnish a plate or soup.

Deglaze: The process of removing the browned bits from the bottom of a sauté pan with the use of liquid and heat.

Dredge: To lightly coat food with flour, cornmeal, or breadcrumbs.

Dust: To lightly coat food with a powdery ingredient or to lightly coat a work surface with flour.

Emulsion: To have one liquid suspended in another, often with liquids that do not mix easily, so emulsions are performed through vigorous stirring or shaking. For example, the combination of oil and vinegar to make salad dressing.

Fond: The roasted browned bits that form on the surface area of a baking sheet, typically used to make sauces.

Gratin: A dish that is topped with cheese or breadcrumbs and dabs of butter and then baked in the oven.

Grease: To apply a thin layer of butter or oil to a cooking surface to prevent food from sticking when cooked.

Infuse: To soak herbs, teas or fruits in liquid to extract their respective flavors.

Kosher salt: A flaky type of granular salt. It is typically proffered in cooking because of its lack of additives.

Leaven: The addition of ingredients (such as yeast, baking soda and baking powder) which cause dough to rise.

Mirepoix: A combination of chopped carrot, celery, and onion.

Mise En Plas: French phrase meaning “putting in place”. Typically referring to setting up cooking supplies, including tools, measured out ingredients and anything else necessary to cook the desired dish.

Mesclun: A combination of small leafy greens often found in specialty stores and food co-ops.

Macerate: To immerse food in liquid to breakdown and soften. The technique is commonly used to infuse fruit with liquor and vise versa.

Muddle: To press fruit and herbs against the side of a glass to release their juices.

Pinch: To grasp a small quantity of spices or seasonings between the thumb and forefinger for sprinkling over food.

Purée: To place vegetables or fruit in a blender or food processor and process until smooth.

Roux: A combination of fat (typically butter) and flour cooked over low heat used to thicken soups and sauces.

Rest: Allowing the prepared food to sit at room temperature, typically referring to meat, when resting allows the juices to reabsorb. 

Reduce: To boil excess liquid in a cooking pan in order to decrease the volume through the process of evaporation. Doing so concentrates the flavor of the dish to be served.

Sauté: To cook food quickly in a skillet, using a small amount of oil or animal fat over medium high heat.

Simmer: To cook food over low heat, whereby small bubbles rise to the surface of a cooking pot. Simmering is the desired process for making stock.

Stock: A flavorful liquid/gelatin like substance  made as a result of boiling bones, meat, vegetables, and herbs in water. It is typically darker and has a richer flavor than broth (see above).

Umami: The fifth flavor element not covered by sweet, sour, salty and bitter. Most often associated with Japanese cooking.

Whisk: To stir egg whites or heavy cream with light rapid movements, thereby forcing air into food.

Zest: The aromatic outermost part of a citrus peel used to flavor food to great effect.


Any terms that you think I missed or have other questions on? Please let me know and I will add to this list!

January 12, 2016 December 30, 2015 Filed Under: Cooking Lessons

My First Kitchen: Cooking Lessons for Newbies

By Jessica

This post may contain affiliate links. I may receive commissions for purchases made through links in this post.

Cooking Lessons

I get asked a lot of questions about cooking, some pretty basic, and some are very involved. After years of running this blog I realize that there are certain aspects of cooking and recipes that I take for granted, things that I assume everyone knows. Then some one like Chuck tries to read my recipes and comes back with a million questions, and I realize that not everyone is on top of all things cooking. I thought it might be a good idea to go into a bit more detail about cooking basics.

This series will be a once a month series that will run for at least a year, perhaps more. I’d really like to use this series to help new cooks build a strong foundation of information that will last a lifetime.

I’m going to start out very small and hit all of the topics that I think are important. I would also love to hear from you guys, what do you want to know? What are the skills that you want to learn or the random weird questions that you have? Please comment or shoot me an email me. If there is anything that I do not know I will take some time to figure it out or get a professional to help me.

I’m really excited about this series so keep an eye out on the second Tuesday of every month for a new cooking lesson starting tomorrow.

January 11, 2016 January 5, 2016 Filed Under: Cooking Lessons

  • « Go to Previous Page
  • Page 1
  • Interim pages omitted …
  • Page 3
  • Page 4
  • Page 5
  • Page 6
  • Go to Next Page »

Primary Sidebar

  • Facebook
  • Instagram
  • Pinterest
  • Twitter
  • YouTube
Hi, I'm Jessica. I'm an herbalist living in the great northeast with my husband Chuck, our two little boys, our dog Brody and a flock of chickens. I'm all about real, good food and good times with awesome people. I spend a lot of time outside, in my garden, and concocting potions and helping people feel their best. I also like tea, reading, and about a million other hobbies. I'm so happy your here on this adventure with me.

Footer

Copyright © 2025 · Foodie Pro Theme On Genesis Framework · WordPress · Log in