• Skip to primary navigation
  • Skip to main content
  • Skip to primary sidebar
  • Skip to footer

Sweet Love and Ginger

  • Home
  • About
  • Recipes
  • Garden
  • Work With Me

Recipe

Sweet Violet Syrup

By Jessica

This post may contain affiliate links. I may receive commissions for purchases made through links in this post.

Violets are one of the first things to pop out of the ground in spring, along with tulips and daffodils of course, but the great things about violets are that they are edible. Both the flowers and the leaves can be eaten, and are a great addition to salads, cocktails and to decorate cakes, I mean look how pretty they are!Sweet Violet Syrup

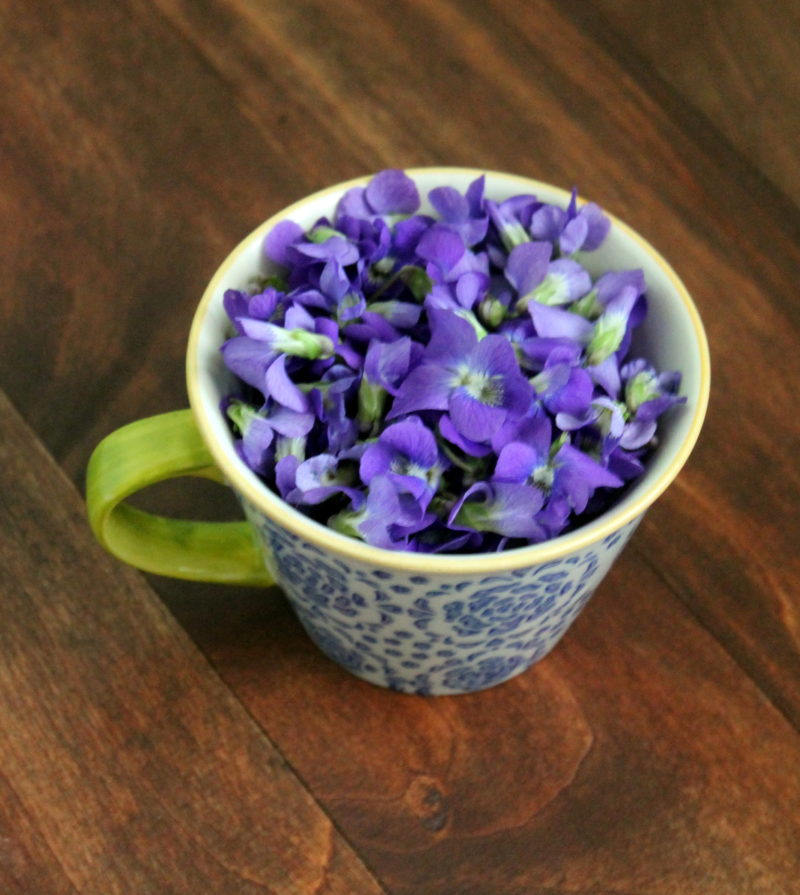
These little babies have been used for centuries for their medicinal properties. Its recorded to have been used as far back as Ancient Greece to prevent headaches and dizziness. I found out that violets actually contain salicylic acid, which the natural “raw” material for aspirin. So it stands up to scientific analysis against these claims.

Sweet Violet Syrup

I had always known that these pretty little flowers were edible but other than salads, and maybe a decorations for sweets, I had no idea what to actually do with them. I mean tossing the leaves and flowers in a salad is easy enough but can get boring pretty fast and honestly I don’t bake all that often. This year however I put in a little effort (thank you internet) and came up with this delightful syrup recipe.

The sweet syrup is a great thing to have around because it can liven up a cup of tea, a simple cupcake recipe or even a cocktail. Because its a simple syrup it can be used to sweeten just about anything (use it like maple syrup or honey), so long as you don’t mind the floral touch or bright purple color it adds.

Sweet Violet Cocktail

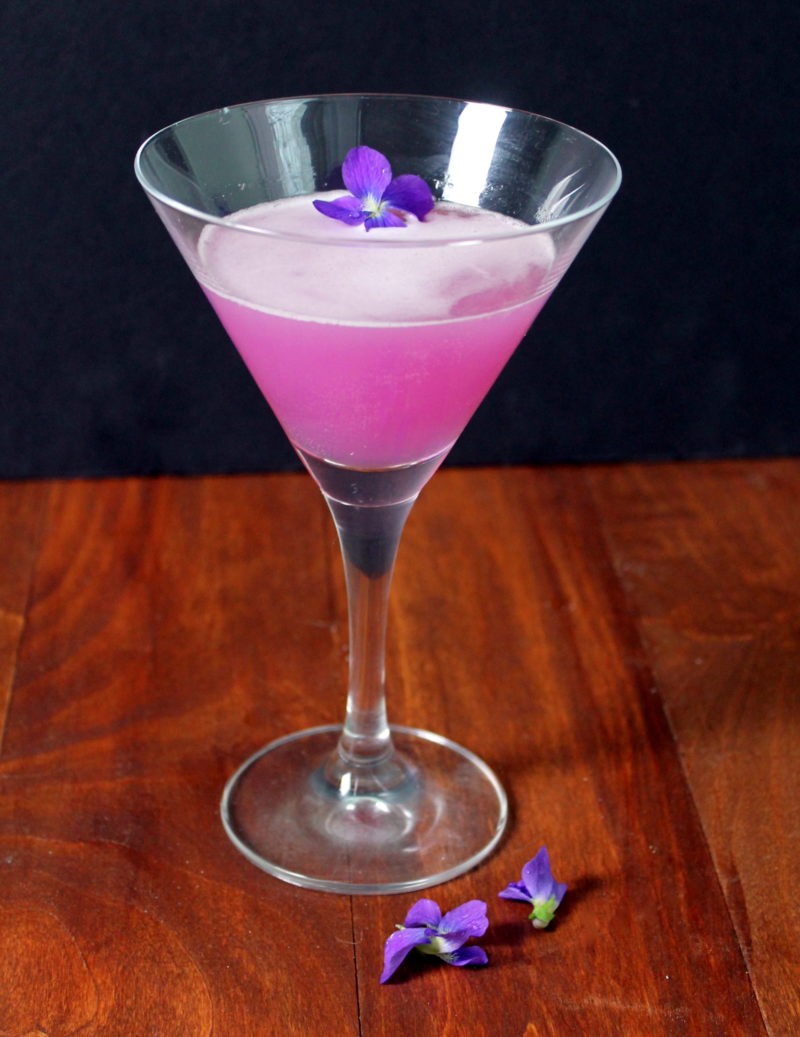
To test it out I made a pretty pink cocktail mixing rum, lemon juice and the syrup. We don’t follow exact cocktail recipes in this house, but it came out pretty darn good anyway. I also tried it in my chamomile & mint tea when I had a headache last night and it was a really lovely addition.

Using it as a cocktail got me to thinking about turning it into a wine next. I think a pretty purple wine would be awesome, so that might be on next year’s list of projects.

Sweet Violet Syrup
Prep time: 20 mins
Cook time: 10 mins
Total time: 30 mins
Serves: 2 cups
Ingredients
  • 2 cup water
  • 4 cups violets, loosely packed
  • 4 cups granulated sugar, white
Instructions
  1. Place the violets in a sterile jar large enough to fit the blossoms.
  2. Bring the water up to a boil in a small sauce pan.
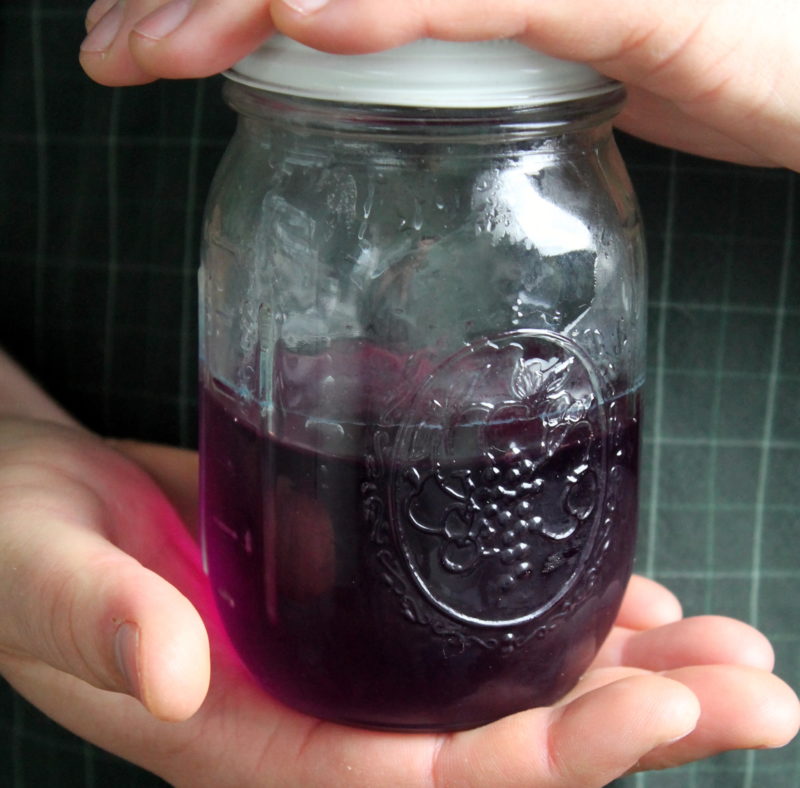
  3. Pour the hot water over the violets and seal the jar. Let it stand for 24 hours.
  4. Strain the liquid through a fine mesh sieve, gently pressing any additional liquid from the violets.
  5. For every cup of liquid yielded, add 2 cups of sugar. Stir together over medium low heat until the sugar dissolves. DO NOT BOIL as you will lose the color of the infusion.
  6. Note: If the mixture does boil or the color becomes a dark brown or black add a drop or two of lemon juice to turn the infusion a more pink color.
  7. Store the syrup in sealed containers in the refrigerator for up to a year.
3.3.3077


April 27, 2016 October 23, 2018 Filed Under: Foraged, Odds & Ends, Recipe Tagged With: Cocktails, Condiment, Foraged

Baked Eggplant Parmesan

By Jessica

This post may contain affiliate links. I may receive commissions for purchases made through links in this post.

Baked Eggplant Parmesan

Spring is finally showing its face around here and while I’m excited to see the flowers poking their heads out and to hear the birds singing, I’m also pretty damn exhausted. Just being honest.

Getting garden beds prepped, spring time household chores, work and a hectic social life have been taking their toll on me. Don’t get me wrong there’s a lot of good happening here it’s just a lot and all at once.

While I love being busy and social at the core I am an introvert. I need some quiet time alone once in a while to recharge my batteries so to speak and this is one of those seasons where it does not happen often.

There was one night last week that I did, by some random miracle, get an entire evening on my own. What did I do with this evening you ask? I made Eggplant Parmesan with homemade sauce.

There is something so relaxing to me about making a meal that takes a little more time and effort than the usual week night dish that just seems so healing to me. It’s like I am saying to myself and to my body that yes you are worth it. You are worth the time to prepare this meal, this nourishing homemade meal from scratch. You are worth it.

Baked Eggplant Parmesan

In today’s society we are all about convenience and food that is quick and easy, while not necessarily being nourishing. With this behavior I have to ask what is it that we are telling our bodies? What are we telling ourselves with this kind of mentality? In my mind we are telling ourselves that we are not worth much if we can take 10 minutes to eat something more than what we can get from a drive through window. We get one shot on this earth with one body and I don’t want to cram it full of sub-par fuel.

Despite this hectic time of life I’m going to take a moment a little more often to cook more food that nourishes not only my body but my soul. I want to cook the types of food that remind me that I am worth the time and effort to make something not only delicious but healthy. I’m going to cook more recipes like Eggplant Parmesan.


Baked Eggplant Parmesan

Baked Eggplant Parmesan
Prep time: 10 mins
Cook time: 40 mins
Total time: 50 mins
Serves: 4 to 6 servings
Ingredients
  • 1 teaspoon dried basil
  • 1 teaspoon garlic powder
  • ½ teaspoon salt
  • 1 egg
  • 1 tablespoon water
  • 1 large eggplant, sliced into ½ inch thick rounds
  • 2 cups tomato sauce of choice
  • 1 cup grated mozzarella cheese
  • ¼ cup fine grated Parmesan cheese
Instructions
  1. Preheat the oven to 425 degrees and line a 2 baking sheets with parchment paper.
  2. In a shallow bowl toss the bread crumbs with the basil, garlic and salt. In a separate bowl whisk together the egg and water until well blended.
  3. Place an eggplant round into the egg mixture, ensuring that both sides are evenly coated. Next place the egg coated round into the panko mixture and again coat it evenly. Place the round onto the lined baking sheet. Repeat this process until all the rounds are coated.
  4. Place the sheets in the oven for 10 minutes. Flip the rounds and place them back in the oven for another 10 minutes. When done the rounds should be golden and crisp. Remove from the oven and set aside.
  5. Using an 8×11 baking dish spread about 1 cup of tomato sauce evenly on the bottom of the pan. Place the baked rounds in an even layer on top of this. Spread another ½ cup of tomato sauce on top and sprinkle with roughly half of the mozzarella cheese. Place the remaining eggplant in another layer and repeat the process of adding sauce and cheese.
  6. When complete sprinkle the Parmesan on top and place in the oven for 18 to 20 minutes. The cheese should be melted and beginning to crisp. Remove from heat and serve immediately.
3.3.3077

April 20, 2016 October 23, 2018 Filed Under: Main Dish, Recipe, vegetarian Tagged With: Vegetarian

Mark Bittman’s Dandelion Greens with Double Garlic

By Jessica

This post may contain affiliate links. I may receive commissions for purchases made through links in this post.

Dandelion Greens

I’ve mentioned dandelion greens (in one of my first posts – sorry for the quality!) here in the past, but they don’t show up often because we don’t eat them often. they are incredibly bitter, and therefore not a house favorite. However I spotted them in a grocery store recently and decided to give them another shot, thinking that maybe farm grown would be less bitter. While I was very wrong in thinking that I don’t think we are going to stop trying them. There is a saying that Momma Chuck always says that goes something like “you have to try something 17 times before you know if you like it or not”. I like this because if forces us to move out of our comfort zone, keeps things interesting and adds to our health

The recipe I used this time is one that is adapted from Mark Bittman’s How to Cook Everything. I liked this recipe because it was easy and it helps mask some of the bitterness. I think next time I might serve them with a red sauce or something with something higher in acid to balance out the bitter taste.

Dandelion Greens with Double Garlic

I also tested out this recipe with a few other greens and found it lent itself well to kale, chard, and spinach, though perhaps best with spinach. I think it might be a nice method to cook broccoli rabe, which is one of my favorite vegetables. Really anything with oil and garlic is good. There is no going wrong there.

Dandelion Greens with Double Garlic
Ingredients
  • 1/4 cup extra virgin olive oil
  • 6 cloves of garlic, sliced
  • 1/4 teaspoon red pepper flakes
  • Salt and freshly ground black pepper, to taste
  • 1 pound dandelion greens with stems, washed and roughly chopped
  • 1/2 cup vegetable stock
  • 1 clove of garlic minced
Instructions
  1. Heat the olive oil in a large saucepan over medium-high heat. Add the sliced garlic, pepper flakes, and some salt and black pepper and cook for about 1 minute. The garlic should soften and become fragrant.
  2. Add the greens and stock. Cover and cook until the greens have wilted slightly, about 5 minutes.
  3. Remove the lid, but continue to cook and stir until the liquid has all but evaporated, about 5 more minutes. Add the minced garlic and cook for 1 more minute. Adjust seasonings and serve.
3.3.3077


April 13, 2016 October 23, 2018 Filed Under: Foraged, Recipe, Side Dish Tagged With: Foraged

Artichoke & Sun Dried Tomato Pesto

By Jessica

This post may contain affiliate links. I may receive commissions for purchases made through links in this post.

Artichoke & Sun Dried Tomato Pesto

It should be that time of year when our thoughts are swarming with spring gardens and summer pools, but unfortunately for us in the northeast the weather (namely the polar vortex) has had other plans.

Now I’m usually a lover of the snow, I mean any excuse to curl up with a book and a cup of tea is a good thing in my view, but snow and freezing temps this time of year mean that my garlic, and early spring flowers are taking a beating. I’m not pleased about it. Not to mention the hiking plans that ended when it started to hail.

Moving on from disappointing weather I decided to spend most of the weekend crafting and baking all sorts of treats (many of which you will see coming up on Plum Deluxe soon enough). I was craving something that reminded me of spring or summer so I dug through my canned goods and came up with this pesto/dip recipe. It’s a little thicker that a typical pesto but that’s one of the things I like about it. It’s a perfect spread for toast or sandwiches, but also a great dip on crackers, chips or veggies. Versatile recipes man they are the thing.

valentine breakfast sandwich recipe

I actually made this for the first time back near new years, where served as a dip it was a hit. It was also a pretty big winner on this sandwich (pictured below). This time around it went on toast with some melted Swiss cheese because that’s what was in the house. I’m thinking an experiment with puff pastry is in order next.

Artichoke & Sun Dried Tomato Pesto

Artichoke & Sun Dried Tomato Pesto
Ingredients
  • 1 (14 ounce) can artichoke hearts, drained
  • ½ cup sundried tomatoes, packed in oil
  • ¾ cup parmesan cheese
  • 3 cloves garlic
  • ¼ cup pine nuts
  • Pinch of salt
  • 1/3 cup extra virgin olive oil
Instructions
  1. Add all the ingredients to a food processor and blend until smooth. You may need to stop and scrape the sides of the bowl to ensure complete blending. Serve immediately.
3.3.3077


April 6, 2016 October 23, 2018 Filed Under: Odds & Ends, Recipe Tagged With: Clean, Condiment

Crock Pot Pea Soup from Leftover Ham Bones

By Jessica

This post may contain affiliate links. I may receive commissions for purchases made through links in this post.

So this isn’t your typical chop everything up and dump it in the crock pot recipe for pea soup that everyone is used to,  let’s just get that out in the open right now.

Don’t get me wrong that modern American classic is one of my favorites, but sometimes you just have ham bones lying around needing to be used. Easter definitely just happened over here so you can imagine the oversized hams that have been prepared as of late.

Pea Soup from Leftover Ham Bones

It starts out easy enough; toss the bones with whatever meat they have left right into the crock pot along with some split peas, broth, and spices. Let that go until the peas are soft and the meat is falling off the bone. Then you add in all the other good stuff (the veggies) and clean the bones, dumping the meat back into the crock.

See that’s not so hard and you can now reap the benefits of the “bone broth” that was created while they simmered in the crock. Not to mention the flavor that using bones adds.  You’ll never want the easy-chop version again.

In this particular recipe I do not use potatoes because we are still on the “slow carb diet” (notice the use of kidney beans) for the most part, but you can add them in with the rest of the vegetables if you prefer.

Pea Soup from Leftover Ham Bones

Crock Pot Pea Soup from Leftover Ham Bones
Ingredients
  • 1 ham bone with meat (about 2 lbs) or 2 cups diced ham
  • 1 lb dried green split peas, rinsed
  • 1 bay leaf
  • ½ a small yellow onion, chopped
  • 2 stalks celery, minced
  • 1 clove garlic, minced
  • 4 cups chicken broth
  • 2 cups water
  • 2 carrots, chopped (about 1 cup)
  • 1 (15.5 oz) can kidney beans
Instructions
  1. Place ham, peas, bay leaf, onion, celery, garlic, broth and water into a large Crockpot. Cover and cook on low for 8 to 10 hours or high for 5 to 6 hours. The peas should be soft, and ham falling off the bone.
  2. Remove the ham and bones from crock pot and transfer to a rimmed baking sheet, set aside to cool for 5 to 10 minutes.
  3. Add the carrot, and beans to crock pot and turn onto high for 2 hours.
  4. Meanwhile remove the ham from the bone and shred into bite size pieces. Return to the Crockpot and stir to combine. Allow the Crockpot to complete cooking.
  5. Once the carrots and beans are soft turn of the Crockpot and serve.
3.3.3077

To speed up the final steps you can also cook the carrot and beans on the stove top first. If you prefer you can also add them with the rest of the ingredients in the beginning, however i find that these ingredients become too mushy for my taste.

March 30, 2016 October 23, 2018 Filed Under: Main Dish, Pork, Recipe, Soup/Stew Tagged With: Pork, Soup/Stew

  • « Go to Previous Page
  • Page 1
  • Interim pages omitted …
  • Page 27
  • Page 28
  • Page 29
  • Page 30
  • Page 31
  • Interim pages omitted …
  • Page 84
  • Go to Next Page »

Primary Sidebar

  • Facebook
  • Instagram
  • Pinterest
  • Twitter
  • YouTube
Hi, I'm Jessica. I'm an herbalist living in the great northeast with my husband Chuck, our two little boys, our dog Brody and a flock of chickens. I'm all about real, good food and good times with awesome people. I spend a lot of time outside, in my garden, and concocting potions and helping people feel their best. I also like tea, reading, and about a million other hobbies. I'm so happy your here on this adventure with me.

Footer

Copyright © 2026 · Foodie Pro Theme On Genesis Framework · WordPress · Log in