• Skip to primary navigation
  • Skip to main content
  • Skip to primary sidebar
  • Skip to footer

Sweet Love and Ginger

  • Home
  • About
  • Recipes
  • Garden
  • Work With Me

appetizer

Triple Cheese Hot Taco Dip

By Jessica

This post may contain affiliate links. I may receive commissions for purchases made through links in this post.

Taco dip.
The old classic.
Hands down one of my favorites.
AAaaand after a little experimenting I think I just brought it to a new level.
You guys, it was so good!
Triple Cheese Hot Taco Dip
You see, we were invited to watch Sunday’s football games at a friend’s house and of course I had to bring something. I always do.  My first thought was wings, but pulled pork was already on the menu and I thought the group, and my own tummy could benefit from something that wasn’t meat based.
Chuck gave me a dirty look when I asked if I could make taco dip sans meat, then raised an eyebrow when I said I’d replace it with black beans. I decided to do it anyway, and I have never been happier with the result. He was in love with is. All of the other guests were happy with it as well. We were left with only a small scoop of leftovers, because you know no one wants to be that person and take the last scoop.
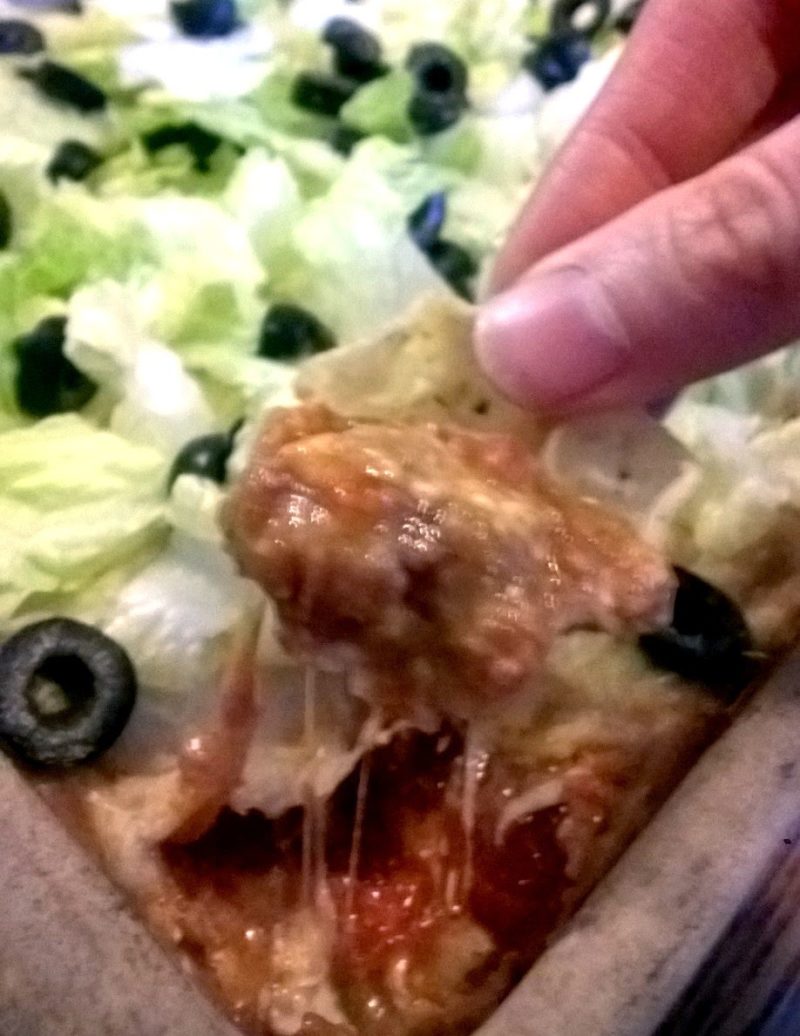
I think it was the two layers of cheese that did it. I mean really, cheese is the way to a man’s heart after all. Maybe it’s just food and I made that up, but I’m going with it because cheese is amazing.
Sorry for the terrible phone photos but it was night time, with apartment lighting and I didn’t expect it to be post worthy after the first attempt. Maybe someday I will make it again and take good photos, maybe.


Triple Cheese Hot Taco Dip
Homemade Taco Seasoning

Triple Cheese Hot Taco Dip
Prep time: 5 mins
Cook time: 30 mins
Total time: 35 mins
Ingredients
  • 1 (15 oz) can black beans
  • 1 cup sour cream
  • 8 oz cream cheese
  • 1 package taco season (3 tbsp homemade)
  • 1 (16 oz) jar salsa
  • 8 oz sharp cheddar cheese
  • 8 oz Monterrey jack cheese
  • 1/2 cup shredded lettuce
  • 1/4 cup sliced black olives
Instructions
  1. Preheat the oven to 350 degrees.
  2. In a 8×8 pan combine re-fried and black beans and spread out into a smooth layer.
  3. In a bowl combine sour cream, cream cheese, and taco seasoning, stirring until well combined. Spread the cream cheese mixture over the beans.
  4. Next sprinkle 4 ounces of sharp cheddar and 4 ounces of Monterrey jack cheese.
  5. Spread the salsa on top next and again top with 4 ounces of sharp cheddar and 4 ounces of Monterrey jack cheese.
  6. Place in the oven for 20-30 minutes or until the cheese begins to brown and the edges bubble.
  7. Let stand 5 minutes and top with shredded lettuce and black olives. Serve warm.
3.3.3077


January 21, 2015 January 5, 2016 Filed Under: Recipe Tagged With: appetizer, Quick & Easy, Vegetarian

Stromboli 3 Ways

By Jessica

This post may contain affiliate links. I may receive commissions for purchases made through links in this post.

I have always been a fan
of finger food. You know, things that have everything contained in a nice
little hand held vassal. It’s especially good if it’s cheesy, and dip able. Stromboli
is one of those types of things. I love making it for pot lucks, and camping
weekends because you can make it ahead of time wrap it in foil and then heat it
up when you are ready to eat.
Stromboli traditionally is
a type of turnover that is usually filled with cheese, Italian meats, and made
with Italian bread dough. Most of the time in the US you can find it with mixed
Italian meats and provolone, or mozzarella and pepperoni.
Just before Christmas (I know
I’m behind, things get busy) Chuck went up to hunting camp and I thought I
would make him some of these. The thing is that I wanted to try something a
little different than the usual, and then got a bit carried away. I ended up
with three awesome fillings, traditional meat and cheese, cheeseburger, and
vegetarian. I’ll admit the vegetarian one was mostly for myself to break off a hunk
of, and the boys didn’t appreciate it as much as the others, but it was still
good, especially dipped into a steaming cup of marina.
For all three of these I
used this pizza dough recipe.
Triple Meat & Cheese Stromboli
1 pizza dough recipe
6 oz pepperoni, sliced
thin
6 oz Salami, sliced thin
6 oz ham, sliced thin
8 thin slices provolone
½ cup shredded mozzarella
½ cup grated parmesan
¼ cup melted butter
(optional)

Preheat the oven to 375
degrees. Roll the pizza dough out into a rectangle (roughly 10 by 13 inches).
Layer the meats and cheeses, leaving about a 1 inch border. Roll the dough up
into a log, folding the ends in to seal them as you go. Place the roll, with
the seam down on a nonstick baking sheet. Brush the top with a bit of melted butter
if desired. Bake until the outside of the dough is golden and fluffy, about 30
minutes.
Broccoli Rabe &
Roasted Red Pepper Stromboli
1 pizza dough recipe
1 bunch broccoli rabe,
chopped
1 tbsp extra virgin olive
oil
2 garlic cloves, minced
Salt & pepper to taste
8 thin slices provolone
½ cup shredded mozzarella
1 (12oz) jar roasted red
peppers
1 tsp salt
¼ cup melted butter
(optional)

Blanch the broccoli rabe,
then strain it and pat dry. Heat the olive oil in a pan over medium high heat.
Add the garlic and cook for about a minute. Add the broccoli rabe, and sauté
until it begins to wilt, about 3-4 minutes. Add salt & pepper to taste,
remove from heat. Preheat the oven to 375 degrees. Roll the pizza dough out
into a rectangle (roughly 10 by 13 inches). Spread the cheese over the dough,
leaving a 1 inch border. Layer the roasted red peppers, and broccoli rabe over
the cheese. Sprinkle the entire thing with salt. Roll the dough up into a log,
folding the ends in to seal them as you go. Place the roll, with the seam down
on a nonstick baking sheet. Brush the top with a bit of melted butter if
desired. Bake until the outside of the dough is golden and fluffy, about 30
minutes.
Cheese Burger Stromboli
½ lb lean ground beef
½ cup diced onion
½ tbsp flour
½ cup beef broth
1 cup diced tomatoes
¼ cup diced pickles
(optional)
1 cup shredded cheddar
cheese
¼ cup melted butter
(optional)

In a large skillet brown
the ground beef over medium high heat, about 3-5 minutes. Add the onion and
cook for another minute, until the onion becomes translucent. Stir in the flour
until well combined then add the broth and tomatoes. Continue to stir and cook
until the liquid reduces and a thick sauce forms. Add pickles if desired, and
remove from heat. Preheat the oven to 375 degrees. Roll the pizza dough out
into a rectangle (roughly 10 by 13inches). Spread the cheese over the dough
leaving about a 1 inch border. Pour the beef mixture over the top and spread it
evenly. Roll the dough up into a log, folding the ends in to seal them as you
go. Place the roll, with the seam down on a nonstick baking sheet. Brush the top
with a bit of melted butter if desired. Bake until the outside of the dough is
golden and fluffy, about 30 minutes.

What are your favorite Stromboli fillings?

January 14, 2015 December 5, 2017 Filed Under: Recipe Tagged With: appetizer, Beef, Camp Food, Make Ahead, Pork, Vegetarian

My Yellow Table Gathering

By Jessica

This post may contain affiliate links. I may receive commissions for purchases made through links in this post.


First off I want to start this by saying CONGRATULATIONS! to Anna of The Yellow Table. Before she had accomplished the monumental goal of raising
over $50,000 to publish her first book she asked her followers to help her
out by throwing dinner parties using her recipes to generate conversation.

I have been following Anna’s entire journey from day 1 and I
now feel like one of those creepy stalker people, because I am so completely
invested in this thing. From writing the book in about 100 days to completing
a cross country road trip, and preparing several dinner parties along the way
she has done so much, so very much that I cannot comprehend how one person
could possibly do it all and remain so humble and thankful.

She’s already reached her goal (and surpassed it by over $10,000), but that wasn’t going to stop me
from throwing my dinner party, besides Chuck might murder me if I didn’t make
those dates I told him about.

I decided to go with the easy dinner party menu that she had
listed, as we had planned to go group ziplining earlier in the day, and I
wasn’t sure how ambitious we all would be. I of course had made a few
alterations, because that’s just how things are done around here and added a
recipe or two.

The Menu
Bacon Wrapped Dates with Cider Mustard Glaze (Recipe Below)
Apricot Dijon Roasted Chicken & Broccoli 
Mimi’s Tomato Tart
Chocolate Chip Cookies

I decided to add the cider mustard glaze to the dates, because one
of our favorite restaurants has a similar appetizer with this kind of glaze,
and I’ve have been dying to figure it out. I also swapped the Roasted Carrots for the tomato tart because tomatoes are beginning to come in season here, and I
can’t resist them. Finally after all that, an adventurous day and the fact that
I don’t actually have any ramekins I decided to simply bake up some cast iron
cookies and serve them with vanilla ice cream instead of the Bittersweet Pudding Cakes, though some day I would really love to try out this recipe.
The night was I hope just what Anna had intended, light and fun
and full of casual chatter. 

I know our home isn’t ideal for dinner parties (I mean check our awesome table) but I
really want to make more of an effort to invite people over and share food and
conversation. It’s so necessary in today’s day and age.

Bacon Wrapped Dates with Cider Mustard Glaze
1/2 lb bacon, cut into thirds
30 dates

30 almonds

½ cup apple cider vinegar (plus a splash)
½ cup granulated sugar
2 tbsp brown sugar
1 tsp ground mustard

Preheat the oven to 375 degrees. Cut a slit into the side of
the date and slip an almond into the center. Wrap each date in 1/3 a slice of
bacon, and arrange with the open side down on a rimmed baking sheet. Bake for
15-20 minutes until the bacon is crisp. Once cooked remove from the oven and
place on a paper towel to drain. Meanwhile combine the vinegar, both sugars and mustard in a
small sauce pan, and bring it to a boil. Immediately reduce to a simmer and
cook for 10 – 12 minutes until syrupy. Remove from the heat and finish it with
a splash more of cider to keep the flavor bright. Move the cooked dates to a
serving tray and drizzle with the glaze. 
There is only one day left to pre-order The Yellow Table Cook Book. So if you are interested at all get to it!

July 14, 2014 February 12, 2018 Filed Under: Entertaining Tagged With: appetizer, Chicken, Chicken/Turkey, Entertaining, Menues, Vegetarian

Sunday Dinner: Asian Style

By Jessica

This post may contain affiliate links. I may receive commissions for purchases made through links in this post.

A few Sundays ago, if you follow me on instagram you know I made
a boat load of wontons. What you don’t know is that I made an entire Asian
inspired Sunday dinner that day. I meant to post it last week, but life got in
the way, it happens.

Regardless, I spent a peaceful afternoon watching New Girl and
folding these little babies. I used this recipe pretty much to a tee (Check this
girl out she knows what’s up), because let’s be honest I have no clue what I’m
doing here with most Asian flavors, aside from soy sauce. The one main difference
is that I followed the instructions on the back of the wontons package to
create the shape you see. These came out magnificent! I loved them! Like totally
completely loved them, and have big plans to make them again in the future,
maybe with a few more changes/additions. I did however get uber fancy and make
my own dipping sauce.

Wonton Dipping Sauce

¼ cup rice wine vinegar
¼ cup soy sauce
1 tablespoon sesame oil
2 tsp ground ginger
1 tsp sesame seeds for garnish

Whisk all ingredients together in a small bowl and serve.
In addition to these guys I made Korean Style Beef in the crockpot.
It was totally inspired by this recipe, also from Damn Delicious, she’s
totally my new food blog crush can you tell? Anyway I wanted to make something
that was clean, so I took her photos, and general idea and made it my own. It
came out AWESOME! I am seriously proud of this one. It’s super easy and healthy
what more can you ask for? It’s definitely going into the I-have-to-work-too-late-to-cook-anything
rotation.

Clean Crockpot Korean Style Beef

1/3 cup low sodium soy sauce
2 tbsp raw honey
1 tbsp sesame sauce
2 cloves of garlic, crushed
¼ tsp red pepper flakes
½ tsp ground ginger
2 lbs lean beef roast, trimmed of visible fat
10 mini sweet peppers, sliced thin
1 cup broccoli florets (optional)
Sesame seeds for garnish

In a small bowl combine soy sauce, sesame oil, garlic, red
pepper flakes, and ginger. Place roast in slow cooker and pour the mixture over
the top. Cover and cook on low for 8 hours or high for 4 hours. Remove the
roast from the slow cooker and shred the beef before returning it to the pot
with its juices and mini peppers and broccoli florets. Cook on high for another
30 minutes. Stir well and serve immediately. 
To round out this meal I also added a little side salad of
bagged Asian slaw, simply because I felt more vegetables were required, and
after making all of the wontons I knew I would be to fried to make something
else.

Hope you guys enjoy this as much as I did. I’m also wondering what your favorite kind of take out is. I would really like to come up with some more easy, and clean takes on traditional take out so please give me some ideas!!

April 16, 2014 March 29, 2018 Filed Under: Recipe Tagged With: appetizer, Beef, Clean, Condiment, Crockpot, Menues, Pork

The Simplicity of Garlic Soup

By Jessica

This post may contain affiliate links. I may receive commissions for purchases made through links in this post.

I’m really into simple lately.

It’s a new year so reflection, change, and all that. It’s just in the air right now, and I am soaking it in. All month I’ve been sharing a few of my favorite simple recipes, things that are simple, and good for both your body and your soul. This is another one of those recipes.

I stumbled on it while Stalking Mrs. Mimi Thorrison on her blog, Manger. If the images aren’t enough to completely captivate you I assure you that her heart felt stories and homey recipes are.

There is something about garlic that I simply cannot get enough of. I go through heads and heads of it weekly. I would take stock in it if there were such a thing, and I would be paying myself. Chuck and I have been known to roast a head of it just for eating, and I find so much pleasure in browning it in a pan. It is the best prize to find that wonderfully brown slightly crisp little clove hiding in the bottom of a soup or pasta dish for us. When I found this recipe I was in a state of shock. Why had I not made this already? How had I not thought of it or even heard of such a thing? I felt robbed, and proceeded to go home and make it without hesitation.

It was the absolute best decision I have ever made.

Though the ingredients are few the flavors in this dish are huge. There is depth and complexity here where with such a simple preparation you would not expect. With some good crusty bread toasted well to dip with it is pure unadulterated heaven and something that must be recreated as often as possible.

Garlic Soup


2 tbsp olive oil

1 shallot, peeled and chopped

1 head of garlic, peeled and chopped

1 tbsp flour

4-5 cups vegetable stock

Salt & pepper to taste

2 additional cloves of garlic, sliced thin

2 eggs, whites and yolks separated

1 tbsp white wine vinegar


Heat the 1 tbsp oil and shallot over medium high heat sautéing
for 1-2 minutes. Add the head of garlic and cook for an additional 2 minutes.
Stir in flour until well combined. Add stock, salt & pepper to the pan and
bring to a simmer. Cover and cook for 15 to 20 minutes. Meanwhile in a frying
pan heat 1 tbsp olive oil over medium high again, and cook the sliced garlic until
brown and crispy, then set aside. Once the soup has simmered and reduced some
puree and return to the pan over medium heat. In a small bowl whisk the egg
yolks together with the vinegar and set aside. Next carefully whisk the egg
whites into the soup, until thin strands begin to appear on top. Immediately remove
the pan from heat and begin to whisk in yolk vinegar mixture. Serve with garlic
chips on top and toast.

January 27, 2014 September 19, 2017 Filed Under: Recipe Tagged With: appetizer, Soup/Stew, Vegetarian

  • « Go to Previous Page
  • Page 1
  • Page 2
  • Page 3
  • Page 4
  • Page 5
  • Page 6
  • Go to Next Page »

Primary Sidebar

  • Facebook
  • Instagram
  • Pinterest
  • Twitter
  • YouTube
Hi, I'm Jessica. I'm an herbalist living in the great northeast with my husband Chuck, our two little boys, our dog Brody and a flock of chickens. I'm all about real, good food and good times with awesome people. I spend a lot of time outside, in my garden, and concocting potions and helping people feel their best. I also like tea, reading, and about a million other hobbies. I'm so happy your here on this adventure with me.

Footer

Copyright © 2025 · Foodie Pro Theme On Genesis Framework · WordPress · Log in