• Skip to primary navigation
  • Skip to main content
  • Skip to primary sidebar
  • Skip to footer

Sweet Love and Ginger

  • Home
  • About
  • Recipes
  • Garden
  • Work With Me

Recipe

Quick and Easy Bacon & Spinach Carbonara

By Jessica

This post may contain affiliate links. I may receive commissions for purchases made through links in this post.

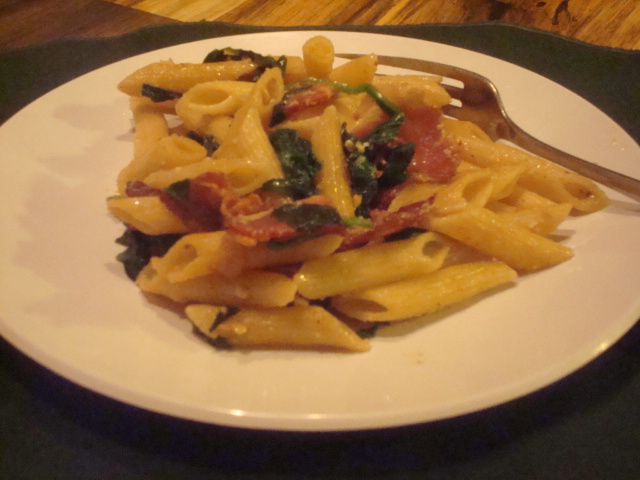
What more need be said? This recipe is simple and easy, and I cannot believe I have yet to post a carbonara recipe!
This is one of those stand by recipes that I love to have in my back pocket, anytime I have extras laying around the fridge to be used I whip up a carbonara. All you really need is a fatty meat, some pasta, an egg, and parmesan cheese. I like to through in some leafy greens, or onions and peppers, even sundried tomatoes and the like. I would like to point out that this is not a traditional carbonara, but a simplified version, one that is easy enough for anyone to throw together in a snap.
I think that this particular recipe is great for fall, especially if you use a smoked bacon, and don’t be shy about swapping spinach for kale, it lends itself wonderfully to this recipe!


Quick Bacon Spinach Carbonara
1 lb dried pasta
½ lb bacon, cut into ½ inch chunks
2 large eggs
1 cup Parmesan cheese
2 cups baby spinach leaves
Salt & Pepper to taste
Place a pot of salted water over medium-high heat to boil. In a large skillet cook bacon until crisp. Drop the pasta into the boiling water and cook for roughly 5 minutes. While the pasta cooks whisk together the eggs and parmesan cheese and a touch of pepper in a small bowl. When the pasta is ready (very aldente) ladle about ½ cup of the pasta water into the egg, cheese mixture, continuing to whisk. Return the skillet to medium heat. Drain the pasta (reserving some of the cooking lioquid) and add to the skillet. Toss the pasta with the egg mixture until it is completely coated, adding more cooking liquid if it seems dry. Add spinach leaves and toss. The leaves will wilt a little, if you prefer them more wilted cover the skillet for 2-3 minutes. Serve immediately, while warm with parmesan cheese sprinkled on top.

Tip of the Day: Adding the pasta right to the pan with the sauce for it while it is still very aldente allows the starches to capture the sauce and bind it to the pasta, meaning there is more flavor in every bite!

October 9, 2012 December 1, 2017 Filed Under: Recipe

D41: Single Sweet Potato Soup

By Jessica

This post may contain affiliate links. I may receive commissions for purchases made through links in this post.

These fall days often make me crave something warm and comforting, especially when I am home alone. On this particular day I decided to comfort myself with one of my favorite fall dishes for lunch. This recipe is a simplified version of my favorite Sweet Potato Soup recipe that is so easy for the single person to whip up!
Simple Single Sweet Potato Soup
1 medium sweet potato, peeled and cubed
1 ½ cups vegetable broth (or chicken broth)
1 tablespoon brown sugar
1/4 teaspoon ground ginger
1/8 teaspoon ground cinnamon
½ cup milk or cream
Pinch salt
In a sauce pan boil potatoes and broth until tender. The liquid will begin to evaporate, so be sure to stir. Add spices and place in the blender. Blend until smooth and return to saucepan, on low heat stir in milk, adjust seasoning and serve.


Now I don’t always use a blender for this recipe. I often simply use a potato masher as shown above. Mostly because I am too lazy to do all those dishes for just me and I enjoy a little texture in the soup. This however is up to you.


October 3, 2012 January 16, 2018 Filed Under: Recipe Tagged With: Dinner 4 1, Soup/Stew, Vegetarian

Serving a Steaming Bowl of Consolation

By Jessica

This post may contain affiliate links. I may receive commissions for purchases made through links in this post.

Chowder breathes reassurance.  It steams consolation.  ~Clementine Paddleford

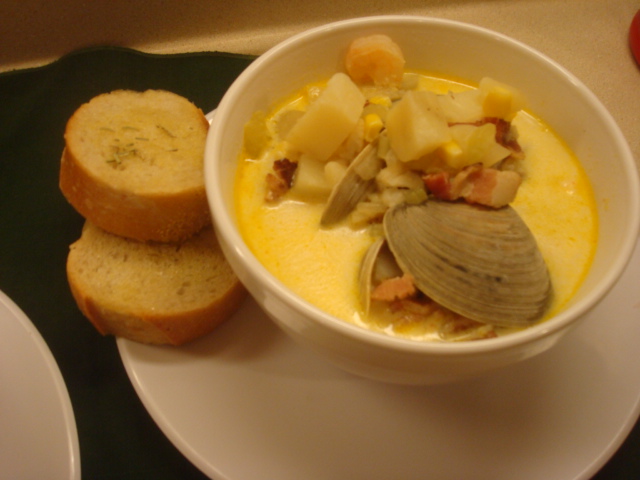
Could this be any more true? I never really knew how much I liked seafood chowder before I met ol’ Chuckles. It’s one of his favorites, so of course I had to learn how to make it for him!
There couldn’t have been a more perfect fall afternoon for it. We had spent most of the day outside and gotten rained on here and there. We were a little chilled and tired after an eventful weekend, so tired in fact that I fell asleep in the car on the way home. I woke up when “All my Life” by The Band Perry came on the radio. Seriously I will never get enough of that song.
As I serenaded Chuck the rest of the ride home we swung into the grocery store and picked up some clams, cod, and a small loaf of fresh baked French bread. As a side I sliced, the bread and brushed it with olive oil, garlic and rosemary. Then popped it in the oven for a while (10-20 minutes depending on size) at 425 degrees. The burst of rosemary flavor blended so beautifully with the creamy deliciousness of the chowder that I jam packed with seafood.


Seafood Chowder
¼ lb bacon, cut into ¼ inch cubes
1 tbsp olive oil
1 large onion, chopped
1 ½ cups chopped celery
1 quart fish stock
2 large potatoes, peeled & chopped
2 bay leaves
1 lb little neck clams
1 lb skinless, boneless cod fillet, cut into chucks
1 lb medium shrimp, shelled, deveined
½ cup frozen corn
1 cup heavy cream
1/8 tsp cayenne pepper
Salt & pepper to taste
In a large sauce pan or dutch oven cook bacon, and drain grease. Add olive oil and heat for roughly 5 minutes. Add onion and celery, cooking until soft. Add fish stock and bay leaves. Bring to a simmer, and add potatoes, cooking until they are just tender, roughly 15 minutes. Add shrimp, clams, fish and corn. Simmer for another 5 minutes. All the clams should open. Heat cream in a small sauce pan over low heat, and add to soup pot. Add final seasoning and serve hot.


September 26, 2012 March 30, 2017 Filed Under: Recipe Tagged With: Seafood, Soup/Stew

Chicken Pot Pie: Like your Great-Grand-Momma made it!

By Jessica

This post may contain affiliate links. I may receive commissions for purchases made through links in this post.

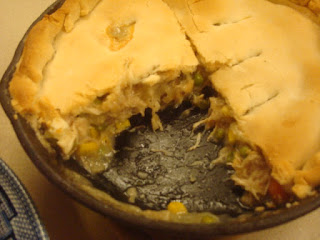
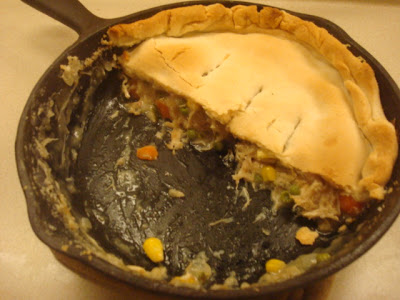
I am so excited to share this recipe. It is a quintessential pot pie, made the old fashioned way. I mean the real old fashioned way, with butter, flour, water, chicken, herbs, and veggies.
The night before I made this I roasted a chicken, because well it was on sale of course! I used the leftovers to make broth (post coming), saved the drippings and chicken pieces for this recipe. If you don’t have a whole roast you can also use bone in thighs, legs, and the like.
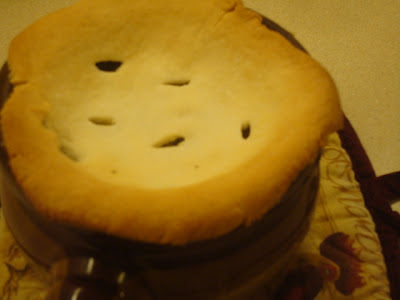
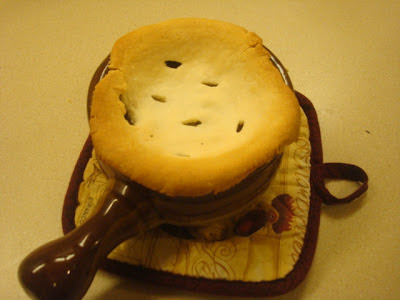
I made a large family sized one as well as an individual one for me to take in my lunch the next day. It was perfectly comforting on the cold rainy day that it was.
Great Gram’s Chicken Pot Pie
2 tbsp drippings (Butter may be substituted)
1 onion, chopped
¾ cup all-purpose Flour
3 cups chicken broth
2 large carrots, diced
3 stalks of celery, chopped
1 cup frozen peas
1 cup frozen corn
½ cup minced fresh parsley1/2 cup chicken pieces

2 pie crusts (recipe below)
Preheat oven to 350. In a large skillet heat chicken drippings, and sauté onions until they become translucent, roughly 10 minutes. Stir in flour, until well blended and simmer roughly 2 minutes. Then add broth, continuing to stir until mixture thickens. Add chicken, vegetables, parsley and salt & pepper to taste. Mix well. Move filling to individual oven safe containers, divided evenly. Cover the top with pie crust liberally, with an inch or two hanging over the edge. If you are using a pie tin or an oven safe skillet you can crimp the dough as you would a sweet pie. Add a few slits to let out steam. Sprinkle the top with sea salt, and place in the oven for 1 hour, or until the top turns golden, and the filling begins to bubble. Serve warm.
Pastry:
1 cup unsalted butter, frozen
3 cups all-purpose flour
3 tbsp sugar
1/3 cup ice water
Combine flour and sugar in a large bowl. Great butter into the bowl, stirring frequently. Stir mixture with a fork continuously while pouring in the cold water. Stop stirring when the dough begins to clump. Use your hands to lightly knead the dough until it forms a ball. Divide this into two parts, and flatten each with the use of a rolling pin.


September 21, 2012 March 30, 2017 Filed Under: Recipe Tagged With: Chicken

Traveling Meatloaf

By Jessica

This post may contain affiliate links. I may receive commissions for purchases made through links in this post.

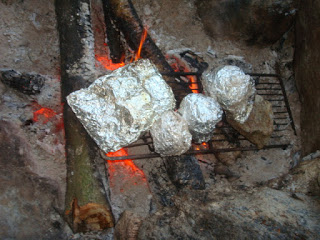
Meatloaf is one of Chuck’s favorite things ever. As he says it’s because “it’s like a whole loaf of meat! What could be wrong with that?” When I told him I had found a way to bring it camping he was very excited indeed.

I made this recipe on our trip to Challis Pond for Memorial Day weekend. And it was a mega hit! We both absolutely loved it, so of course I have to share it here with you!

Traveling Meatloaf
½ lb lean ground beef
2 tablespoons bread crumbs
4 large onions
1 tablespoon ketchup
1 clove garlic, minced
2 tsp Worchester sauce
½ tsp thyme
1 tsp parsley
1 tsp pepper
1 tsp salt
1 egg
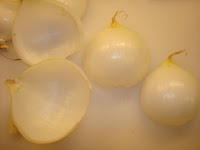
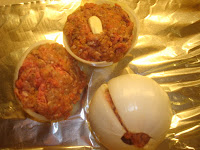
Combine all ingredients, except onions in a large bowl with hands until well blended. Remove papery shell from onions, and slice in half. Remove all but the remaining outer piece. Pack a ball of meat mixture into the onion half and “close” with remaining half. Wrap in tin foil. Cook in the fire for roughly 20 minutes or until the center is no longer pink, turning often. Serve warm. Once wrapped meatloaf can be frozen in order to travel.
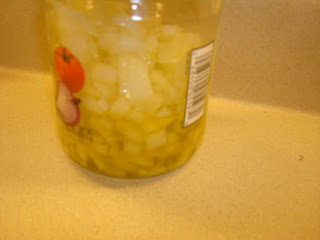
I realize that you will have quite a bit of onion leftover after this, but that’s ok. I chopped up the centers for several of the other meals we made, such as Hobo Stew, and Foil Potato Packets. Still having some leftover I simply minced them up and tossed them in a jar with oil. The oil will infuse some of the onion flavor and help preserve the onion so I can use it up in my cooking when we get back from camping.

Also I want to mention some lessons learned. The main thing being that grease drips out and will catch the foil on fire so be sure to wrap them more than once. And use more than one onion shell. The outside onion burned, but we like to eat the onion, so I think having more than one layer would be good so you can enjoy the onion. And yes I put a chunk of garlic in the middle. It was the best idea ever!

September 12, 2012 August 30, 2016 Filed Under: Camping/Hiking, Recipe Tagged With: Beef, Camp Food

  • « Go to Previous Page
  • Page 1
  • Interim pages omitted …
  • Page 77
  • Page 78
  • Page 79
  • Page 80
  • Page 81
  • Interim pages omitted …
  • Page 84
  • Go to Next Page »

Primary Sidebar

  • Facebook
  • Instagram
  • Pinterest
  • Twitter
  • YouTube
Hi, I'm Jessica. I'm an herbalist living in the great northeast with my husband Chuck, our two little boys, our dog Brody and a flock of chickens. I'm all about real, good food and good times with awesome people. I spend a lot of time outside, in my garden, and concocting potions and helping people feel their best. I also like tea, reading, and about a million other hobbies. I'm so happy your here on this adventure with me.

Footer

Copyright © 2025 · Foodie Pro Theme On Genesis Framework · WordPress · Log in