• Skip to primary navigation
  • Skip to main content
  • Skip to primary sidebar
  • Skip to footer

Sweet Love and Ginger

  • Home
  • About
  • Recipes
  • Garden
  • Work With Me

Main Dish

Crock Pot Pea Soup from Leftover Ham Bones

By Jessica

This post may contain affiliate links. I may receive commissions for purchases made through links in this post.

So this isn’t your typical chop everything up and dump it in the crock pot recipe for pea soup that everyone is used to,  let’s just get that out in the open right now.

Don’t get me wrong that modern American classic is one of my favorites, but sometimes you just have ham bones lying around needing to be used. Easter definitely just happened over here so you can imagine the oversized hams that have been prepared as of late.

Pea Soup from Leftover Ham Bones

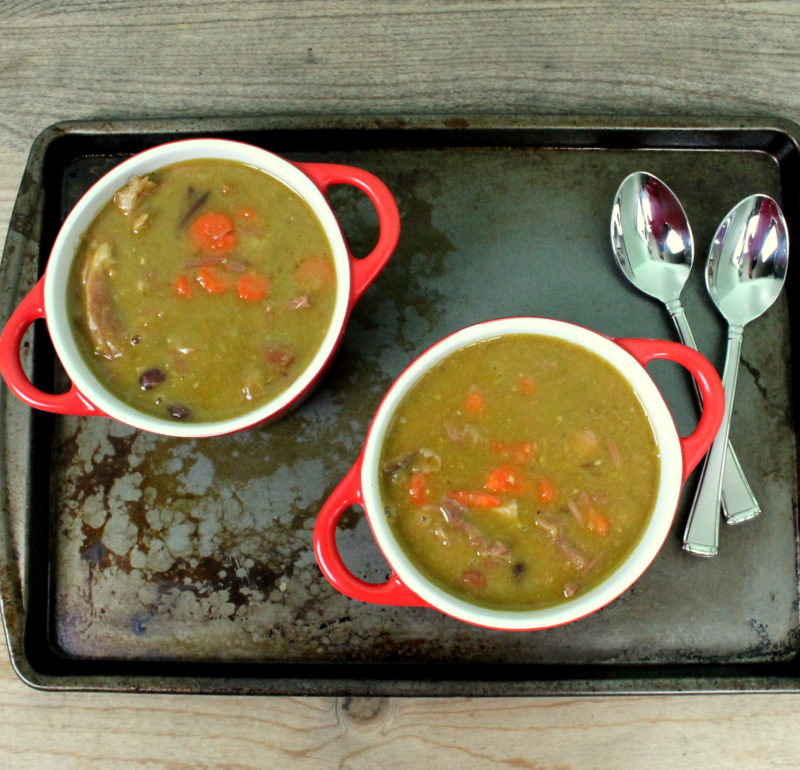
It starts out easy enough; toss the bones with whatever meat they have left right into the crock pot along with some split peas, broth, and spices. Let that go until the peas are soft and the meat is falling off the bone. Then you add in all the other good stuff (the veggies) and clean the bones, dumping the meat back into the crock.

See that’s not so hard and you can now reap the benefits of the “bone broth” that was created while they simmered in the crock. Not to mention the flavor that using bones adds.  You’ll never want the easy-chop version again.

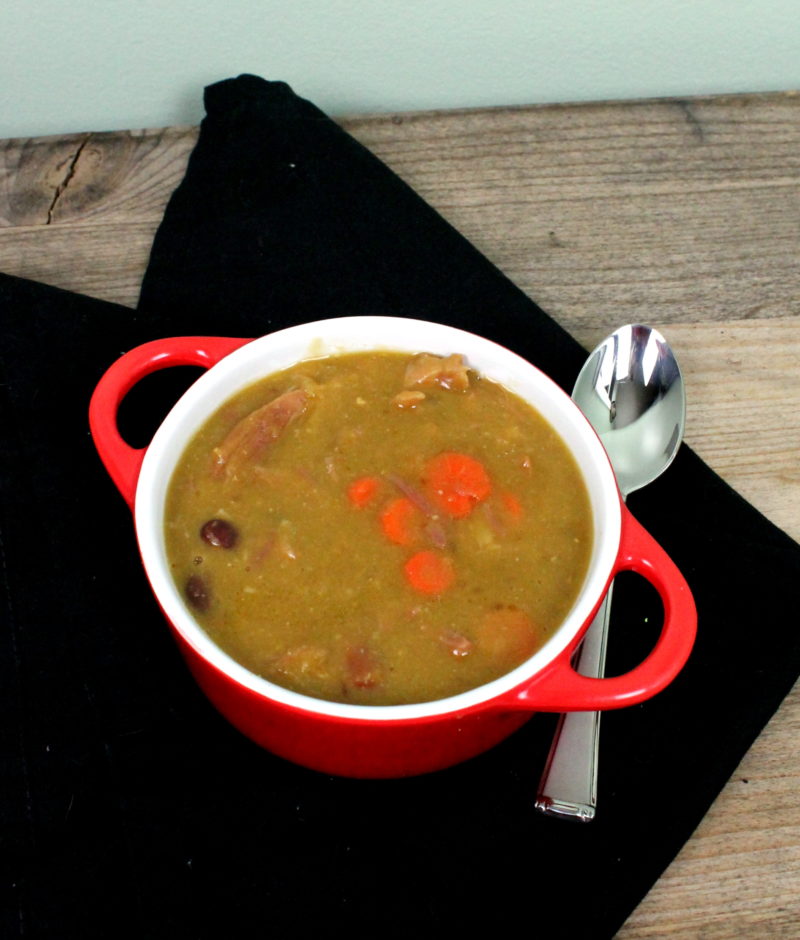
In this particular recipe I do not use potatoes because we are still on the “slow carb diet” (notice the use of kidney beans) for the most part, but you can add them in with the rest of the vegetables if you prefer.

Pea Soup from Leftover Ham Bones

Crock Pot Pea Soup from Leftover Ham Bones
Ingredients
  • 1 ham bone with meat (about 2 lbs) or 2 cups diced ham
  • 1 lb dried green split peas, rinsed
  • 1 bay leaf
  • ½ a small yellow onion, chopped
  • 2 stalks celery, minced
  • 1 clove garlic, minced
  • 4 cups chicken broth
  • 2 cups water
  • 2 carrots, chopped (about 1 cup)
  • 1 (15.5 oz) can kidney beans
Instructions
  1. Place ham, peas, bay leaf, onion, celery, garlic, broth and water into a large Crockpot. Cover and cook on low for 8 to 10 hours or high for 5 to 6 hours. The peas should be soft, and ham falling off the bone.
  2. Remove the ham and bones from crock pot and transfer to a rimmed baking sheet, set aside to cool for 5 to 10 minutes.
  3. Add the carrot, and beans to crock pot and turn onto high for 2 hours.
  4. Meanwhile remove the ham from the bone and shred into bite size pieces. Return to the Crockpot and stir to combine. Allow the Crockpot to complete cooking.
  5. Once the carrots and beans are soft turn of the Crockpot and serve.
3.3.3077

To speed up the final steps you can also cook the carrot and beans on the stove top first. If you prefer you can also add them with the rest of the ingredients in the beginning, however i find that these ingredients become too mushy for my taste.

March 30, 2016 October 23, 2018 Filed Under: Main Dish, Pork, Recipe, Soup/Stew Tagged With: Pork, Soup/Stew

Fig & Prosciutto Pizza with Arugula

By Jessica

This post may contain affiliate links. I may receive commissions for purchases made through links in this post.

Fig & Prosciutto Pizza with Arugula

You might have noticed over time that I often try to mimic my favorite restaurant dishes at home. If it’s something I really love like Linguine with Clam Sauce, or Penne con Fionchietto why not learn to make it at home so I can have it more often and spend less money? At least that’s been my thought process.

This pizza is one of those recipes. We have had a version of it at a number of restaurants and it continues to be a favorite of both chuck and I. A simple but flavorful dough is definitely key, since the rest of the ingredients are fairly subtle. This has been my favorite pizza dough recipe for a while.

Fig & Prosciutto Pizza with Arugula

The real stars of this dish are quite obviously the figs and prosciutto; though I personally think the reduced balsamic is the thing that really brings it all together. Then again I may or may not have a slight love affair with the stuff. I also think the arugula is necessary to add some freshness, and a peppery bite to an otherwise salty-sweet dish.

Fig & Prosciutto Pizza with Arugula

Fig & Prosciutto Pizza with Arugula
Prep time: 5 mins
Cook time: 25 mins
Total time: 30 mins
Serves: Serves 4
Ingredients
  • 1 pre-made pizza dough
  • 1 ½ tablespoons extra virgin olive oil
  • 1 clove of garlic, minced
  • 8 ounces fresh grated mozzarella
  • ½ cup balsamic vinegar
  • ½ cup figs (about 12 California figs, halved or 6 mission black figs sliced)
  • 2 ounces prosciutto, hand shredded into strips
  • ½ cup arugula
Instructions
  1. Preheat the oven to 450 degrees.
  2. Roll out the pizza dough on a prepared pizza stone or baking sheet. Brush the top of the dough with olive oil and sprinkle with garlic. Spread the mozzarella on top of the pizza and place in the oven. Bake for 10 to 12 minutes.
  3. While the pizza cooks place the balsamic in a small pan over medium high heat. Allow it to simmer for 10 to 15 minutes. The liquid should have reduced by half and become syrupy. Remove from heat, and set aside.
  4. The crust should have begun to brown and the cheese melted. Scatter the top with figs and prosciutto and place in the oven for another 2 to 3 minutes.
  5. Remove from heat and let stand for 2 minutes. Scatter the arugula on top and drizzle with balsamic.
  6. Serve immediately.
3.3.3077


March 23, 2016 October 23, 2018 Filed Under: Main Dish, Recipe Tagged With: appetizer

Sausage & Tomato Rugout

By Jessica

This post may contain affiliate links. I may receive commissions for purchases made through links in this post.

These last few weeks of beautiful weather has really excited me to get outside and spend some time in my gardens and finishing house projects. I mean it was 70 the other day and it was the beginning of March?! Usually we are still buried under piles of snow here in March so this is really weird. Unfortunately one of the side effects of spend so much time breathing in the fresh spring air is that I’ve kind of put cooking on the back burner for a while. It’s that weird time of year when the spring veggies and herbs haven’t quite made their appearance yet and I’m totally not in the mood for more soup so there have been a lot of tossed together last minute dinners lately. What can I say even I just don’t have it in me sometimes to cook a four course meal every night. I’d much rather be drinking wine by our new fire pit (more on that soon), I mean if we are being honest here.

Sausage & Tomato Rugout

This recipe is one that just keeps popping up in our household, and with good reason, since it’s one of my favorites. I love it because I always have everything for it on hand, it’s super easy to whip up for lunch or dinner and it’s pretty darn healthy too. I also really love that I can swap out ingredients for whatever I have at the time; for example I have used broccoli rabbe, kale, and collard greens instead of spinach. I have also changed the type of beans and even mixed them because I had leftover to use in the fridge.

While this recipe can easily serve four if you are interested in making it go further serving it with a side or pasta or rice is also a great option.

Sausage & Tomato Rugout

Sausage & Tomato Rugout
 
Cook time: 20 mins
Total time: 20 mins
Serves: 4 Servings
Ingredients
  • 1 tablespoon olive oil
  • 1 small onion, chopped
  • 1 lb chicken sausage, sliced
  • 3 cloves of garlic, minced
  • 6 cups of loose packed baby spinach
  • ½ cup low sodium chicken broth
  • 2 (16 ounce) cans cannellini beans, drained and rinsed
  • 1 (14.5 ounce) can diced tomatoes
  • Salt & pepper to taste
Instructions
  1. Heat oil in a large skillet over medium high heat. Saute onion and sausages for 4 to 5 minutes or until the sausages have browned and the onion turned translucent.
  2. Add the garlic and cook for another 1 to 2 minutes.
  3. Stir in the kale, broth, beans, and tomatoes. Bring to a boil and reduce heat to a simmer. Cover and cook for 8 to 10 minutes, stirring occasionally.
  4. Adjust seasonings and serve.
 
3.5.3251


Similar Recipes:

Turkey Sausage & Wild rice salad
Sun Dried Tomato & Sausage Skillet
American Style Goulash

March 16, 2016 November 26, 2019 Filed Under: Main Dish, Pork, Recipe Tagged With: Chicken/Turkey, Clean, Quick & Easy, Weeknight Meals

Pan Seared Goose Breast with Cumberland Sauce

By Jessica

This post may contain affiliate links. I may receive commissions for purchases made through links in this post.

Pan Seared Goose Breast with Cumberland Sauce

If you follow me on instagram you might have seen the awesome new cook book that I got for Christmas, Duck, Duck, Goose, by Hank Shaw. I was super excited to get this book especially because Chuck scored his first goose on Christmas Eve. What are the odds right?

It took us probably way longer than it should have to pluck and gut the goose, but that’s what happens when you have 2 clueless newbs figuring it out as they go. Afterward our back yard was completely covered in feathers. I should have taken pictures of the whole thing, but alas I am not good at remembering the camera at times like this.

Anywhoodles we let the bird rest in the fridge for the holiday and I spent some time reading in my new book and online about how to cook the thing, finding that the breasts unanimously get overdone and dry if roasted whole, so I decided to cut them out and cook them separately. I chose to serve it with Cumberland sauce because the stuff is awesome, obviously.

Pan Seared Goose Breast with Cumberland Sauce

I was pleasantly surprised to see that one breast was plenty to feed both Chuck and I, leaving the whole other breast for a second meal. These Canada Geese are big guys. I was also pleasantly surprised by the quality of the meat, while the goose itself is pretty fatty the breasts themselves are rather lean (excluding the skin), and tastes remarkably like other red game meats. I was really happy with this dish, and cannot wait for Chuck to get more next year!

Pan Seared Goose Breast with Cumberland Sauce
Prep time: 10 mins
Cook time: 30 mins
Total time: 40 mins
Serves: 4 to 6 servings
Ingredients
  • 2 goose breasts, with skin, fat trimmed
  • Salt and pepper to taste
  • 1 shallot, minced
  • ½ cup Port wine
  • ¾ cup broth (chicken, or vegetable)
  • ½ teaspoon dry mustard
  • ¼ teaspoon cayenne
  • Zest from one lemon
  • Zest of 1 orange
  • ¼ cup currant jelly
  • Salt and pepper to taste
Instructions
  1. Bring the breasts up to room temperature. Pat the breasts dry with a paper towel then salt and pepper both sides. Place the breasts skin side down in a room temperature large steel, or cast iron skillet and place it on the stove. Turn the heat up to medium high until the pan begins to sizzle. Turn the heat down to medium low and cook for roughly 10 to 12 minutes. The skin should be crisp and easily pull away from the pan, if it does not easily pull away continue to allow it to cook.
  2. Flip the breasts over and immediately salt the skin side. Allow them to cook on this side for 5 to 7 minutes for a medium rare duck or 8 to 9 minutes for a well done duck breast.
  3. Remove the duck from heat when it’s reached desired doneness. Place it on a cutting board, skin side up and let it stand for 8 to 10 minutes.
  4. While the goose rests prepare the sauce. Drain the pan of excess fat, leaving about 1 tablespoon in the pan. Return the pan to medium high heat and add the shallot, sautéing for 1 to 2 minutes, until it softens.
  5. Stir in the Port wine, scraping brown bits from the bottom of the pan. Allow it to simmer until it has reduced to half.
  6. Add the broth, orange and lemon zest, mustard, and cayenne and stir until well blended. Cook for one minute before adding the currant jelly. Allow it to boil until the jelly has been incorporated and the sauce thickens. Adjust the seasonings and remove from heat.
  7. Serve the goose breast sliced with sauce on the side.
3.3.3077


March 9, 2016 October 17, 2019 Filed Under: Main Dish, Recipe, Wild Game Tagged With: Wild Game

Clams with Sausage & Cannellini

By Jessica

This post may contain affiliate links. I may receive commissions for purchases made through links in this post.

Clams with Sausage & Cannellini

This past weekend I celebrated my 28th birthday. It was a pretty laid back kind of birthday. Sleeping late, with Chuck and Brody, a good breakfast, a trip to the grocery store, 60 degree weather, all came together to make a pretty awesome day for me.

People sometimes thin that I’m crazy for wanting to spend my whole birthday cooking, but when you love to do something then it’s really enjoyable and it doesn’t feel like work at all. Chuck took me to the store (I totally wore sweatpants and slippers, because I could) and we picked up everything I needed to make this dish. I had originally planned to bake bread, and a few other things, but ended up taking a nap on the couch instead; I’m not even mad.

This dish though, it was perfect. A few ingredients combined in a way that’s just divine. I found the original recipe in a recent issue of bon Appetite, but used the beans instead of homemade pasta, because slow carb. Also using beans took a whole bunch of steps out of the recipe, so it came together in less than 30 minutes giving me enough time to toss some arugula in a lemon dijon dressing for a side dish. It’s kind of perfect for a weeknight meal don’t you think? I do.

Clams with Sausage & Cannellini

Clams with Sausage & Cannellini
Prep time: 5 mins
Cook time: 20 mins
Total time: 25 mins
Serves: 2 Servings
Ingredients
  • 2 tablespoons olive oil
  • 4 ounces Italian sausage, casings removed
  • 4 cloves of garlic
  • 1 lb little neck clams, scrubbed
  • 1/3 cup dry white wine
  • 1 (15.5 ounce)can cannellini beans, drained
  • Salt & pepper to taste
  • 1 tablespoon unsalted butter
  • 1 tablespoon finely chopped parsley
Instructions
  1. Heat oil in a large skillet over medium high heat. Add sausage and cook, crumbling it into small pieces, until browned, about 5 minutes.
  2. Add the garlic and cook for 1 minute.
  3. Add clams and wine. Cover and let cook, shaking the pan occasionally until the clams are all opened, about 5 to 6 minutes. Remove any that do not open.
  4. Stir in beans and cook for another 2 minutes, or until warmed through. Add butter, parsley and toss. Adjust seasoning and serve.
3.3.3077


March 2, 2016 October 23, 2018 Filed Under: Main Dish, Pork, Recipe, Seafood

  • « Go to Previous Page
  • Page 1
  • Interim pages omitted …
  • Page 12
  • Page 13
  • Page 14
  • Page 15
  • Page 16
  • Interim pages omitted …
  • Page 20
  • Go to Next Page »

Primary Sidebar

  • Facebook
  • Instagram
  • Pinterest
  • Twitter
  • YouTube
Hi, I'm Jessica. I'm an herbalist living in the great northeast with my husband Chuck, our two little boys, our dog Brody and a flock of chickens. I'm all about real, good food and good times with awesome people. I spend a lot of time outside, in my garden, and concocting potions and helping people feel their best. I also like tea, reading, and about a million other hobbies. I'm so happy your here on this adventure with me.

Footer

Copyright © 2026 · Foodie Pro Theme On Genesis Framework · WordPress · Log in