• Skip to primary navigation
  • Skip to main content
  • Skip to primary sidebar
  • Skip to footer

Sweet Love and Ginger

  • Home
  • About
  • Recipes
  • Garden
  • Work With Me

Recipe

Garden Updates and Panzanella

By Jessica

This post may contain affiliate links. I may receive commissions for purchases made through links in this post.

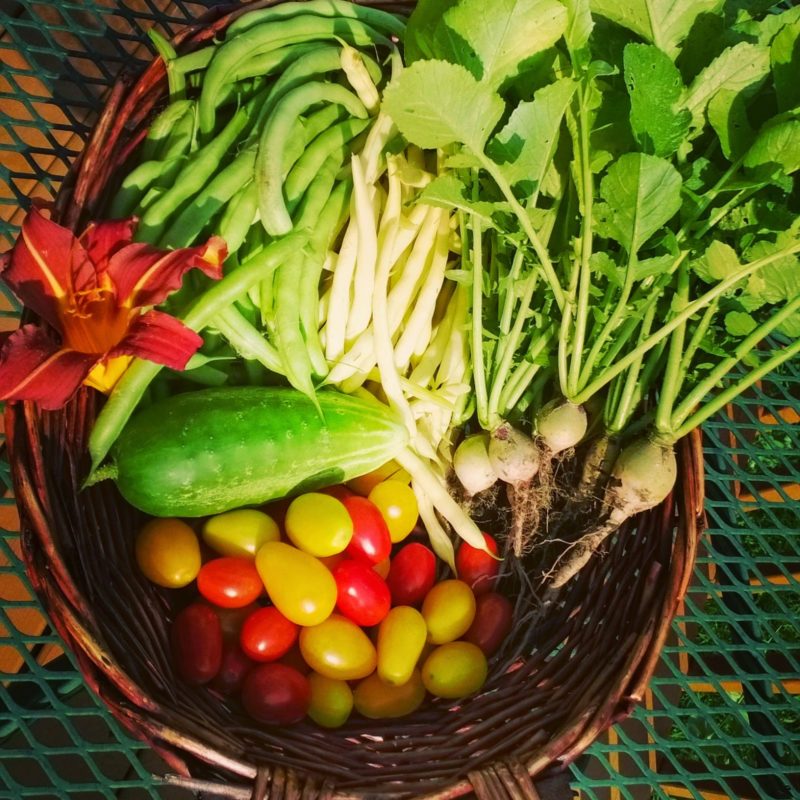
The garden has been on overdrive. I have been freezing more
beans than I think we can eat this year (yessss!), and the tomatoes are turning
bright colors of red and gold.

There is nothing better than fresh garden tomatoes, they are
so incredibly sweet and have so much flavor. One of my tomato plants has
actually outgrown its cage and I had to add some wooden stakes to keep it
upright. It has gotten so bushy I can’t even begin to prune it. I am not the
only one I know with this problem, so I’m thinking it must be the year of the
tomato around here.
I recently had to pull all of my arugula and lettuce mix,
since a lot of it went to seed while we were on vacation a couple weeks ago. I
think I’m going to do a late summer radish crop or maybe some other cold
weather veggies, I will have to look at what my options are. My peas are
reaching the end of days with the heat, so I’m going to pull them soon and get
ready for a fall crop of peas. Maybe this time around I’ll be able to store some
for winter, Chuck it pretty good about eating them before I can get them
stored.
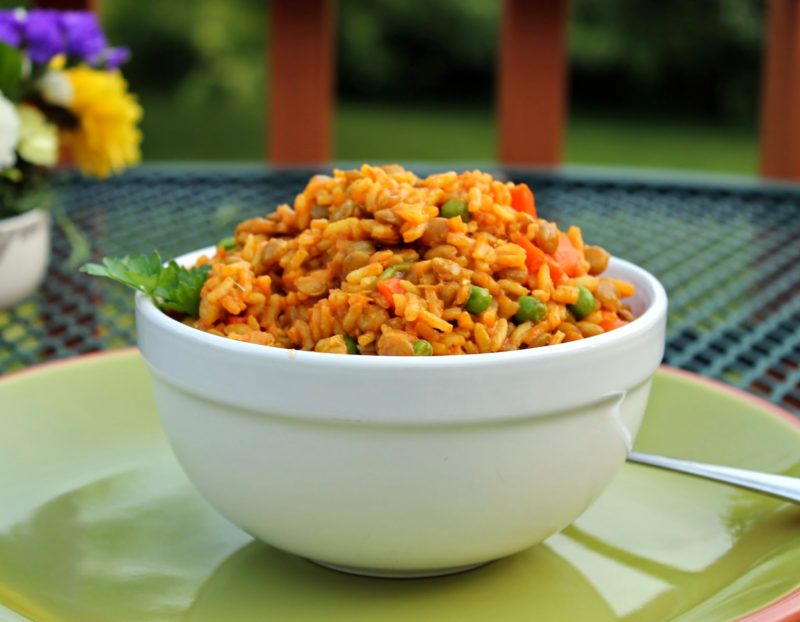
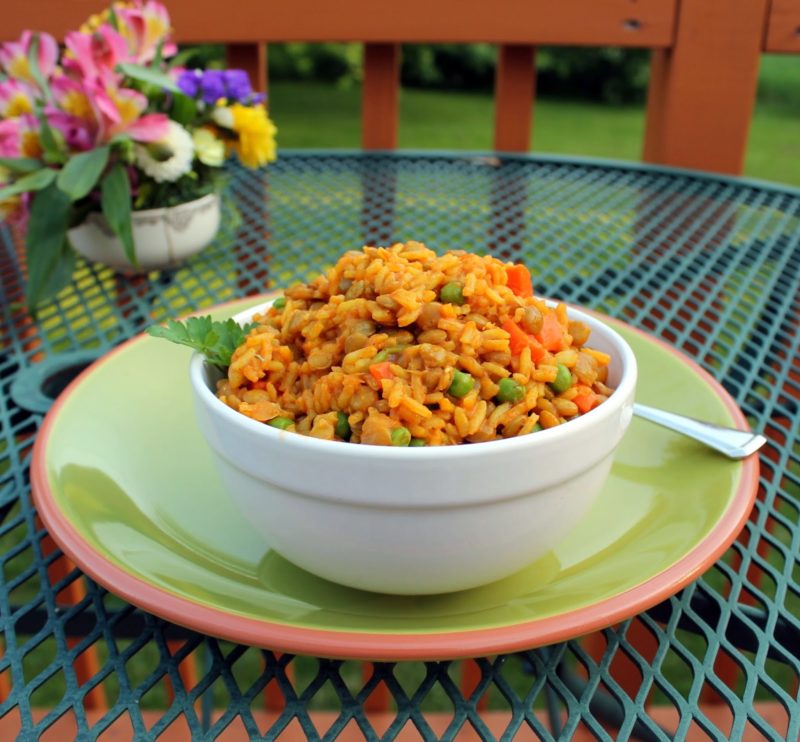
In the mean time let’s talk about one of my favorite meals
with these garden treats. This year I have been loving these wonder bowls,
but also a simple classic panzanella. A nice warm panzanella with fresh garden
produce and a big glass of white wine and you have one happy camper over here.
Simple Early Season Panzanella
3 cups day-old crusty bread, cubed
3 tbsp extra virgin olive oil
4 medium tomatoes, chopped into 1-2 inch pieces
3 cups arugula
2 cloves garlic, crushed
1 tbsp diced red onion
2 tbsp red wine vinegar
Fresh ground pepper

Preheat the oven to 425 degrees. On a large cookie sheet toss
bread with1 tbsp extra virgin olive oil and toast for 5-6 minutes, tossing
once. Remove from heat, and set aside. In a large bowl add all other
ingredients and toss to combine. Add the bread, and toss again. Serve immediately.

Serves 4-6

August 6, 2014 February 12, 2018 Filed Under: Recipe Tagged With: Vegetarian

Chuck’s Blueberry Buttermilk Pancakes

By Jessica

This post may contain affiliate links. I may receive commissions for purchases made through links in this post.

It’s blueberry season in the northeast. Chuck and I try to
make time to go blueberry picking every year, but unfortunately this year has
gotten away from us. We can’t seem to make time for anything with all the
events we have to go to. I’m not loving it but I guess that’s part of being an
adult these days. I’ll be a bit relieved when this season passes for us.

Luckily a couple of friends came to visit us last weekend
and brought us a bit of the bounty from their berry picking excursions. I
couldn’t have been more thrilled that they offered to share with us! Most of
the berries were eaten just on their own, but I managed to get Chuck (the
breakfast chef of our house) to make me some blueberry pancakes.
I’m not usually a huge fan of pancakes, but these ones I just
love. They were exactly what I needed after a hectic couple days at work.
Coming back from vacation will cause some chaos let me tell you.


Chuck’s Blueberry Buttermilk Pancakes

2 cups all-purpose flour
¼ cup sugar
2 ¼ tsp baking powder
½ tsp baking soda
½ tsp salt
2 eggs
2 cups buttermilk
½ tsp vanilla extract
¼ cup unsalted butter, plus some
1 cup blueberries
In a large bowl mix together flour, sugar, baking powder,
baking soda, and salt. Blend in butter, eggs, buttermilk and vanilla until it
forms a lumpy batter. Heat a small dab of butter in a skillet over medium heat
and ladle (about ¼- 1/3 cup) some of the batter into the skillet. Add a few of
the blueberries to the top of the pancake. When small bubbles begin to form in
the batter (about 2-3 minutes) flip the pancake and cook for another 2-3
minutes or until they it begins to brown. Serve warm with maple syrup. (Serves
4-6)


PS: Don’t Forget to enter the giveaway!!

July 31, 2014 February 12, 2018 Filed Under: Recipe Tagged With: Brunch, Vegetarian

A Million Reasons to Try Lamb Kofta

By Jessica

This post may contain affiliate links. I may receive commissions for purchases made through links in this post.

Lamb Kofta Recipe

Oh the goodness. I cannot even begin to tell you how delicious this recipe is. From the intriguing flavor of the spiced lamb, to the cooling effect of the tzatziki, and the light fluffy texture of the pita there is so much awesomeness going on I can’t even describe to you.

It’s surprisingly not spicy, I say surprisingly because Middle Eastern food makes me think spice, but maybe that just goes to show that I need to step out of my box more.
Don’t leave out a single spice, they blend together so well that I can’t imagine any of them not being together. Also don’t skimp on the spices, they are completely necessary to make this thing work. Though you can use whole ginger (about ½ inch piece peeled) I opted for Penzys Dried ginger because I never use up a whole root before it goes bad, and it’s a waste. Also Penzys cinnamon is the bomb just saying. In fact you should probably just go check out the entire store and stock up on everything there. Here is a store locator. No this is not a sponsored post, I just love that place.
Lamb Kofta Recipe

You could potentially use beef if lamb scares you, or is too expensive, but honestly I think the flavor of the lamb is what makes the spices work so well, and it the perfect vehicle, so really don’t mess with that either.

 Tzatziki is awesome, enough said.
As for the pita, please, please don’t break them open. Simply toast them up a bit and fold that beautiful round thing like a fluffy taco to hold all of your lamb-tzatziki goodness.
Toppings are simple, a bit of tomato, and arugula for a bit of brightness and crunch.  Then go right ahead dig on in. Let the juices run down your hand and make a big old mess. It’s good. So good. Go ahead and enjoy it. You know you want to.
Lamb Kofta Recipe


Kofta Kabobs (Recipe Adapted from TheBlackPepercorn.com)

1 lb lean ground lamb
3 garlic cloves, crushed
1 ½ tsp dried ginger
3 tbsp fresh parsley, chopped
1 tbsp fresh mint, chopped
2 tsp cumin
2 tsp coriander
1 tsp cinnamon
1 tsp fresh ground black pepper
1 tsp salt
Combine all ingredients in a bowl and hand knead until well
combined (Note: if using wooden skewered soak them in water for 15-20 minutes
before using them). Break the meat into 4 equal sections and form long thin egg
shaped balls. Thread them onto a skewer and place them onto a preheated grill.
Cook for 12-15 minutes, turning regularly until the center is no longer pink.
Remove from heat and serve with pita, and tzatziki. (Serves 4)


Lamb Kofta Recipe


Tzatziki (Recipe Adapted from Food Network)
1 medium cucumber, peeled, seeded, shredded, & drained
1 cup of Greek yogurt
1 clove of garlic, crushed
1 tsp lemon zest
1 tbsp lemon juice
2 tbsp fresh dill
sprinkle fresh ground pepper
Combine all ingredients in a bowl and stir until well combined.
Serve chilled.
So maybe I didn’t actually list a million reasons, but I think I praised it all well enough to make you see the light.

July 23, 2014 April 29, 2016 Filed Under: Recipe Tagged With: Condiment, Lamb, Summer

Kchidhi – Easy, Clean, Vegan, and Delicious

By Jessica

This post may contain affiliate links. I may receive commissions for purchases made through links in this post.

This is a easy and healthy recipe based on traditional Indian Kchidhi.

In my vegetarian adventures lately I have been stumbling across some really interesting new blogs that I will definitely be sharing with
you guys in the near future. This recipe is one that I adapted from one of these blogs, Holy Cow. It’s a super simple rice dish that I made for my lunch
at the beginning of the week. It was actually filling and satisfying enough to get me through the entire week without getting bored. That is something that never happens.

This recipe actually serves 4-6 people, but I’m sharing it here today because I think it’s a great vehicle for the single person to eat
all week. I just added whatever leftover veggies we had the night before, or steamed up some new ones and I had a complete meal that varied a little
throughout the week.
The version you see here is a simpler version, I guess you could say I “Americanized” it, but I wanted it to be an approachable recipe. The
original recipe isn’t difficult by any means, but I opted not to use a pressure cooker, and frozen veggies, to speed up the whole process.


Note: Garam Marsala was not available at my regular grocery store, however I did find it at whole foods.

 (Original Recipe)

Kchidhi – Easy, Clean, Vegan, and Delicious
Prep time: 5 mins
Cook time: 60 mins
Total time: 1 hour 5 mins
Serves: 4-6 Servings
Ingredients
  • 1 tsp vegetable oil
  • 1 large onion, chopped
  • ¼ tsp turmeric
  • ½ tsp cayenne
  • 1 tbsp coriander
  • 1 tsp garam masala
  • 1 tbsp dried ginger
  • 1 tbsp tomato paste
  • 1 ½ cups brown rice
  • 1 cup moong dal (lentils)
  • 1 cup frozen peas and carrots
  • Salt & pepper to taste
Instructions
  1. Place the moong dal in a bowl with 1 cup of water and let it sit for 15 minutes.
  2. Meanwhile heat oil in a large thick bottomed sauce pan, saute the onion for 5 minutes or so, until it is translucent and begins to carmelize.
  3. Add turmeric, cayenne, coriander, and ginger stirring for an additional minute.
  4. Stir in tomato paste for one minute then add rice moong dal (with liquid) and then 4 cups more water. Stir well and bring liquid to a boil. Reduce to a simmer, cover and cook for 35-40 minutes or until the rice and lentils are soft.
  5. Stir in the frozen vegetables and garam masala. Then remove from heat. There should be some liquid left in the bottom of the pan so that the consistency is similar to a risotto. Serve warm.
3.3.3070

July 18, 2014 May 11, 2015 Filed Under: Recipe, vegetarian Tagged With: Dinner 4 1, Make Ahead, Vegan, Vegetarian

Summery Citrus Tilapia

By Jessica

This post may contain affiliate links. I may receive commissions for purchases made through links in this post.

Summery Citrus Tilapia
The thing about the summer is that it’s hot. Sometimes it’s so hot that the idea of eating food actually makes my stomach flip. How could I possibly be hungry when the rest of my body feels all floppy and in coherent?
But then hungry and floppy almost instantly becomes hangry, like seriously hangry. When you are already uncomfortable little things seem 10 times worse than they actually are.
This was one of those days.
Luckily for me we can’t open our freezer without a landslide of food falling on us. I like to keep stocked up on good sales, and quickly defrosting stuff to help curb out Chinese takeout addiction. Tilapia is one of those things that defrosts pretty quickly, and cooks just as fast, saving time away from the super hot oven.
I basically tossed the fillets into parchment with some herbs, and citrus zest from whatever we happened to have on hand. Did I mention it was hot? I wanted fresh and bright flavor, and very little work. My plan  worked because the tilapia came out moist and bright, and in only 20 minutes. I paired it with some leftover wild rice pilaf, and raw broccoli. Our veggies tend to be raw when I am feeling lazy. I’m told they are better for us that way, which is just an added bonus to the energy I’m saving, and dishes we don’t have to wash.
At least this is what I tell people instead of just “yeah I was lazy”. I’m sure they totally buy it. At least Chuck likes most vegetables raw anyway, sans dip.
He is weird I know.
Summery Citrus Tilapia
This recipe is super easy and perfect for summer, or in winter when you are dreaming of summery beach days.
Summery Citrus Tilapia
Prep time: 10 mins
Cook time: 15 mins
Total time: 25 mins
Serves: 4 servings
Ingredients
  • 3 tilapia fillets (about 1 lb)
  • 1 clove of garlic, minced
  • Zest from one orange
  • Zest from one lemon
  • Zest from one lime
  • 1 tablespoon fresh parsley coarsely chopped
  • Slat & pepper to taste
Instructions
  1. Preheat the oven to 450 degrees.
  2. Place 1 tilapia fillet on a large piece of parchment paper and top with 1/3 of the garlic, zests, parsley, salt & Pepper. Repeat with the remaining fillets. Fold up the sides of the parchment to create a pouch and seal in the fish.
  3. Place in the oven on a baking sheet and cook for 12-15 minutes or until the fish flakes easily with a fork.
  4. Carefully remove from the oven and open the packets slightly. Let cool for 3-5 minutes and serve.
3.3.3077

July 16, 2014 April 29, 2016 Filed Under: Recipe Tagged With: Clean, Seafood

  • « Go to Previous Page
  • Page 1
  • Interim pages omitted …
  • Page 48
  • Page 49
  • Page 50
  • Page 51
  • Page 52
  • Interim pages omitted …
  • Page 84
  • Go to Next Page »

Primary Sidebar

  • Facebook
  • Instagram
  • Pinterest
  • Twitter
  • YouTube
Hi, I'm Jessica. I'm an herbalist living in the great northeast with my husband Chuck, our two little boys, our dog Brody and a flock of chickens. I'm all about real, good food and good times with awesome people. I spend a lot of time outside, in my garden, and concocting potions and helping people feel their best. I also like tea, reading, and about a million other hobbies. I'm so happy your here on this adventure with me.

Footer

Copyright © 2026 · Foodie Pro Theme On Genesis Framework · WordPress · Log in