• Skip to primary navigation
  • Skip to main content
  • Skip to primary sidebar
  • Skip to footer

Sweet Love and Ginger

  • Home
  • About
  • Recipes
  • Garden
  • Work With Me

Vegetarian

D4One: South Western BLT Salad

By Jessica

This post may contain affiliate links. I may receive commissions for purchases made through links in this post.

Where has this series gone
too?

Ramen noodles mostly. I
love that stuff.

This time of year I tend to
make big casseroles, or roasted dinners so we eat leftovers for days, which is
also a reason why I haven’t been cooking for my single self a lot, even though
this is the time of year Chuck is gone the most, why when I have an entire
fridge of food to eat and all I have to do is reheat?

Well I’m going to get back
on that horse and keep this series alive. It’s been around since the beginning,
and is one of my favorites, so it must be done.

For the first Dinner 4 One
of the New Year I thought I would start out with an old favorite. I’m finding
myself compelled to share a lot of the recipes that I had previously thought
were rather boring because I believe that you guys may not find them boring,
and they may open up new doors for you. This whole thing is about sharing after
all.

This trick is a fail proof
healthy and cheap method for making dinner or lunches for your single self. It’s also super easy. 

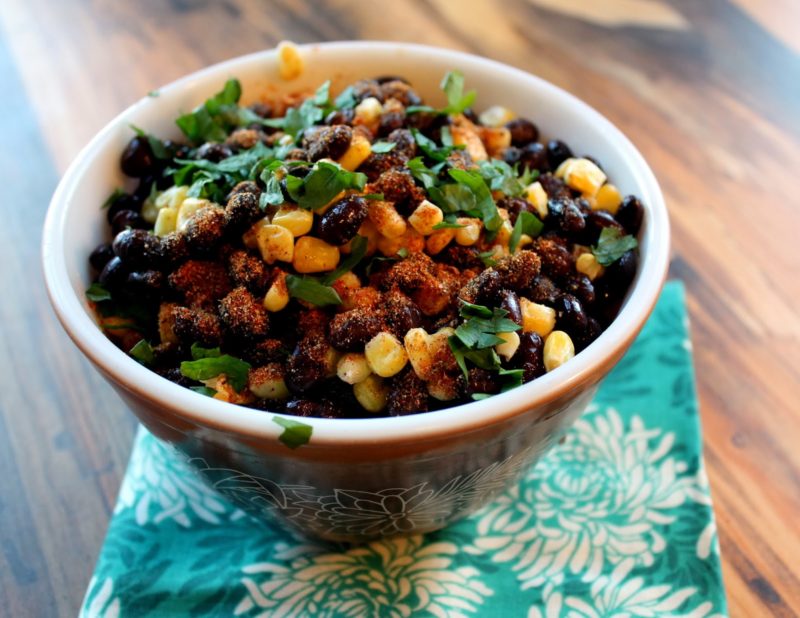
Black Bean & Corn Toss


1 can of black beans,
drained & rinsed

1 cup frozen corn

1 handful of cilantro
chopped

2tsp cumin

1 tsp paprika
1 tsp cayene

1/2 tsp garlic powder

1/4 tsp chili powder

Salt & pepper to taste

1 tsp extra virgin olive
oil


Combine all ingredients in
a large bowl and toss to combine. Serve as you please, warmed in the microwave,
stove or cold. Will keep in an air tight container for up to 1 week.

Once this concoction is
made it can be tossed around on a myriad of different things to extend, liven
or transcend the flavors. It is my favorite addition to plain ol’ boxed mac n
cheese (I will never give that stuff up). It’s great on its own or just plopped
over some rice or quinoa. I also like it tossed with salsa and eaten with
chips. Oh or tossed with salsa and scrambled eggs. Or just over salad.

Are you catching on here?
Spend some times on day 1 and make this thing, then for the next few days you
have a good clean source of protein to create an infinite number of meals. The
recipe here will last me alone, two or three days, but it’s easy enough to
double or triple or even make and freeze, so don’t be shy about it, especially
if you like that southwestern kind of flavor.

If you are looking for the
all-time best recipe
to possibly make with this, well let me help you
out.

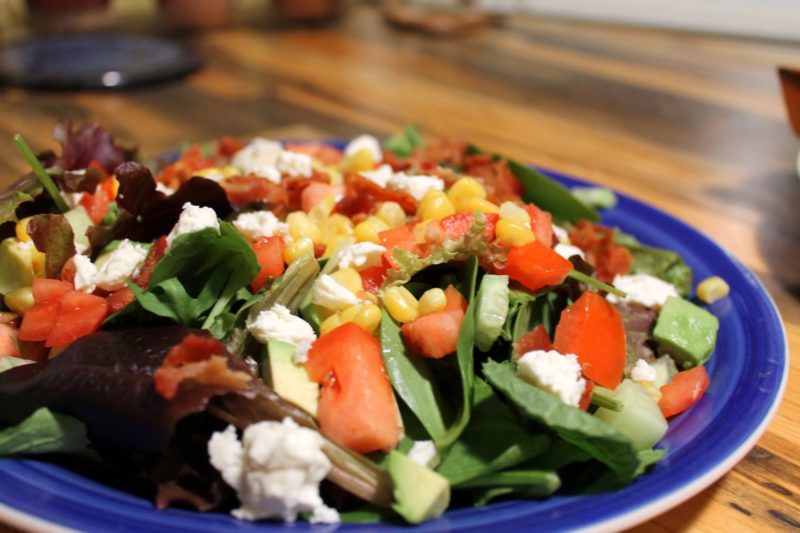
Southwestern BLT Salad


A big pile of mixed greens

1 tomato, chopped

½ an avocado sliced or
chopped

2 oz. goat cheese crumbled

3 strips of bacon, crumbled

½ cup of black bean &
corn toss

Salad dressing of choice (I
like catalina)

Layer the ingredients on a
large plate. Top with dressing and enjoy!


How do you like
to prepare food when your alone, fancy, or boxed mac?

February 19, 2014 December 5, 2017 Filed Under: Recipe Tagged With: Clean, Dinner 4 1, Vegetarian

A Real Dinner Party at Our House

By Jessica

This post may contain affiliate links. I may receive commissions for purchases made through links in this post.

I want to preface this by saying that our lives are far from glamorous. Chuck and I live in a modest apartment on a dead end road, and aside from being fairly small it is also laid
out pretty horribly. It is warm and charming with lots of updated windows, and cute molding, but everything is pretty boxy and cut off, which makes entertaining hard. Don’t worry we manage. The kitchen is eat-in style, though there isn’t much room for the two of us at the table let alone any guests. We make it work, and improvisation is key. And since cooking for my friends is something that I have always loved to do and simply cannot stop doing; regardless of how impossible it may seem.

I try to have everything close to ready if not already done before anyone arrives; along with the kitchen table clear, because that has to serve as the buffet. The small fold-able table that does triple duty as dining table, craft space, and beer die set up is pulled out just before we are ready to eat, otherwise it’s cumbersome presence takes up too much of the living room. Chuck and I usually take the couch as it is a little low for table eating as well as maneuvering in and out of. We handle it. Then out comes the plates and cutlery stacked neatly on the counter, it has to be self serve because that folding table doesn’t fit everything.

It works, and I haven’t had a complaint yet. Of course that could be because all of our friends are also living in modest, horribly laid out apartments, so they get it.


Last weekend Chuck and I entertained our friends Alicia and Wil. She was gracious enough to bring chocolate covered strawberries for desert as well as a good white wine. Here is what the menu Looked like: Salad with Lemon Shallot Vinaigrette, Simply Roasted Chicken with mashed potatoes and Gravy as well as Braised Cabbage & Carrots.
Though it sounds like a lot it was all pretty easy to prepare, basically I popped the chicken in the oven, peeled & while they boiled prepared the cabbage & carrots. When the chicken came out in went the veggies, and I made the gravy and mashed the potatoes; which gave the chicken plenty of time to rest before being carved. The salad was just greens rinsed and spun, and the vinaigrette made the day before. From start to finish it took probably 2 hours to prepare, and there was plenty of time to mix a few
drinks, chat with Chuck and take Brody outside 4 or 5 times (he really likes the snow) in between. The perfect end to the week.


Simple Roasted Chicken
Prep time: 10 mins
Cook time: 1 hour 20 mins
Total time: 1 hour 30 mins
Serves: 6 to 8 servings
Ingredients
  • 1 whole 4 lb chicken
  • 2 tablespoons olive oil
  • ½ tablespoons salt
  • 1 teaspoon pepper
  • 1 teaspoon curry powder
  • 1 teaspoon garlic
Instructions
  1. Preheat oven to 425 degrees.
  2. Remove the chicken from all packaging (including giblets) and pat dry with paper towels.
  3. Rub the outside with oil, spices and place breast side up in a shallow roasting pan. (Optional: tie the legs up with kitchen twine and fold the wing tips under.)
  4. Place chicken in the oven and cook for about an hour and 20 minutes, or until the skin is golden and crisp. When poked with a knife or fork in the thickest part of the thigh the juices should run clear. A thermometer also inserted into this part of the chicken should read 165.
  5. Remove the chicken to a platter and allow it to rest for about 10 to 15 minutes.
  6. Carve the chicken and serve.
3.3.3077


Quick Chicken Gravy

1 cup drippings from roast chicken pan
1/3 cup flour
1 tsp salt
1 tsp pepper
2 springs thyme
Broth as needed

In a small sauce pan heat drippings over medium heat. Whisk
in flour and spices and cook, allowing the mixture to reduce slightly and
thicken. If it is too thick add broth or water by the tablespoon, whisking
until blended each time.


Braised Cabbage & Carrots

3 tbsp butter
5 strips of bacon, cooked & crumbled
1 head of cabbage, shredded
4 large carrots, peeled & chopped
2 tbsp brown sugar
1/3 cup apple cider vinegar
1 tbsp Worcestershire sauce
½ cup vegetable broth or water
Salt & pepper to taste

Preheat oven to 425. In an oven proof skillet melt butter
with bacon, and then add cabbage, and carrots, tossing lightly. Stir in the
remaining ingredients and place in the oven for 30-40 minutes stirring
occasionally until carrots have reached desired doneness. Serve warm.


Lemon Shallot Vinaigrette

2 tsp grated lemon zest
¼ cup fresh lemon juice
1 tbsp Dijon mustard
1 tbsp white wine vinegar
1 large garlic clove, crushed
2/3 cup extra virgin olive oil

Combine all ingredients in a small bowl and whisk until well
combined. May serve immediately, or be kept in the fridge for up to 1 week.


February 14, 2014 December 5, 2017 Filed Under: Entertaining Tagged With: Chicken, Condiment, Entertaining, Menues, Vegetarian

Whole Roasted Brown Trout

By Jessica

This post may contain affiliate links. I may receive commissions for purchases made through links in this post.

I have never whole roasted a fish before, even though I have
eaten a lot of fish. I mean I grew up fishing, and have an obsession with sea
food. I don’t know whether it’s relaxing in the boat with a book that I enjoy
more or the actual fishing, but it’s definitely an activity that Chuck and I enjoy
together. Even in the winter cold, ice fishing is pretty fun too.

Last weekend I let Chuck run off with his cousin Shecky (don’t
ask where these names come from, I promise you that the stories are unoriginal)
for a day of ice fishing sans women. It has to be done once in a while, or the
poor guy ends up with estrogen overload and develops a little tick. That and it
was ranging between one and zero degrees out that day. I took one for the team
and stayed warm home practicing my camera skills.

I was pretty impressed that Chuck not only managed to remain
fairly sober, but was also able to catch an actual fish between beers and
shenanigans. I don’t want you to get the wrong impression and think that Chuck
is a bad fisherman, it is more the fact that when these two hooligans are
together very little of what they set out to accomplish actually gets done, unless
of course their goal is to finish the thirty rack, they can handle that one
pretty well.

Anyway somehow between the two of them they managed to get
this fish, so of course it was up to me to cook it. I have wanted to try
roasting a whole fish for a while. Everyone says it’s easy, they look
beautiful, and I was hoping they tasted as good as they looked. I scanned a few
recipes before I came up with this one, and was pretty impressed with the
result.


Whole Roasted Brown Trout

1 large whole trout, gutted and cleaned

1 tbsp olive oil

Salt & pepper

1 lemon, sliced

1 bunch fresh thyme

Preheat the oven to 425 degrees. Rub the trout with oil, salt
and pepper inside, and out. Then Stuff the stomach cavity with lemon and thyme.
Roast in the oven on the middle rack for 20 to 30 minutes or until the ski is
crisp and meat flakey.

Along with this I chose to serve potatoes. If you have been
following along recently you have probably noticed an upswing in the simplicity
of my meals. This is an extremely simple side dish that is adored in our
household. You can swap out these fingerlings for chopped russets or red
potatoes as well, whatever your preference.


Garlic Roasted Fingerling Potatoes

1-2 tbsp extra virgin olive oil

3-4 cloves of garlic, sliced

1 lb fingerling potatoes, halved

Course sea salt

Preheat the oven to 425 degrees. In a large oven safe
skillet heat oil and garlic over medium high heat for 1 minute. Add potatoes
and toss to coat. Place in the oven for 10 to 15 minutes, or until potatoes can
be pierced with a fork. Remove from heat, sprinkle with salt and serve.

February 5, 2014 December 4, 2017 Filed Under: Recipe, Seafood Tagged With: Vegetarian

The Simplicity of Garlic Soup

By Jessica

This post may contain affiliate links. I may receive commissions for purchases made through links in this post.

I’m really into simple lately.

It’s a new year so reflection, change, and all that. It’s just in the air right now, and I am soaking it in. All month I’ve been sharing a few of my favorite simple recipes, things that are simple, and good for both your body and your soul. This is another one of those recipes.

I stumbled on it while Stalking Mrs. Mimi Thorrison on her blog, Manger. If the images aren’t enough to completely captivate you I assure you that her heart felt stories and homey recipes are.

There is something about garlic that I simply cannot get enough of. I go through heads and heads of it weekly. I would take stock in it if there were such a thing, and I would be paying myself. Chuck and I have been known to roast a head of it just for eating, and I find so much pleasure in browning it in a pan. It is the best prize to find that wonderfully brown slightly crisp little clove hiding in the bottom of a soup or pasta dish for us. When I found this recipe I was in a state of shock. Why had I not made this already? How had I not thought of it or even heard of such a thing? I felt robbed, and proceeded to go home and make it without hesitation.

It was the absolute best decision I have ever made.

Though the ingredients are few the flavors in this dish are huge. There is depth and complexity here where with such a simple preparation you would not expect. With some good crusty bread toasted well to dip with it is pure unadulterated heaven and something that must be recreated as often as possible.

Garlic Soup


2 tbsp olive oil

1 shallot, peeled and chopped

1 head of garlic, peeled and chopped

1 tbsp flour

4-5 cups vegetable stock

Salt & pepper to taste

2 additional cloves of garlic, sliced thin

2 eggs, whites and yolks separated

1 tbsp white wine vinegar


Heat the 1 tbsp oil and shallot over medium high heat sautéing
for 1-2 minutes. Add the head of garlic and cook for an additional 2 minutes.
Stir in flour until well combined. Add stock, salt & pepper to the pan and
bring to a simmer. Cover and cook for 15 to 20 minutes. Meanwhile in a frying
pan heat 1 tbsp olive oil over medium high again, and cook the sliced garlic until
brown and crispy, then set aside. Once the soup has simmered and reduced some
puree and return to the pan over medium heat. In a small bowl whisk the egg
yolks together with the vinegar and set aside. Next carefully whisk the egg
whites into the soup, until thin strands begin to appear on top. Immediately remove
the pan from heat and begin to whisk in yolk vinegar mixture. Serve with garlic
chips on top and toast.

January 27, 2014 September 19, 2017 Filed Under: Recipe Tagged With: appetizer, Soup/Stew, Vegetarian

Appreicating Simple Recipes & Wild Rice Pilaf

By Jessica

This post may contain affiliate links. I may receive commissions for purchases made through links in this post.

I LOVE cooking (obviously right?), so I have a lot of recipes. Even a few that I don’t or haven’t yet shared on here. The reason is simple; it’s a lot of freaking effort. I have to plan, prepare, cook, photograph, edit, write a post, a recipe, double check it all and then it’s ready to post.
Wild Rice Pilaf

Sometimes I just want to write down a recipe and hold onto it for later use or to share with others. There are about a million places to do that, but lately I have been keeping track of them all on MyRecipeMagic.com. So I uploaded this recipe recently that I have made a bunch over the years. I didn’t post it on this blog because it was such a simple recipe that I didn’t think it would generate a lot of traffic, and honestly I wasn’t that excited about it.

I’m not going to put myself through the hoopla I just described if I’m not excited about it. This blog is meant to be a hobby, something fun, and therefore I don’t put pressure on myself for it because then it would defeat the purpose.

Anywho; I uploaded this recipe and within a day it received double the views of any other recipe I had uploaded to the site. Did you catch that? Within. A. Day. What’s more, is something I hadn’t noticed until I was looking at these results was the very next most popular recipe was my Parmesan Pasta Recipe, also a super simple recipe that I make all the time. The reason for this phenomenon I’m not quite sure, but it’s made me think that perhaps this is in fact a recipe worth posting on the blog. Maybe simple recipes are  something to get excited about, I mean we all need then from time to time, we all make them, and I’m sure that those non-cooking people would really appreciate a good explanation of how to make some of these simple dishes.

I won’t wax on about the virtues of the simply prepared dish instead I will leave you with the recipe in question. A perfectly simple side dish that can elevate any meal, and as an added bonus it is completely clean. Enjoy!

Wild Rice Pilaf

1 tablespoon extra virgin olive oil
1 onion ( chopped )   
2 carrots ( medium, peeled and chopped )   
1 cup wild rice, raw
2 1/2 cups water1 teaspoon salt
1/2 cup peas ( fresh or frozen )   
1 teaspoon black pepper
1 tablespoon scallions ( chopped )    
In a large sauce pan Heat oil over medium high heat and sauté onion, and carrot for 5-7 minutes or until the onion becomes translucent. Add rice water and salt to the pan and bring to a boil. Once boiling reduce heat to low, cover and cook for 50 minutes to an hour. The rice should be tender, and water dissipated. You may however need to drain the last little bit. Add peas, pepper and stir to incorporate. Serve with scallions on top.


Wild Rice Pilaf


January 24, 2014 February 23, 2016 Filed Under: Recipe Tagged With: Clean, Side Dish, Vegetarian

  • « Go to Previous Page
  • Page 1
  • Interim pages omitted …
  • Page 13
  • Page 14
  • Page 15
  • Page 16
  • Page 17
  • Interim pages omitted …
  • Page 22
  • Go to Next Page »

Primary Sidebar

  • Facebook
  • Instagram
  • Pinterest
  • Twitter
  • YouTube
Hi, I'm Jessica. I'm an herbalist living in the great northeast with my husband Chuck, our two little boys, our dog Brody and a flock of chickens. I'm all about real, good food and good times with awesome people. I spend a lot of time outside, in my garden, and concocting potions and helping people feel their best. I also like tea, reading, and about a million other hobbies. I'm so happy your here on this adventure with me.

Footer

Copyright © 2026 · Foodie Pro Theme On Genesis Framework · WordPress · Log in