• Skip to primary navigation
  • Skip to main content
  • Skip to primary sidebar
  • Skip to footer

Sweet Love and Ginger

  • Home
  • About
  • Recipes
  • Garden
  • Work With Me

Recipe

Asian Glazed Chicken Legs & Carrot Ginger Dressing

By Jessica

This post may contain affiliate links. I may receive commissions for purchases made through links in this post.

Right now I am basking in the wonder that is the great
Adirondacks in upstate NY, completely void of technology. This post I have had
ready and waiting in the wings for a while, and so it is posting on auto pilot
while I am away enjoying the awesomely long 4th of July weekend. I
hope you  like it!
These quick and easy Asian Glazed Chicken Legs are an
awesome new twist for tossing chicken on the grill, and this zingy Asian style
dressing over a salad is the perfect pairing for a quick and simple summer
meal.
Asian Glazed Chicken Legs

¼ cup honey

1/3 cup low sodium soy sauce

1 tbsp fresh grated ginger root

4 cloves garlic, minced

6 chicken legs

In a large bowl stir together honey, soy sauce, ginger, and
garlic. Place chicken in the bowl and refrigerate for at least an hour (can be
left over night). Once marinated place chicken on a preheated grill over medium
high heat for 20-30 minutes, rotating every 5-10 minutes, until well done.
While the chicken is cooking pour the remaining marinade into a sauce pan and
simmer over low heat for about 10 minutes until it thickens. Use this liquid to
baste the chicken once it’s done. Serve warm.
The dressing may look complicated because you have to cook
down the carrot, but leftover grilled, or roasted carrots work as well, and you
can always make the dressing a few days ahead, and use it as a dip, or on
additional salads throughout the week.
Carrot Ginger Dressing

¼ cup carrots, cooked

1 tbsp minced ginger

1 small garlic clove

1 tbsp minced onion

2 tbsp rice wine vinegar

2 tsp low sodium soy sauce

1 tsp lemon juice

1 tbsp oil

Place all ingredients in the blender and blend until smooth.
Serve chilled.

July 6, 2013 December 1, 2017 Filed Under: Recipe Tagged With: Chicken, Clean, Condiment, Summer, Vegetarian

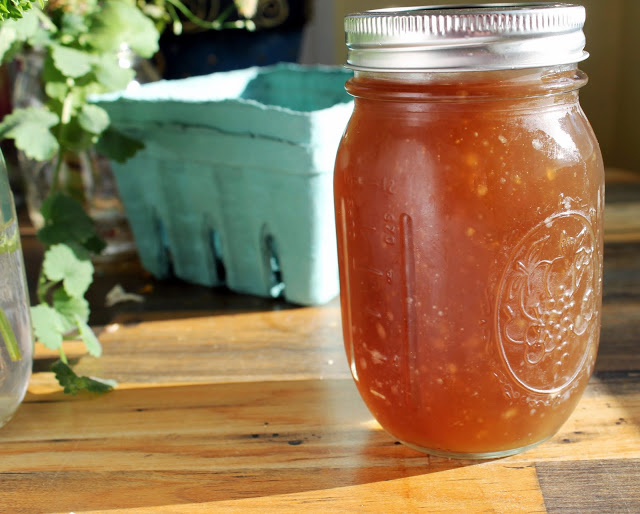
Quick, Easy Clean: Crock Pot Chicken Broth

By Jessica

This post may contain affiliate links. I may receive commissions for purchases made through links in this post.

Homemade chicken broth is the best kind of broth, that’s for
sure. It is so versatile that I use it nearly every day, but with a full time
job, and a social life finding time to spend hours simmering a pot of broth on
the stove is not always possible.

To be honest I feel silly for not having thought of this
before. There have been numerous time when my heart broke to have to throw out
an entire chicken carcass; it’s just a complete waste. But now I have the
perfect solution; the crock pot.

I usually roast my chicken in a crock pot anyway, for the
same reasons I don’t always make broth (my busy life), so why not make the
broth in a crock pot?

On this particular occasion I had roasted an entire chicken
for the sole reason to supply Chuck with lunch meat. When I see whole chicken
for sale for less than a dollar, you can bet that always buy one sometimes 2 or
3. You cannot beat that price for a couple dinners and/or a week’s worth of
lunches.

Roasting a chicken in a crock pot is pretty easy, I just rub
it and stuff it with whatever spices are on my mind at the time with (usually 2
tsp salt, 2 tsp pepper, 2 tsp garlic powder, 1 tsp curry, and stuffed ½ an
onion and a couple cloves of garlic), line the pot with tinfoil, as shown
below, and put it on low for 8 hours. Once it’s done its edible, but I like the
crispy skin and carmelization that you get from roasting, so I use the tin foil
to transfer the chicken over to a roasting pan and pop it in the oven at 425
for 20-30 minutes, until the skin is golden and crispy.

Now since I was just planning on using it for lunches I used
the tin foil to transfer it to a cutting board where I could break it down more
easily. Everything that isn’t going into sandwiches or salads goes back into
the crockpot, along with some other things of course; the recipe is below for
all of that.

Finding time to make old recipes, and homemade food work in
this busy modern life is truly a wonderful blessing that makes my heart happy.

Crock Pot Chicken Broth

1 leftover chicken Carcass (or bones), meat removed

1 onion chopped (leave the peel on)

1 rib of celery

1 carrot, roughly chopped

1 sprig fresh parsley

1 sprig of fresh thyme

1 tsp salt

1 tsp pepper

2 bay leaves

Place all ingredients in the crock pot and cover with water
(leaving at least ½” at the top). Place the crock pot on low for 8-10 hours;
Once cooked pass the stock through a fine sieve to remove the leftover herbs,
bones and pieces. At this point you may simmer on the stovetop for 30 minutes
to an hour to further reduce, or use as is. It can remain refrigerated for
roughly 5 days, or frozen for later use.

Random Side note: DO NOT leave the butter Dish next to the
crock pot while it is doing its thing. I have done this at least 3 times
recently, and it never ends well.

July 3, 2013 December 4, 2017 Filed Under: Recipe Tagged With: Chicken, Clean, Crockpot

Dinner & Lunch for 1: Healthier Twice Baked Potato & Grilled Cheese

By Jessica

This post may contain affiliate links. I may receive commissions for purchases made through links in this post.

So I’m pretty much a genius, just saying.

I found this recipe in Clean Eating Magazine recently and
was very interested in it. I mean who doesn’t love twice backed potatoes, and
cheese, and bacon? I added & changed a few things, but it turned out
wonderfully!

Loaded Spinach & Egg Baked Potatoes

1 large Yukon gold potato

1 tsp oil

½ cup spinach

1 clove of garlic, minced

1 tbsp chopped onion

2 strips of bacon, cooked and crumbled

1 egg

1-2 tbsp shredded cheddar cheese

½ tbsp chives, chopped

Preheat the oven to 350 degrees. With a fork stick a few
holes into the potato at various angles. Place in the microwave and using 45
second intervals cook until it begins to soften, 1-2 minutes. Meanwhile in a
small skillet sauté spinach, garlic, onion, and half of the bacon in oil, until
the spinach becomes wilted, and remove from heat. Once the potatoes are cooked,
cut an oval out of the top and use a spoon to scoop out the insides, leaving
about ¼ to ½ inch around the edge, and discard. Place the spinach mixture
inside the potato and carefully crack an egg into the potato, and top with cheese
and bacon. Place the potato into the oven and back for 15-20 minutes, or until
desired doneness of egg. Once cooked top with chives and serve with sour cream,
or salsa.

Now once I made this delectable little concoction I was at a
huge loss as to what to do with the leftover cooked potato insides. I thought
of mashed potatoes, potato pancakes, and soup, you know all the usual things.

That’s when it hit me.

It was like a ton of bricks.

 Loaded Potato Grilled
Cheese!

I saw a recipe several weeks ago from one of my new favorite
blogs B.S. in the kitchen for Perrogie Grilled Cheese, and well let’s be
honest if Bob & Carlene can do it than there is no reason I can’t do it too. And I did,
for lunch the next day, in between attempting to organize at least one more
room in this house.

Loaded Potato Grilled Cheese

2 slices of bread

1 small pat of butter

¼ cup traditional mashed potatoes

¼ cup cheddar cheese

1 slice of bacon cooked & Crumbled

1 tbsp chopped chives

Spread the mashed potato on one slice of bread. Top with
chives, bacon, and cheese, and the additional piece of bread. Butter both
pieces of bread and place in a preheated skillet over medium heat. Cook until
the outside is toasted and the cheese is melted. Serve warm.

And there you have 1 potato, 1 person and two meals for the single person.

June 25, 2013 October 8, 2023 Filed Under: Recipe Tagged With: Dinner 4 1

On a Chickpea Kick: 3 Recipes

By Jessica

This post may contain affiliate links. I may receive commissions for purchases made through links in this post.

I don’t know what’s gotten into me and Chuck lately, but we
love the Chickpeas. He saw a recipe for toasted Chickpeas in a magazine in the
bathroom at his mothers; apparently he had no other reading options (boys!) and
wanted me to make them, so from his memory and my experimenting I came up with
this recipe.

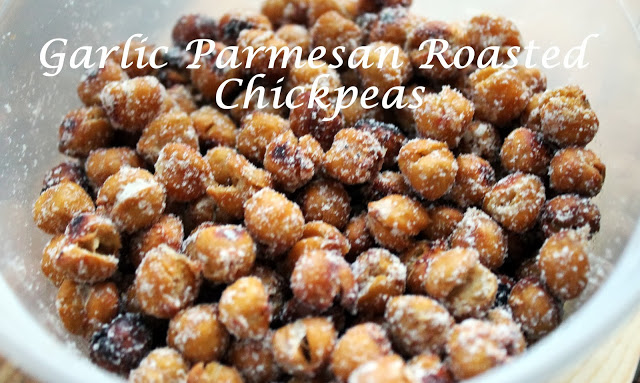
Garlic Parmesan Toasted Chickpeas

2 15 oz cans of chickpeas (Garbonzo Beans), drained & Rinsed

1 tbs extra virgin
Olive Oil

1 tbsp garlic
powder

1 tsp sea salt

¼ cup parmesan Cheese

Spread chick peas out over paper towels and allow them to dry. Preheat the oven to 400 degrees. Transfer chickpeas to a baking sheet and drizzle with oil, Sprinkle garlic powder and salt over the top, and give them a good toss to coat. Bake in the oven for 45 minutes, or until they become golden and crispy. Once semi-cooled toss with parmesan cheese and serve.


Then last week I came across a pretty fancy recipe in Bon Apetite, which I was dying to make when I first saw it months ago, but so not feeling like putting the effort into. As you know I love to improvise, and made it up my own way. This resulted in the recipe below, which is an awesome, single skillet, budget friendly and vegetarian meal. Now I did serve this with a side of meat for Chuck, though I ate just this dish and it was completely satisfying for me.

Rosemary Chickpeas with Ditalini

1 cup ditalini
1 cup pasta water
1 onion, diced
1 carrot diced (optional)
1 can chick peas drained2 tbs tomato paste
2 tsp rosemary
½ tsp cracked red pepper
Large bunch of fresh spinach
Salt & pepper to taste

Cook ditalini according to package instructions, reserving 1 cup of the cooking liquid. Meanwhile in a large skillet saute onion in oil, until it begins to turn translucent. If you are adding carrot add it at this time. Stir in chickpeas, tomato paste, pasta water, rosemary, and cracked red pepper. Cook for 5-6 mintues, stirring often. Remove from heat, add spinach and toss. Adjust seasonings and serve warm. (serves 4-6)

Since I’m talking about Chickpeas I thought it only appropriate to also add my Super Garlicky Hummus Recipe. I make this all the time, because it’s so easy. I have also been known to swap the garlic for roasted red peppers, jalapeños, herbs, sun dried tomatoes and about a million other things. It’s pretty versatile, so you can add nearly anything, oh and did I mention it’s cheap? You can get a whole 16oz can of chickpeas for less than a dollar, and most of the other vegetables and oils that can be used to mix in are things that you probably have in your pantry or can be leftover from another recipe, so at the most you would spend 2-3 dollars total for double or even triple the quantity of the premade stuff that typically costs 4-5 dollars. I simply cannot understand why anyone would buy hummus to eat at home when it is this freaking easy. Really check out the recipe below if you don’t believe me.

Super Garlicky Hummus

1 Can chickpeas, drained and rinsed
3 cloves of garlic, peeled
1 tbs lemon juice
1 tsp salt & pepper, each
3 tbs oil
2 tbs water

Place all ingredients into a blender and blend until smooth.
Add more water if the mixture begins to clump. Serve immediately, or store in the fridge for up to 1 week.


June 17, 2013 December 1, 2017 Filed Under: Recipe Tagged With: Clean, Vegetarian

Rainy Days & Lemon Oregano Chicken Paillards

By Jessica

This post may contain affiliate links. I may receive commissions for purchases made through links in this post.

Man o man this whole rain thing is really putting a damper
on my garden, there’s been so much rain that many things are having a hard time
growing, my little babies need sunshine too! Speaking of little babies, Brody
has been getting into all kinds of trouble this week, I think he could use some
sun time too. Unfortunately Chuck has to work all weekend; his crazy hours are
really starting to bug me. I told him to tell his boss I was going to have words
with him, but I don’t think I’m threatening enough. Maybe he will be able to
take all the money he’s banking and spend on me or something? Just a thought.

Without him around there’s no one to occupy the little Brody
man while I run, and his little joints are strong enough for a long run with
me, so I haven’t gone over a mile in a couple weeks. I just do not feel it’s
fair to put him back in his crate once I’m home from work, even if is only for
a 45 minute run, so if Chuck isn’t around I spend my time doing sprints with
him, or just playing. I need to get my gym together so I can actually use it!
Is it awful that we STILL don’t have the house together yet? I’m still moving
boxes from my parents, it’s pretty ridiculous.

With all this rain, and lack of actually workout time I have
had more time to experiment in the kitchen. I consider this a good thing since I
have finally been able to develop a successful recipe for Lemon Oregano Chicken
paillards. One of you asked for it a very, very long time ago when I posted my
Lemon Oregano Chicken Thighs and Green Beans Recipe. I’m sorry for the pictures,
it was late and I was tired. I promise it tastes better than it looks.

The previous recipe used whole chicken thighs, so I didn’t have
to contend with crisping the skin, or making sure it was cooked through (bone
in are always more difficult that way), however there were a lot less drippings
in the pan to help punch up the flavor. Also the lemons don’t get quite as caramelized
in this recipe, but they are still pretty delicious, that is if you like to
suck all the life out of them like I do. 

Lemon Oregano Chicken Paillards

4 Chicken Paillards

1 tbsp olive oil

Salt and pepper

1 tbs butter

2 small shallots, diced

2 cloves of garlic minced

2 sprigs fresh oregano

½ a lemon, sliced & De-seeded

½ cup low sodium chicken broth

Heat oil over medium high heat and liberally season the
chicken with salt and pepper. Cook the chicken for 2-3 minutes a side, or until
the juices run clear. Remove from the pan and set aside. Add butter to the pan and
sauté shallots, oregano and garlic until it becomes aromatic (1-2 minutes).
Place the lemon slices flat in the bottom of the pan and cook for an additional
minute. Deglaze with the broth and cook for 3-4 minutes while the broth reduces,
scraping the browned bits from the bottom of the pan. Return the chicken to the
pan and toss with sauce. Serve warm, placing a lemon on top of each paillard.

Oh! I didn’t have green beans, but you can blanch them and add them to the pan with the chicken much like the last recipe, and I suggest serving it with the Simple Parmesan Pasta that I posted recently, the parmesan cheese blends so well with this dish. And a final note if you don’t know what in the hell a paillard is, check out this post.

June 14, 2013 December 1, 2017 Filed Under: Recipe Tagged With: Chicken, Spring

  • « Go to Previous Page
  • Page 1
  • Interim pages omitted …
  • Page 66
  • Page 67
  • Page 68
  • Page 69
  • Page 70
  • Interim pages omitted …
  • Page 84
  • Go to Next Page »

Primary Sidebar

  • Facebook
  • Instagram
  • Pinterest
  • Twitter
  • YouTube
Hi, I'm Jessica. I'm an herbalist living in the great northeast with my husband Chuck, our two little boys, our dog Brody and a flock of chickens. I'm all about real, good food and good times with awesome people. I spend a lot of time outside, in my garden, and concocting potions and helping people feel their best. I also like tea, reading, and about a million other hobbies. I'm so happy your here on this adventure with me.

Footer

Copyright © 2025 · Foodie Pro Theme On Genesis Framework · WordPress · Log in