• Skip to primary navigation
  • Skip to main content
  • Skip to primary sidebar
  • Skip to footer

Sweet Love and Ginger

  • Home
  • About
  • Recipes
  • Garden
  • Work With Me

Meal Plan 3.20.16

Meal Plan 3.20.16

By Jessica

This post may contain affiliate links. I may receive commissions for purchases made through links in this post.

This is a meal plan based on the the typical meals that I actually cook on a regular basis. It is not an exact diary of what we eat, but it’s pretty darn close. Enjoy!

Monday – Pantry Lemon Pepper Chicken w/ White Bean & Arugula Salad

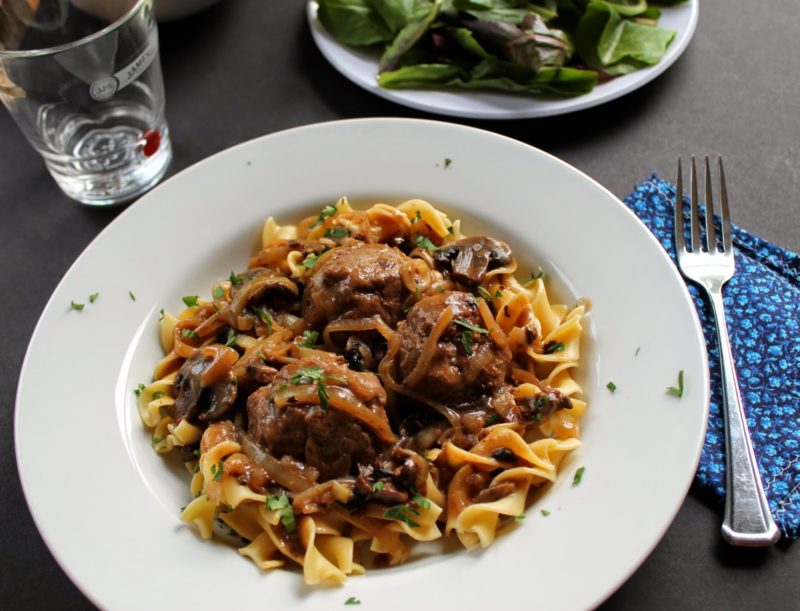
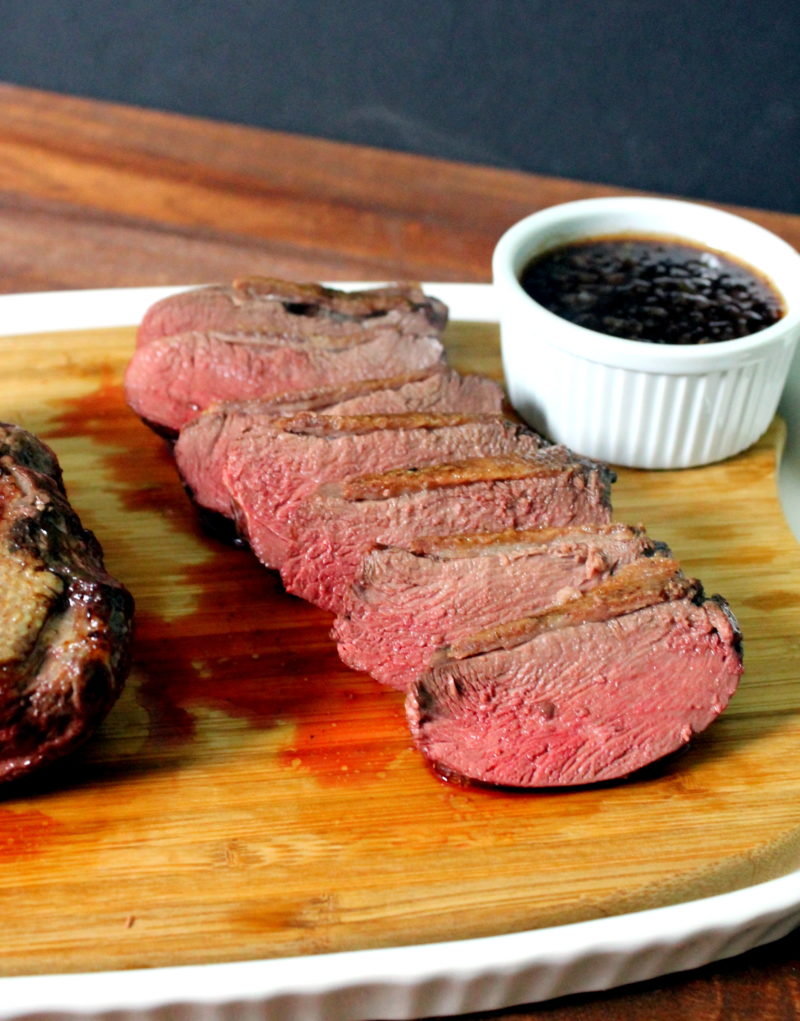
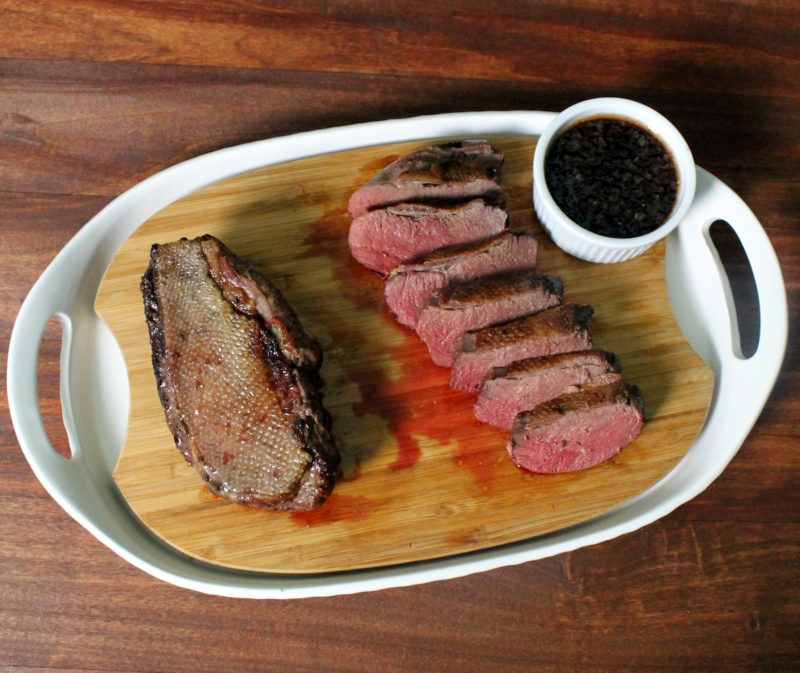
Tuesday – Salisbury Steak Meatballs over Salad greens

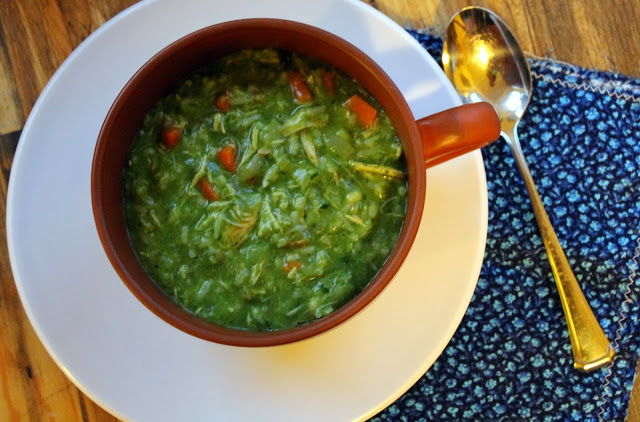
Wednesday – Lean Green Cream of Chicken & Rice Soup

Thursday – Feta raddish & Snap Pea Salad with pork chops

Friday – Icelandic Fish Soup w/ salad

March 20, 2016 January 16, 2018 Filed Under: Meal Plan

Sausage & Tomato Rugout

By Jessica

This post may contain affiliate links. I may receive commissions for purchases made through links in this post.

These last few weeks of beautiful weather has really excited me to get outside and spend some time in my gardens and finishing house projects. I mean it was 70 the other day and it was the beginning of March?! Usually we are still buried under piles of snow here in March so this is really weird. Unfortunately one of the side effects of spend so much time breathing in the fresh spring air is that I’ve kind of put cooking on the back burner for a while. It’s that weird time of year when the spring veggies and herbs haven’t quite made their appearance yet and I’m totally not in the mood for more soup so there have been a lot of tossed together last minute dinners lately. What can I say even I just don’t have it in me sometimes to cook a four course meal every night. I’d much rather be drinking wine by our new fire pit (more on that soon), I mean if we are being honest here.

Sausage & Tomato Rugout

This recipe is one that just keeps popping up in our household, and with good reason, since it’s one of my favorites. I love it because I always have everything for it on hand, it’s super easy to whip up for lunch or dinner and it’s pretty darn healthy too. I also really love that I can swap out ingredients for whatever I have at the time; for example I have used broccoli rabbe, kale, and collard greens instead of spinach. I have also changed the type of beans and even mixed them because I had leftover to use in the fridge.

While this recipe can easily serve four if you are interested in making it go further serving it with a side or pasta or rice is also a great option.

Sausage & Tomato Rugout

Sausage & Tomato Rugout
 
Cook time: 20 mins
Total time: 20 mins
Serves: 4 Servings
Ingredients
  • 1 tablespoon olive oil
  • 1 small onion, chopped
  • 1 lb chicken sausage, sliced
  • 3 cloves of garlic, minced
  • 6 cups of loose packed baby spinach
  • ½ cup low sodium chicken broth
  • 2 (16 ounce) cans cannellini beans, drained and rinsed
  • 1 (14.5 ounce) can diced tomatoes
  • Salt & pepper to taste
Instructions
  1. Heat oil in a large skillet over medium high heat. Saute onion and sausages for 4 to 5 minutes or until the sausages have browned and the onion turned translucent.
  2. Add the garlic and cook for another 1 to 2 minutes.
  3. Stir in the kale, broth, beans, and tomatoes. Bring to a boil and reduce heat to a simmer. Cover and cook for 8 to 10 minutes, stirring occasionally.
  4. Adjust seasonings and serve.
 
3.5.3251


Similar Recipes:

Turkey Sausage & Wild rice salad
Sun Dried Tomato & Sausage Skillet
American Style Goulash

March 16, 2016 November 26, 2019 Filed Under: Main Dish, Pork, Recipe Tagged With: Chicken/Turkey, Clean, Quick & Easy, Weeknight Meals

Garden Plans 2016

By Jessica

This post may contain affiliate links. I may receive commissions for purchases made through links in this post.

Last year I had big plans for the garden and while I got a lot done I have come to realize that building the garden of my dreams is going to be a slow and steady process with lots of little baby steps.

Lately the unseasonably warm weather has sparked my interest in gardening a bit early this year. Over the weekend I started making moves for this year’s garden, ordering blueberry bushes, and planting some early cold-weather crops. We finally pruned the apple trees (better late than never), removed a number of half dead ever green plants from the front garden and finished filling the rest of the garden beds. I was even able to talk chuck into building me another set of garden boxes for the 12 tomato plants I’m going to plant this year.

Picture2

Above is the tentative vegetable garden plan (yes its in excel, I’m a nerd). It’s not set in stone yet because I’m never sure what’s going to grow well or not but I like to have an outline ready before I plant. No one wants to end up with a million beets and nothing else.

I also have yet to figure out my herb garden plans since our deck/patio design keeps changing as we actually live in the house. I’m guessing it will still have to be a raised bed of some sort because our soil is all sand and really lacking nutrients. This year will most likely just be a potted herd garden like I have had in the past. Once the deck is built I’ll have a better idea of what I can work with.

Potted Herb Garden

Potted Herbs 2014

Last year’s herb garden included chives, thyme, oregano, mint, rosemary, basil and parsley. This year I’d like to add lemon balm, sage, lavender, Echinacea, German chamomile, Cuban oregano, comfrey, nettle, yarrow, cilantro, tarragon, garlic chives and possibly a few others. I know that this list sounds pretty large, but many of these are perennials that I can take pieces of while my friends or family are thinning their own gardens. The only real difficulty here is then finding a place for them all, once they are planted many will just come back each year with little effort on my part. Similarly with the wild leeks, Jerusalem artichoke, horseradish, and raspberries that we will hopefully get from some family.

Some of the herbs will be planted in the flower garden, since they are flowing herbs, and the front flower gardens are in need of some help. I was able to plant some tulips and daffodils last year that have started to come up, but I will defiantly need to plant a few more perennial flowers to really fill them in. I’m going to look for some roses, and clematis first off. I also have some wild flower seed mix leftover from a never completed wedding project that I’m planning on sprinkling in some parts of the yard for color and to help the bees.

Obviously I’m super excited already about my garden so please tell me about your garden plans. I would really really love to hear more about gardens!

March 14, 2016 March 14, 2016 Filed Under: Garden

Environmentally Friendly Feminine Hygiene

By Jessica

This post may contain affiliate links. I may receive commissions for purchases made through links in this post.

Ok fellas those of you who frequent this blog may opt to bow out of this post, it might get a little dicey for you.

GladRags Moon Cup, Size B

Today I want to talk about something that even I’m a little squeamish about discussing in a public forum, but for the good of the environment I’m going to suck it up. Are you ready? Periods. Yep I said today I want to talk about periods, a woman’s best friend.

Each month for a number of years like so many other women I pretty much without thought toiled with single use pads or tampons, thinking this was really the only option available to me to deal with the monthly scourge. I never liked the set up, being someone who likes to avoid chemicals and excessive packaging, regularly using a large wad of chemically dowsed cotton, wrapped in multiple layers of packaging was not my favorite. When I started to hear rumblings of this thing that could eradicate all that and save me money I was pretty interested, so I went and bought a Moon Cup.

Environmentally Friendly Feminine Hygiene

This simple little thing made of medical grade silicone that could be reused for years and only costs $20 bucks seemed way to good to be true, but how could I not try it? I was pleasantly surprised how easy the process was, and how much cleaner (on more levels than one) when compared to conventional tampons and pads. Not to mention the avoidance of a number of side effects listed on the side of the box that are often over looked. This little tiny cup feels like a godsend and I think everyone should start using one immediately.

How it works: The small cup is inserted into the vagina and collects all of the ejected menses “stuff”. Once full the cup is removed, tipped out, cleaned and reinserted until it is full again. The process repeats until the period is over.  Yes ladies and gentlemen (if there are any still here) it’s that easy. Though that may be an over simplification, since getting the little cup up there for the first time can be a little awkward. The instructions on the package help and it does get so much easier. I promise.

The first time around can be a little weird. I swear I could feel it, and I was terrified of everything just tipping out everywhere. Rest assured, that never happened.

To add to the awkwardness cleaning out the cup means you actually see what your body is emitting on a regular basis. Maybe that’s not as freaky as I think it is, but for me it was totally weird. After a few months though the weirdness subsided and I learned how to gauge when the cup needed to be cleaned. Some time it’s only once a day, others it’s like 4, which totally depends on the day, and probably the person. I was also super nervous about needing to clean it out in public bathrooms, but it holds so much that I don’t need to worry about it for a fairly large stretch of time, and if it’s an emergency a bit of toilet paper will do. While I haven’t used it for camping yet I stumbled across this article from REI, which makes me think that this is totally doable.

So now I’m going to get on my soap box here and tell you why you should try a menstrual cup.

  1. Money – At $20 bucks it pays for itself within a few months, but lasts way longer than that.
  2. Saves the environment – Aside from the vastly reduced packaging in your life by skipping tampons and pads using a menstrual cup reduces pollution that created in manufacturing and distributing large quantities of them as well.
  3. Health – There are no added scents or chemicals being inserted into your body, nuff said.
  4. Cleanliness – yes the idea of having to clean out your menstrual cup may seem off putting, but when you really think about it having a garbage can full of cotton pads of the stuff is way more gross.
  5. Ease of Use – Carrying around the cup in its fabric case is just as easy as carrying around a tampon, but way less obvious, plus you never have to worry about it getting crushed or wet when your water bottle leaks. You can always be prepared and never have to think about it again.

And because I love a good rap video.

Phew, ok I’ll down off the box now. I love this thing, but I am super interested in your opinions. Have you used it? Did you try it? Would you try it? Anything else?


March 11, 2016 March 9, 2016 Filed Under: In My Head

Pan Seared Goose Breast with Cumberland Sauce

By Jessica

This post may contain affiliate links. I may receive commissions for purchases made through links in this post.

Pan Seared Goose Breast with Cumberland Sauce

If you follow me on instagram you might have seen the awesome new cook book that I got for Christmas, Duck, Duck, Goose, by Hank Shaw. I was super excited to get this book especially because Chuck scored his first goose on Christmas Eve. What are the odds right?

It took us probably way longer than it should have to pluck and gut the goose, but that’s what happens when you have 2 clueless newbs figuring it out as they go. Afterward our back yard was completely covered in feathers. I should have taken pictures of the whole thing, but alas I am not good at remembering the camera at times like this.

Anywhoodles we let the bird rest in the fridge for the holiday and I spent some time reading in my new book and online about how to cook the thing, finding that the breasts unanimously get overdone and dry if roasted whole, so I decided to cut them out and cook them separately. I chose to serve it with Cumberland sauce because the stuff is awesome, obviously.

Pan Seared Goose Breast with Cumberland Sauce

I was pleasantly surprised to see that one breast was plenty to feed both Chuck and I, leaving the whole other breast for a second meal. These Canada Geese are big guys. I was also pleasantly surprised by the quality of the meat, while the goose itself is pretty fatty the breasts themselves are rather lean (excluding the skin), and tastes remarkably like other red game meats. I was really happy with this dish, and cannot wait for Chuck to get more next year!

Pan Seared Goose Breast with Cumberland Sauce
Prep time: 10 mins
Cook time: 30 mins
Total time: 40 mins
Serves: 4 to 6 servings
Ingredients
  • 2 goose breasts, with skin, fat trimmed
  • Salt and pepper to taste
  • 1 shallot, minced
  • ½ cup Port wine
  • ¾ cup broth (chicken, or vegetable)
  • ½ teaspoon dry mustard
  • ¼ teaspoon cayenne
  • Zest from one lemon
  • Zest of 1 orange
  • ¼ cup currant jelly
  • Salt and pepper to taste
Instructions
  1. Bring the breasts up to room temperature. Pat the breasts dry with a paper towel then salt and pepper both sides. Place the breasts skin side down in a room temperature large steel, or cast iron skillet and place it on the stove. Turn the heat up to medium high until the pan begins to sizzle. Turn the heat down to medium low and cook for roughly 10 to 12 minutes. The skin should be crisp and easily pull away from the pan, if it does not easily pull away continue to allow it to cook.
  2. Flip the breasts over and immediately salt the skin side. Allow them to cook on this side for 5 to 7 minutes for a medium rare duck or 8 to 9 minutes for a well done duck breast.
  3. Remove the duck from heat when it’s reached desired doneness. Place it on a cutting board, skin side up and let it stand for 8 to 10 minutes.
  4. While the goose rests prepare the sauce. Drain the pan of excess fat, leaving about 1 tablespoon in the pan. Return the pan to medium high heat and add the shallot, sautéing for 1 to 2 minutes, until it softens.
  5. Stir in the Port wine, scraping brown bits from the bottom of the pan. Allow it to simmer until it has reduced to half.
  6. Add the broth, orange and lemon zest, mustard, and cayenne and stir until well blended. Cook for one minute before adding the currant jelly. Allow it to boil until the jelly has been incorporated and the sauce thickens. Adjust the seasonings and remove from heat.
  7. Serve the goose breast sliced with sauce on the side.
3.3.3077


March 9, 2016 October 17, 2019 Filed Under: Main Dish, Recipe, Wild Game Tagged With: Wild Game

  • « Go to Previous Page
  • Page 1
  • Interim pages omitted …
  • Page 60
  • Page 61
  • Page 62
  • Page 63
  • Page 64
  • Interim pages omitted …
  • Page 157
  • Go to Next Page »

Primary Sidebar

  • Facebook
  • Instagram
  • Pinterest
  • Twitter
  • YouTube
Hi, I'm Jessica. I'm an herbalist living in the great northeast with my husband Chuck, our two little boys, our dog Brody and a flock of chickens. I'm all about real, good food and good times with awesome people. I spend a lot of time outside, in my garden, and concocting potions and helping people feel their best. I also like tea, reading, and about a million other hobbies. I'm so happy your here on this adventure with me.

Footer

Copyright © 2025 · Foodie Pro Theme On Genesis Framework · WordPress · Log in