• Skip to primary navigation
  • Skip to main content
  • Skip to primary sidebar
  • Skip to footer

Sweet Love and Ginger

  • Home
  • About
  • Recipes
  • Garden
  • Work With Me

Recipe

Blue Apron Review & Thai Chicken Burgers

By Jessica

This post may contain affiliate links. I may receive commissions for purchases made through links in this post.

This is a review of Blue Apron & their Thai Chicken Burger Recipe. I was not compensated by Blue Apron for this review.

Thai Chicken Burgers

Recently a couple friends of ours, we shall call them the Birdtails (long story unimportant story) offered Chuck and I the opportunity to try out Blue Apron. Apparently after you receive a few deliveries you can then let someone else try it out for free, which is a pretty cool way for them to build business if I do say so myself. I wasn’t planning on reviewing it, but I really want to share this amazing burger recipe so I figured it was only fair.

I like to cook so this was never really something that interested me however with the wedding coming and all the crafts that I had going on I thought that it would a good time to try it out. For that purpose it worked out great. I didn’t have to meal plan or grocery shop and everything comes premeasured, with instructions so food life was pretty easy. Most of the recipes were pretty good, especially these burgers, which we will get to soon. However I did have a few qualms; while all the packaging is recyclable it’s still a lot of packaging, and my environmentalist heart just can’t stomach that. The other thing was the delivery times, wed, thurs, fri, or sat for my area just doesn’t work the end of the week is always tough for us, because we travel or go to my parents for dinner, so I’d prefer a Monday or Tuesday delivery. I also think that the recipes available might be a little too much for a picky eater, there aren’t any plain Jane recipes here folks, this is geared toward foodies. As you can probably tell my gripes are few for the huge benefit that comes from the service, and the awesome food that results.

So now that the review is out of the way let’s talk burgers.

Thai Chicken Burgers

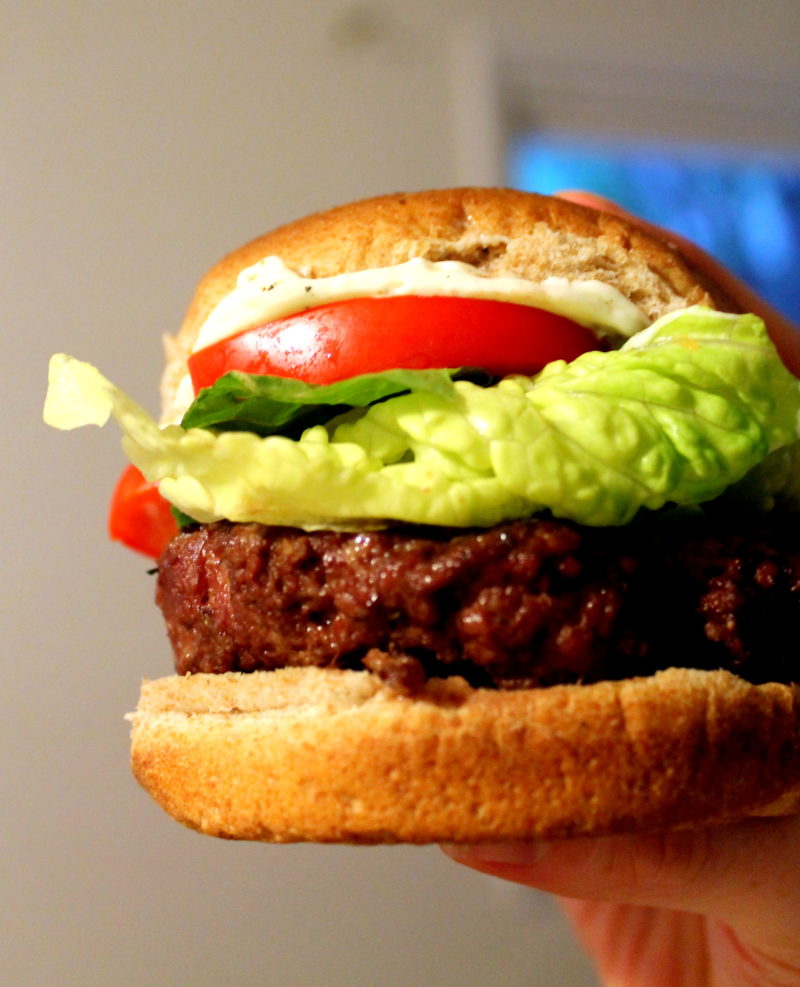
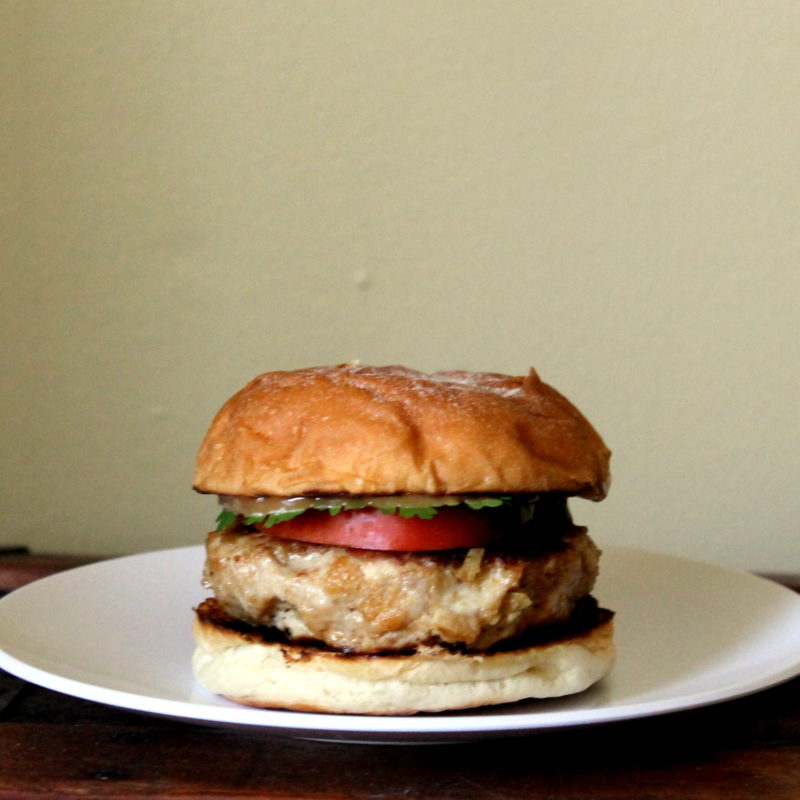
I absolutely loved these burgers, like can’t stop thinking about them, must make them again soon, they might be my favorite burger ever, kind of love. I was not expecting this. In fact I was expecting to hate these. You see lemon grass and I don’t generally get along. I’ve had it in tea, and occasionally in food, and every time after a few tastes, my stomach does a back flip and it takes everything I have not to throw it up (sorry; truth). My feelings for cilantro aren’t far off, while cilantro doesn’t make my stomach flip, I can only handle a small amount before it takes over my taste buds and the rest of the dish is ruined. In this case though I was piling it on! It was all just so good together. So amazingly wonderfully good!

Now the hoisin mayo is the stuff that dreams are made of in burger world. A two ingredient simple sauce that really brings the whole burger together. Its hard to say what my favorite part of this burger was, everything went so perfectly together and the overall flavor was spot on.

Thai Chicken Burgers

Now I do have to note I changed up the recipe a bit because of my apprehension, so this is my version of the Blue Apron Recipe.

Blue Apron Thai Chicken Burgers
Prep time: 10 mins
Cook time: 15 mins
Total time: 25 mins
Serves: 4 Servings
Ingredients
  • 1 inch piece of ginger grated (about 2 tablespoons grated ginger)
  • 1 stalk of lemongrass grated (about 2 tablespoons grated lemongrass)
  • 3 cloves of garlic, minced
  • 2 tablespoons of oil – seperated
  • 1 ½ lb ground chicken
  • 1 ½ cup panko bread crumbs
  • 2-4 teaspoons sriracha (add to taste)
  • 4 teaspoons sesame oil
  • 2 tablespoons low sodium soy sauce
  • ¼ cup mayo
  • 2 tablespoons Hoisin sauce
  • Bunch cilantro, stems removed
  • 1 tomato, sliced thin
  • 4 buns
Instructions
  1. In a large pan heat 2 teaspoons of oil over medium high heat. Add the ginger, lemongrass, and garlic. Cook for 30 seconds to 1 minute or until the mixture becomes aromatic. Remove from heat and place in a large bowl to cool.
  2. Lightly wipe out the pan. And make the Hoisin mayo by whisking together the hoisin sauce and mayo until well combined. Set aside.
  3. When the lemongrass, garlic, ginger mixture has cooled add the ground chicken, breadcrumbs, sriracha, sesame oil, and soy sauce. Using your hands mix the ingredients until well combined and then begin to form the mixture into patties about ½ inch thick.
  4. In the same pan used earlier heat 1 tablespoon of oil over medium high heat. Add the burgers to the pan and cook for 3 ot 5 minutes per side, until browned and remove from heat.
  5. Toast the buns if desired in the same pan before assembling burgers with burger, slice of tomato, cilantro, and hoisin mayo.
  6. Serve immediately.
3.3.3077

More Burger recipes:

Mediterranean Chickpea Burgers

Mediterranean Chickpea Burgers

Thai Ground Chicken Salad

Thai Ground Chicken Salad

Chicken Caesar Buger

Chicken Caesar Buger

September 30, 2015 October 23, 2018 Filed Under: Chicken/Turkey, Main Dish, Recipe, Sandwich Tagged With: Chicken, Chicken/Turkey, Clean, Sandwich

Chuck’s Venison Chili

By Jessica

This post may contain affiliate links. I may receive commissions for purchases made through links in this post.

Chuck's Venison Chili

September ushers in a whole new season of food in our house; a season that I always get excited about. Warm beverages, comfy layers, fall colors, are always awesome, but for me, in fall it’s the food; squash, soups, tomato sauces, roasts, stews, corn and peppers abound. I get excited thinking about the smell of simmering sauces and the anticipation of a slow cooked meal coming to fruition without passing out from heat stroke like one does in the summer months.

Even Chuck gets excited about some of his favorite dishes this time of year, Squash Soup with Smoked Cheddar, Lamb & Leek Shepard’s Pie, Chicken Pot Pie, and Spaghetti and Meatballs. Now, there is one dish that I don’t even attempt to make any more this time of year, because Chuck and his father have perfected it, and that is chili. There’s no need for me to get involved with this time-honored tradition of father-son culinary expertise. They have it down.

Chucks Venison Chili

Chili is one of those often contested American dishes, If this were Texas they would denounce this recipe for its beans, but in the Northeast, this is how we do it, and how we like it; filling and hearty with meat, beans, and lots of thick flavorful sauce. We top it with sour cream, cheddar cheese, chives, olives, parsley or whatever else our hearts desire, but usually with a side of cornbread. I’ve also been known to eat leftovers cold and straight from the pan with crackers, because hey why not?

Now Chuck will make it with any number of meat types, but the favorite in our house uses venison. If you prefer it does work with just about any other type of ground meat, however. If you are looking for more info on how we prepare our venison grinds, check out this post.

Chucks Venison Chili

Chuck’s Venison Chili

  • 1 tablespoon olive oil
  • 1 lb ground venison
  • ½ a medium onion (chopped)
  • 1 clove garlic minced
  • 1 jalapeño pepper (diced)
  • 2 tablespoons chili powder
  • 1 teaspoon ground cumin
  • 1 teaspoon dried oregano
  • 1 15 ounce can red kidney beans, drained & rinsed
  • 1 15 ounce can black or pinto beans
  • 1/2 cup corn (fresh or frozen)
  • 1 14.5 ounce can diced tomatoes
  • 1 14.5 ounce can tomato sauce
  • Salt & pepper to taste
  1. Heat oil over medium high heat in a large thick bottomed sauce pan or Dutch oven. Add venison, and onion, and cook until the venison is browned, breaking it up into crumbles.
  2. Add garlic, jalapeno, and spices stirring well to combine. Cook for an additional minute.
  3. Stir in the beans, corn, and tomatoes until well blended.
  4. Bring to a boil and reduce to a simmer. Cover and cook for 8 to 10 minutes.
  5. Remove from heat and serve.

Get this recipe and more in my Venison eCookbook

Similar Recipes:

Venison with Morel Sauce

Venison with Morel Sauce

Sauted Ramps

Sauteed Ramps

Venison Burgers

Venison Burgers

September 16, 2015 November 1, 2022 Filed Under: Main Dish, Recipe, Soup/Stew, Venison, Wild Game Tagged With: Soup/Stew, Venison

Spinach & Chicken Manicotti Freezer Meal

By Jessica

This post may contain affiliate links. I may receive commissions for purchases made through links in this post.

Chicken, Spinach and ricotta are stuffed into aldente Manicotti shells, covered in fresh tomato sauce and cheese to make a healthy and decadent meal.

Chicken & Spinach Manicotti


Right now I’m really thankful that I have this meal in my back pocket, both for the blog and for my hungry stomach.

You see I was rolling through my photos hoping that I had an un published recipe somewhere in the midst to share with you guys and realized that I hadn’t been shopping in a couple weeks and we have nothing planned for dinner. Man is my brain frazzled. Luckily my over achieving self prepared a couple of meals ahead of time for just such moments. One of those meals I happened to stumble upon in my photos that has yet to make an appearance here on the blog.

Chicken & Spinach Manicotti

I actually got the original recipe from Mavis, whose blog I’m a little obsessed with. Chuck approved and well now it’s a staple in my “I don’t want to cook” arsenal, because it being in the freezer means it only needs to be heated and served. Did I mention it’s healthy? And Chuck likes it? Yes it is a winner.

I want to mention while manicotti is perfectly fine, and in fact that is what is shown in these pictures it also goes well for stuffed shells or even a lasagna adaptation if you want to give them a shot.

My version uses ricotta and my homemade tomato sauce, because that’s how we like it around here, but the cottage cheese used in the original version with your favorite premade sauce, I’m sure is delicious too. I also used frozen spinach, because I always have a ton of it and it takes one more step out of the whole process making it that much easier.

Chicken & Spinach Manicotti

Spinach & Chicken Manicotti
Prep time: 20 mins
Cook time: 40 mins
Total time: 1 hour
Serves: 4 Servings
Ingredients
  • 1 lb chicken, cooked & shredded
  • 1 package frozen spinach, thawed and liquid removed
  • 16 ounces ricotta cheese
  • 1 teaspoon garlic powder
  • ½ teaspoon onion powder
  • ½ teaspoon black pepper
  • 3 to 4 cups of tomato sauce
  • 9 manicotti shells prepared according to package instructions
  • 1 ½ cups fresh grates mozzarella cheese
Instructions
  1. In a large bowl combine the chicken, spinach, ricotta, and spices.
  2. Like a 9×13 baking pan with about 1/3 of the spaghetti sauce.
  3. Using your hands gently stuff the manicotti shells until they are full and place them in the baking pan.
  4. Cover the shells with the rest of the sauce (more or less depending on preference) and top with mozzarella cheese.
  5. To cook immediately: Bake, uncovered at 350 degrees for 40 minutes, or until the cheese is melted and bubbly.
  6. To Freeze & Cook: Cover the pan with foil and freeze while flat. Cook covered at 350 degrees for 30 minutes, then uncover and continue to cook for another 30 to 40 minutes or until heated through.
3.3.3077


September 9, 2015 December 5, 2017 Filed Under: Recipe

Venison Burgers

By Jessica

This post may contain affiliate links. I may receive commissions for purchases made through links in this post.

A simple recipe for basic venison burgers as well as a discussion on perfecting a homemade burger.

Venison Burgers

The all American burger is something I’m fairly certain everyone is familiar with, even if you’ve never set foot in the U.S. By now McDonalds has infiltrated nearly the entire globe so people are at the very least familiar with the concept.

While I’ve had my share of take out burgers I honestly believe that nothing can compare to a homemade burger if it’s done right. Now there innumerable camps that have staked their claim to the best way to prepare burgers, contesting meat to fat ratios, spice content, meat type and all that jazz. For me honestly I think simplicity works best.

I think a solid 80 to 20 meat to fat ratio is ideal. Fat is what makes the burger juicy and tender. However, when grinding large portions of venison meat at once (usually the case for us) Chuck and I opt for a 90/10 ratio since it works best for other recipes. Sometimes I add more fat when I want to cook burgers sometimes I don’t. They are really good either way. If you are using a lower fat ratio then I suggest mixing in a little liquid to the meat before cooking to help them stay juicy. We typically add in a couple cups of water during the grinding process before vacuum sealing and storage for this reason. For venison burgers I like to use pork fat, usually in the form of bacon, because it’s the most easily accessible.

I’m also a firm believer in handling the meat as little as possible. Working it too much can make the burgers dense and crumbly, no one wants that. To combat this I just combine my spices separately and gently work them into the meat before forming the burgers, only handling the meat for a few minutes to do all of this.

I am a member of the flip once camp. I know that the number of times you flip doesn’t actually make a difference in anything but the outside crust. I like a little crust on the outside of my burger, and since I like mine mostly rare it’s not hard to just flip once and get a perfect burger.

If your meat is already ground up (fat included) then go ahead and heat that grill up. If you are starting from scratch this post from Hank Shaw gives a great overview on grinding meat. If you are looking to use a different type of fat in your meat this post talks about some of my favorites.

Venison Burgers

Venison Burgers
Prep time: 5 mins
Cook time: 10 mins
Total time: 15 mins
Serves: 4 servings
Ingredients
  • 1 1/2 lbs ground venison (fat included)
  • Salt & pepper
  • Burger buns & toppings for serving
Instructions
  1. Preheat the grill.
  2. Using your hands form 4 roughly equal patties.
  3. Season liberally on both sides with salt and pepper.
  4. Grill the burgers to your desired doneness (5-6 minutes on the first side and 1-2 minutes on the second for side for medium-rare).
  5. Remove the burgers from the grill and let stand for 4 minutes before serving on buns with desired garnish.
3.5.3228

Similar Recipes:

Venison Breakfast Sausage

Venison Breakfast Sausage

Perfect Venison Loin

Perfect Venison Loin

Whole Roasted Brown Trout

Whole Roasted Brown Trout

September 4, 2015 October 17, 2019 Filed Under: Main Dish, Recipe, Sandwich, Venison, Wild Game Tagged With: Venison

Summer Garden Vegetable Tomato Sauce

By Jessica

This post may contain affiliate links. I may receive commissions for purchases made through links in this post.

This is a recipe for Summer Garden Vegetable Tomato Sauce that I canned for later use using a pressure canner.

IMG_8064

The tomato bounty is winding down now. I’m so happy that despite my negligence my tomato plants produced enough for me to make a small batch of veggie tomato sauce. Something that’s kind of new in this house. In years past meat sauce has always been the thing, but I’m doing my best to change that, little by little.

I had a ton of vegetables sitting on my counter and in my fridge and they needed to get used up so I pretty much dumped them all in this sauce. I did find that the tomato flavor was dulled by all the vegetables, but it still tasted delicious so it’s a recipe I decided should be recorded.

Here is my Basic Tomato Sauce Recipe if you are interested.

Since adding vegetables to tomato sauce reduces the acidity a pressure canner is required to can it. I’m so happy to finally have one! I cannot wait until the temperatures go down a bit so I can comfortably make broth and can that. I sound like a total dork, but I really cannot wait!

If you are interested in canning your tomato sauce I used this method.

Summer Garden Vegetable Tomato Sauce
Prep time: 15 mins
Cook time: 2 hours
Total time: 2 hours 15 mins
Serves: 10 Servings
Ingredients
  • ½ cup olive oil
  • 1 small onion, chopped fine
  • 6 cloves of garlic, minced
  • 1 medium carrot, shredded fine
  • 1 cup eggplant, chopped fine
  • 1 cup zucchini, chopped fine
  • ½ cup green bell pepper, chopped fine
  • 10 cups tomatoes, seeded & chopped
  • 2 tsp black pepper
  • ½ tablespoon fresh chopped parsley
  • 1 ½ tablespoons fresh thyme
  • 1 tablespoon fresh basil, chopped
  • 1 tablespoon fresh oregano, chopped
  • Salt to taste
Instructions
  1. In a large thick bottomed sauce pan heat the oil over medium high heat. Add the onion, garlic, and carrots, cooking for one minute or until it becomes fragrant.
  2. Stir in the eggplant, zucchini, and green pepper and cook for another 2 to 3 minutes until the vegetables begin to soften.
  3. Add the tomatoes & spices and bring the mixture to a boil, stirring occasionally. Once boiling reduces the heat to low and allow it to simmer for 2 to 3 hours, with occasional stirring. Longer cooking times will result in a smoother – less chunky sauce.
  4. Adjust seasoning & serve.
  5. Note: To reduce cooking time use pureed tomatoes or puree the mixture after 30 minutes of simmering and serve.
3.3.3077


September 2, 2015 October 23, 2018 Filed Under: Odds & Ends, Pasta, Recipe, vegetarian

  • « Go to Previous Page
  • Page 1
  • Interim pages omitted …
  • Page 33
  • Page 34
  • Page 35
  • Page 36
  • Page 37
  • Interim pages omitted …
  • Page 84
  • Go to Next Page »

Primary Sidebar

  • Facebook
  • Instagram
  • Pinterest
  • Twitter
  • YouTube
Hi, I'm Jessica. I'm an herbalist living in the great northeast with my husband Chuck, our two little boys, our dog Brody and a flock of chickens. I'm all about real, good food and good times with awesome people. I spend a lot of time outside, in my garden, and concocting potions and helping people feel their best. I also like tea, reading, and about a million other hobbies. I'm so happy your here on this adventure with me.

Footer

Copyright © 2026 · Foodie Pro Theme On Genesis Framework · WordPress · Log in