• Skip to primary navigation
  • Skip to main content
  • Skip to primary sidebar
  • Skip to footer

Sweet Love and Ginger

  • Home
  • About
  • Recipes
  • Garden
  • Work With Me

Recipe

Simple Burst Sun Gold Sauce

By Jessica

This post may contain affiliate links. I may receive commissions for purchases made through links in this post.

So. Many. Sun Golds.

Aren’t they beautiful? They are so sweet and delicious. I’m
thinking of all kinds of ways to use them in all kinds of recipes. This one so
far is one of my favorites.
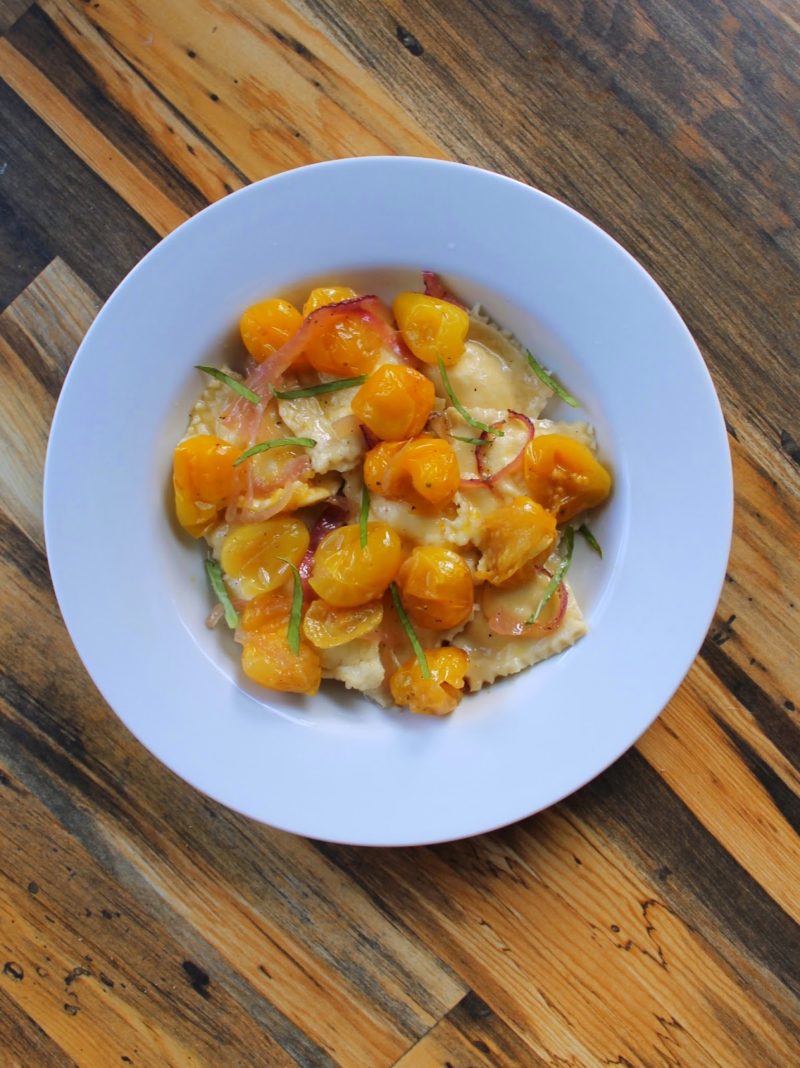
This is probably the simplest sauce I have ever made. I don’t
even know if you can call it a sauce, since it’s pretty chunky, but it lent
itself well to pasta so I guess it’s a sauce. I just had so many sun golds that
were supremely ripe and ready to be devoured so I decided to roast them, easily
with some flavor boosters and because I like them in their oozy burst state I
decided not to blend them. Again so easy.  

I’m sure this recipe would work with nearly any type of
tomato, but I like the bright color and super sweet taste in these babies.
For the ravioli I made those about as simple as possible. I
have been experimenting with varying pasta dough recipes to find my favorite. I
used this recipe this time around and found it to be difficult to work and
a bit dry, but that could have also simply been the heat in this tiny kitchen
in the summer. The filling was plain old ricotta, with nothing else, again because
we were going simple here. I also served it with a Pinot Grigio for good measure.
I’m thinking that this sauce at least may make itself into
rotation for our dinner parties, it’s just too easy. We might even have to try
it over some chicken, or with rice or something. Experiments are always fun.


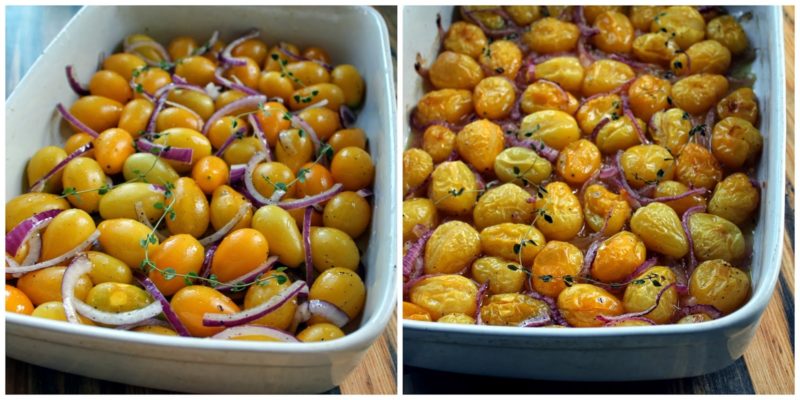
Burst Sun Gold Sauce (Serves 4)

1 quart sun gold tomatoes
½ a medium red onion, sliced thin
Salt & Pepper to taste
2 tbsp extra virgin olive oil
4-5 sprigs of thyme
Chopped basil for garnish

Preheat the oven to 375. Combine tomatoes, onion, salt,
pepper and oil in a large baking dish. Toss well to combine and spread evenly. Bake
in the oven for 35-40 minutes or until the tomatoes begin to burst, and release
juices. Remove from oven and serve immediately.

September 10, 2014 February 12, 2018 Filed Under: Recipe Tagged With: Clean, Condiment, Summer, Vegan, Vegetarian

Apricot Pork Kabobs

By Jessica

This post may contain affiliate links. I may receive commissions for purchases made through links in this post.

 A quick and easy recipe for Apricot Pork Kabobs, that is a fun and flavorful for summer.
Apricot Pork Kabobs
Sometimes I get stuck in a rut when it comes to pork. I can dress it up Asian style, or with apples (such as here, and here), but other
than that I always seem to fall back on the simple rosemary and garlic staple, or shake & bake that I know a lot of us in the north east grew up with. I
have been trying to break that mold lately and it’s working out surprisingly well.
This recipe is so far one of my favorites. With only 4 ingredients it comes together super quick, and super inexpensive. Here it is
made for the grill, but it can just as easily be broiled in the oven as kabobs or even a whole loin. I did notice that the final product need extra sauce, and that some people (think Chuck) liked to use the sauce to dip their veggies in, so this recipe makes enough for that as well.

As for what to serve with it, the options are pretty much endless. A big green salad is perfect, since the sauce can act as a dressing,
and it goes wonderfully with blue cheese crumbles. Basically swap out the barbecue chicken in this recipe for these kabobs. I have also served it with simple roasted potatoes, or you could try a basic rice pilaf like this one. Since there is so much flavor in this recipe I think basic sides are a good
option.

Apricot Pork Kabobs
Prep time: 30 mins
Cook time: 15 mins
Total time: 45 mins
Serves: 4 Servings
Ingredients
  • 6 oz apricot preserves
  • 1 1/2 tbsp low sodium soy sauce
  • 1 tsp ground garlic
  • 1 lb pork loin, cut into fist size pieces
Instructions
  1. In a small sauce pan over medium heat add preserves, soy sauce, and garlic and stir well to combine. Cook for 1-2 minutes or until the preserves have liquefied and the sauce has thickened.
  2. Remove from heat and pour about 3/4 of the sauce over pork, reserving the rest and cover.
  3. Let the pork marinade for about 30 minutes (up to 1 hour) before placing it on pre-soaked wooden skewers.
  4. Place kabobs on a preheated grill over medium high heat for about 3-4 minutes per side basting with leftover marinade.
  5. Once cooked through remove from heat and baste with reserved marinade. Serve warm with reserved sauce on the side.
3.3.3070
PS: Check out my newest post over on the Charming Blog; 10 Super Easy ways to Eat Healthier Now without Trying too Hard

September 3, 2014 January 29, 2018 Filed Under: Recipe Tagged With: Pork, Summer

Backpack Tuna Mac

By Jessica

This post may contain affiliate links. I may receive commissions for purchases made through links in this post.

This might very well be one of the best things to bring on a hike
ever. I love that they make tuna in a pouch with flavoring already! I mean does
it get easier than that?
You could basically just spoon it out of the package with crackers
and call it a meal, but I decided to up it a notch by cooking pasta for it. I
also chopped up some cucumbers, and carrots, but those are totally optional.
For this recipe I used the classic deli style tuna, but Ranch is
also a great option.
If you have a fireplace with a grate just
cook the pasta in a pan over the open fire. If you just have a fire pit without
a good grate it may be a bit more complicated. In order to cook the pasta you need
to get a pretty big fire going and then let it burn down to coals. You can
place the pot right on the coals, depending on your equipment or you can place
it on a rock in the middle (you may want to get that in place ahead of time).

The water may not actually boil like it would on the stove, but it
will get hot, and cook the pasta. Be sure to stir the pasta often and test it
to see when it’s done. Cooking times will vary based on the temperature of the
fire, but it should take anywhere from 10-25 minutes. If it is taking a while
feel free to build up the fire around the pot using small sticks, just make
sure you can still access the handles, and that they are not in danger of
melting. Note: It’s important to have the right gear for cooking over a fire. I
am working on a camping gear page now, but in the mean time, this pot is a
great example of the type that we use. 
Once the pasta is done, just drain it and stir in the tuna, and
any other ingredients. I mean how easy is that?
Another note: If you are backpacking water is a precious commodity,
I suggests saving the drained water for other uses. You could use it with
bisquick in the morning for pancakes, or stir simply in hot cocoa.

August 27, 2014 February 12, 2018 Filed Under: Camping Recipe, Recipe Tagged With: Camp Food

Hobo Chicken & Rice

By Jessica

This post may contain affiliate links. I may receive commissions for purchases made through links in this post.

This was an experiment that turned out wonderfully! I’ve been making tin foil dinners for about forever, but rice never really seemed like it was a viable option since it requires so much water.. even instant rice, but modern day offers a lot of options. So we tried a new experiment.

We used chicken with instant flavored rice, some veggies and
it worked like a charm. The chicken was moist and flavorful; the rice perfectly
cooked and while the broccoli was slightly over done, I won’t complain I mean
it was so easy and delicious.
We used Uncle Ben’s Ready Rice because the instructions required no
additional water to cook, so we thought it might work in the foil, and it did,
wonderfully. In preparing this meal I cut up the chicken ahead of time and
tossed it with the oil, salt and pepper in a small ziplock bag before tossing
it in the freezer. We do this to ensure our food stays fresher on our camping
trips, and we have less work to do in the woods.
Hobo Chicken & Rice
1 chicken breast, cut into bit size pieces
½ a package of instant, flavored rice
1 cup cut vegetables of choice

Take two large sheets of tin foil and place one on top of
the other. Place the chicken in the middle along with oil, salt & Pepper.
Toss the chicken to coat. Add rice on top and vegetables. Bring the sides of
the top piece of foil up together and roll downward to create a closed tube.
Roll the side openings up to seal the tube and flip the package over. Repeat
the same folding technique with the other piece of foil and place packet on hot
coals. Cook for 20 minutes or so turning and flipping the package regularly. Remove
from heat and allow the package to cool for a minute before opening. If you
open the package and the chicken is not thoroughly cooked refold the package
and return it to hot coals until the chicken is fully cooked. (Serves 1)

August 20, 2014 February 12, 2018 Filed Under: Camping Recipe, Recipe Tagged With: Camp Food, Chicken, Chicken/Turkey

Barbecue Grilled Chicken Salad

By Jessica

This post may contain affiliate links. I may receive commissions for purchases made through links in this post.

I have a pretty huge obsession with barbeque, I mean who wouldn’t? It’s saucy, for one you can change it up however you like, a little sweeter, a bit more of a vinegar bite, or bring on the heat. Plus it’s super versatile. I mean you don’t just have to use it in conjunction with the grill. I have slathered it on grilled cheese, and even baked with it.
This time around I wanted to lighten it up with salad. I love salad, but Chuck isn’t as sold as I am on the stuff, and prefers somethingheartier, so most of the time our salads are pretty loaded down (example 1, 2, & 3) with an abundance of vegetables, cheeses, croutons, and meat sides, remember it’s all about compromise.
Barbecue Grilled Chicken Salad

I have been making this salad for years, and I’m sure that

it is nothing new to you guys after all, the concept is pretty basic. It’s getting the ratios down that takes time. I think I finally have it; the perfect balance of ingredients.
I personally think it’s so well balanced that dressing isn’t even necessary. There are so many flavorful, creamy components that it would be just overkill. However I know not everyone feels that way, so a light drizzle of olive oil might be in order.
Barbecue Grilled Chicken Salad


Barbecue Grilled Chicken Salad
Prep time: 1 hour
Cook time: 10 mins
Total time: 1 hour 10 mins
Serves: Serves 4
Ingredients
  • 1/2 cup BBQ Sauce
  • 3 Boneless, skinless chicken breasts
  • 3 cups chopped romaine lettuce
  • 3 cups baby spinach
  • 1 cup cherry tomatoes, halved
  • 1 medium cucumber, chopped
  • 1 cup sliced carrots
  • 1/4 cup chopped red onion
  • 3/4 cup frozen corn, defrosted
  • 1 avocado, cut into 1 inch pieces
  • 1/3 cup blue cheese crumbles
Instructions
  1. Trim the chicken of fat and place in a covered bowl with about barbecue sauce to marinade, at least half an hour.
  2. Cook on a preheated grill for 4-5 minutes a side, or until the juices run clear, basting with sauce regularly.
  3. Meanwhile toss all vegetables together in a large bowl and top with avocado and blue cheese.
  4. When the chicken is done, and cooled cut it into bite size pieces and top the salad.
  5. Serve immediately with your choice of dressings.
3.3.3077

August 13, 2014 November 24, 2015 Filed Under: Recipe Tagged With: Chicken, Chicken/Turkey, Clean, salad

  • « Go to Previous Page
  • Page 1
  • Interim pages omitted …
  • Page 47
  • Page 48
  • Page 49
  • Page 50
  • Page 51
  • Interim pages omitted …
  • Page 84
  • Go to Next Page »

Primary Sidebar

  • Facebook
  • Instagram
  • Pinterest
  • Twitter
  • YouTube
Hi, I'm Jessica. I'm an herbalist living in the great northeast with my husband Chuck, our two little boys, our dog Brody and a flock of chickens. I'm all about real, good food and good times with awesome people. I spend a lot of time outside, in my garden, and concocting potions and helping people feel their best. I also like tea, reading, and about a million other hobbies. I'm so happy your here on this adventure with me.

Footer

Copyright © 2026 · Foodie Pro Theme On Genesis Framework · WordPress · Log in