• Skip to primary navigation
  • Skip to main content
  • Skip to primary sidebar
  • Skip to footer

Sweet Love and Ginger

  • Home
  • About
  • Recipes
  • Garden
  • Work With Me

Side Dish

Crispy Honey Mustard Sweet Potato Fries

By Jessica

This post may contain affiliate links. I may receive commissions for purchases made through links in this post.

Honey Mustard Sweet Potato Fries

I might be the smartest person to ever enter a kitchen.

Ok that might just be my opinion, but you should strongly consider the possibility that it’s true.

I came up with the craziest concept the other day and I had to try it. Then tweek it, and try it again, and again, and well hell 4th time is the charm. I may or may not have eaten all the experiments in between, you guys, because omg they were all delicious. Too bad I wasn’t just going for delicious though.

Honey Mustard Sweet Potato Fries

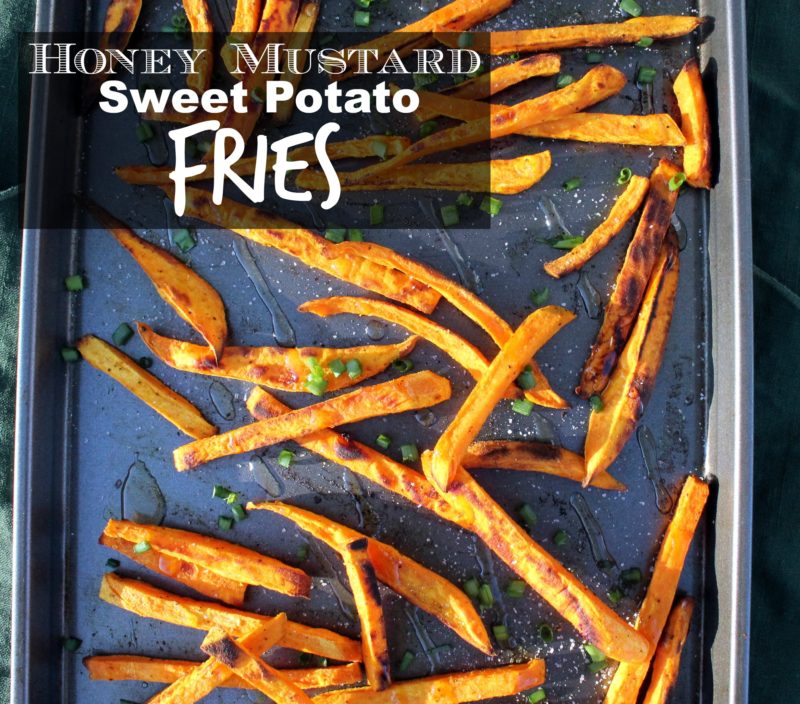
Not that delicious is bad (it’s totally great), you see, I wanted sweet potato fries and honey mustard, because they just go together you know? I mean that combination is already delicious so I wanted to do something different than just make a dipping sauce, because lets be real here that’s been done for year now. Not that there’s anything super wrong with dipping, dipping sauce is awesome, but not what I was looking for either.

I wanted an all in one fry, kind of like barbecue chips, they need nothing, all the flavor is there already.

Honey Mustard Sweet Potato Fries

So I toiled and toiled in a hot steamy kitchen; ok maybe I just baked a few batches of fries while I waited for Chuck to get back from golfing and it was actually a lot of fun. Let’s just go ahead and establish my dork status now, I like to experiment and you know use the scientific method, that thing we all learned in middle school. Yeah I’m that girl. Anyway coming up with the right spice to liquid ratio was the key here. We want crispy fries, with all the flavor and then there was the honey. I’m pretty positive there’s no way to cook the fries with the honey on them and have them come out both crispy and not burned honey tasting.

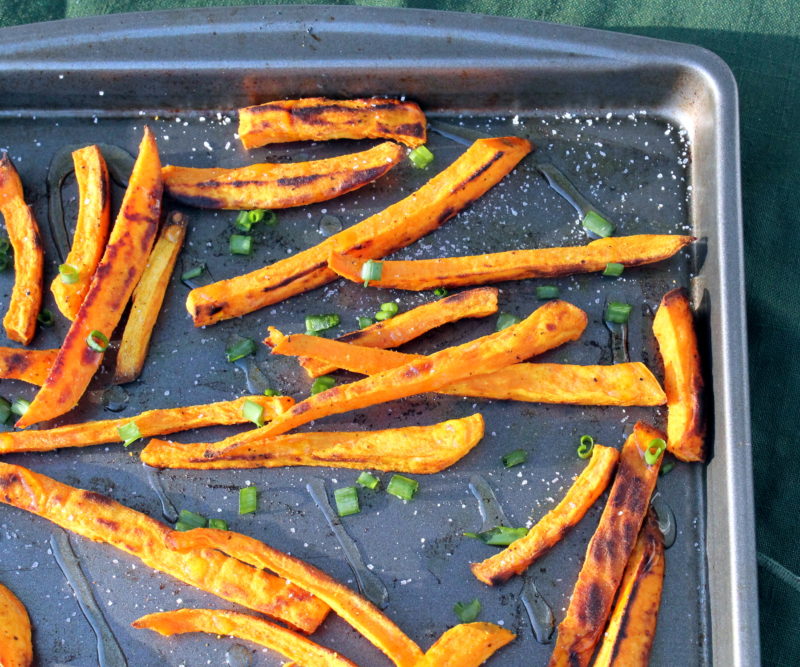
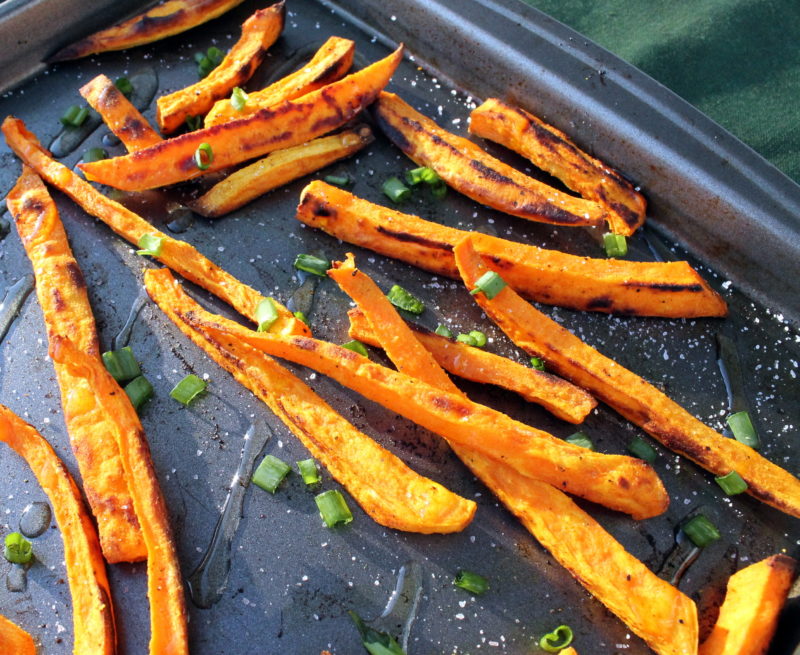
In the end the honey drizzle was just the thing. I’m pretty sure I ate my weight in sweet potato that day. It’s cool, I don’t have a wedding dress to squeeze myself into in a few months or anything. Psh. Whatever.

You are going to love this really, it’s the best, and the new way to cook sweet potato fries. I’m telling you this is going to be a thing.

Crispy Honey Mustard Sweet Potato Fries
Prep time: 10 mins
Cook time: 30 mins
Total time: 40 mins
Serves: 4 servings
Ingredients
  • 2 tablespoons oil
  • 1 tablespoon white wine vinegar
  • 1 teaspoon lemon juice
  • 1 tablespoon ground mustard
  • ½ teaspoon turmeric
  • ½ teaspoon salt
  • ¼ teaspoon pepper
  • ¼ teaspoon paprika
  • 2 large sweet potatoes, peeled and cut into strips
  • 1-2 tablespoons honey
  • 1 teaspoon of course sea salt
  • 1 tablespoon green onion, chopped (for garnish)
Instructions
  1. Preheat the oven to 400 degrees.
  2. In a small bowl whisk together the oil, vinegar, lemon, mustard, turmeric, salt, pepper, and paprika.
  3. In a large bowl toss the sweet potato with the spice mixture until well coated.
  4. Spread the potato out on a large prepared baking sheet, so that none of them are touching and place in the oven and bake for 15 minutes.
  5. Turn the fries once and place back in the oven for 15 minutes then remove from heat and let cool slightly.
  6. Drizzle with honey. Sprinkle with salt and green onion. Serve immediately.
3.3.3070

Honey Mustard Sweet Potato Fries

May 6, 2015 October 15, 2019 Filed Under: Recipe, Side Dish Tagged With: Clean, Gluten Free, Side Dish, Vegetarian

Roast Veggie Bowl with Lemon Pesto Dressing

By Jessica

This post may contain affiliate links. I may receive commissions for purchases made through links in this post.


It’s that time of year when we are constantly surrounded by
overly rich and heavy food. It’s great; I mean who doesn’t get excited for thick
and creamy soups, gravy, cookies, and pies? But these are the day’s I find
myself feeling the most weighed down. My body feels lethargic and slow, I’m
easily bloated and grumpy. Really they only thing I have to blame is all of the
rich carb loaded food that I’m likely to eat.

This year I am attempting to avoid that. Not only am I going
to try really hard to follow my own
advice, but I’m incorporating more light, veggie loaded healthy meals into our
weekly diet. Meals like this, this or this.
I was scanning through my fridge to see what I had to make
up lunch one day a few weekends ago when I remembered the early summer wonder bowl I had made what seemed like years ago (in fact it was only months). I thought it would be a good idea to
make myself a winter version with roasted, and sautéed vegetables. I couldn’t
have been happier with the result especially with this simple and bright
dressing, because pesto.

I used the vegetables that I had on hand, leftovers from
friends and family member’s gardens, but you can use whatever you have on hand,
even leftovers warmed up from the night before. Just be sure to cut the hardier
vegetables up small enough to roast evenly with the less hardy vegetables.


Roasted Winter Veggie Bowl (Serves 2-4)
2-3 purple potatoes, cleaned, and chopped into 3/4″ cubes
1/2 a small butternut squash peeled and chopped into 3/4″ cubes
1 medium red onion, peeled and quartered
2-3 tbsp olive oil, separated
Salt & Pepper to taste
3 cloves of garlic, peeled and halved
1 bunch of broccoli rabe, chopped


Preheat the oven to 400 degrees. Place the potatoes, squash and onion on a baking sheet. Drizzle with about half of the oil, and sprinkle with salt and pepper. Roast the vegetables in the oven for about 40-45 minutes or until the vegetables are all tender. Meanwhile drizzle the rest of the oil in a large pan and add in the garlic and broccoli rabe. Saute for 3-4 minutes or until it is tender, and vibrant green. Combine all ingredients in a large bowl and serve warm.


Lemon Pesto Dressing (Serves 5-6)
1/2 cup prepared pesto 
2 tbsp white wine vinegar
1 tbsp fresh lemon juice
zest of one lemon
1/4 cup extra virgin olive oil
pinch of salt


Combine all ingredients in a small bowl until well blended. Serve immediately, or stored in an air tight container in the fridge for 5-7 days.

December 17, 2014 December 5, 2017 Filed Under: Recipe, Side Dish Tagged With: Fall, Vegetarian, Winter

Venison Sausage Stuffing

By Jessica

This post may contain affiliate links. I may receive commissions for purchases made through links in this post.

I’m so incredibly excited to share this recipe with you today.

It’s a recipe that I got from Miss Amy, kind of. She’s not exactly one to write down what she does or how she does it, so there is definitely some improvisation in nearly everything she makes based on what she has on hand. This of course makes it difficult for me or anyone else to recreate it. I can usually figure it out pretty easily. I mean most of these recipes I have seen made about 8 bajillion times but once in a while there is just one that I cannot for the life of me get right.

This is one of those recipes.

It only took me 2 or 3 YEARS to get right. I didn’t make it often at first because I could never get it right, but this winter I made it my life goal, and after several unsuccessful attempts I think I’ve finally gotten it.

You see this is one of Chuck’s favorite things ever so it’s kind of imperative that I get it right. I don’t think it would make or break the relationship or anything but I like pleasing him, so it became pretty important to me, and he was happy to be my guinea pig.

The thing is with stuffing that it’s very dependent on personal preference. I know quite a few people who prefer it dry and others that prefer more of a chunky-pudding consistency. Personally I like it exactly in the middle, and that’s what made getting it right hard.

Now if you don’t have or are not a fan of venison sausage just swap it out for any other sausage you prefer, it will change the flavor a bit, but not the recipe.

If you do prefer it moister I would suggest not uncovering it while it cooks, before you try adding more liquid. It makes a big difference. If you like it dryer simply uncover it sooner. However I would do this in small increments because a lot can happen in a minute or two in the oven.

Venison Sausage Stuffing
Prep time: 10 mins
Cook time: 45 mins
Total time: 55 mins
Serves: 4 to 6 Servings
Ingredients
  • ½ lb venison sausage
  • 1 tbsp butter
  • 1 onion, peeled & chopped
  • 1 celery rib chopped
  • 3 cups chopped toasted bread of choice (I like to use
  • different types for texture)
  • 1 cup vegetable broth
  • 1 tsp oregano
  • ½ tsp thyme
  • Salt & Pepper to taste
Instructions
  1. Preheat oven to 350 Degrees.
  2. Place bread cubes on a rimmed baking pan and bake for 6 to 8 minutes, until toasted and golden.
  3. Meanwhile in a large skillet cook and crumble the sausage until browned over medium high heat. Discard excess fat if any (venison usually doesn’t have much but beef or pork sausage will) and remove from pan and place in a 9×12 inch baking pan.
  4. In the same pan add butter, onion, celery thyme, parsley, salt and pepper. Sauté over medium heat for 8 to 10 minutes, or until the vegetables are softened. Remove from heat and combine with sausage.
  5. Deglaze the hot pan with broth and allow it to simmer over medium high heat until reduced slightly (you should be left with 1 ½ cups liquid), scraping the browned bits from the bottom of the pan while it simmers.
  6. Combine the toasted bread with the sausage and vegetables. Add the reduced broth and toss to combine.
  7. Place in the oven and bake for 30 minutes until browned on top and hot in the middle.
3.3.3077

Similar Recipes:

Caramel Apple Bread Pudding

Leftover Turkey & Stuffing Casserole

Leftover Mashed Potato Pancakes


February 26, 2014 October 17, 2019 Filed Under: Recipe, Side Dish, Venison, Wild Game Tagged With: holidays, Side Dish, Venison

Green & Yellow Beans: 4 Ways

By Jessica

This post may contain affiliate links. I may receive commissions for purchases made through links in this post.

Right now the garden is overflowing with green and yellow beans (mostly yellow). We cannot eat them fast enough, so I have started putting a few in the freezer, but I’m still loading up our meals with quite a few of them.

After a long weekend away visiting Chuck’s parents in VT we came back to the mother-load of beans. So I decided I would cook them all in one night.

Now the issue was how to make a load of green beans appealing to us. I opted to make them in all of
our favorite ways, the idea being that they would feel like separate side dishes and not be a chore to
eat, plus it would be a great way to showcase my favorite green bean recipes here on the le blog. 

Charred Barbeque Green Beans

1lb green or yellow beans

¼ cup prepared barbeque sauce

Place grean beans on a preheated grill over high heat and
cook until the outsides begin to char. Toss with barbeque sauce and serve.

Quick Greek Style Green Beans

1 tbsp extra virgin olive oil

2 cloves of garlic, sliced

1 lb
green or yellow beans

Juice from ½ a lemon

½ a lemon sliced

¼ cup of feta cheese crumbles

In a large frying pan heat oil and garlic over medium heat sautéing
for 3-5 minutes, or until garlic begins to brown and become aromatic. Add beans
and toss cooking for an additional 1-2 minutes, just enough to heat the beans
through. Transfer to a serving tray and toss with lemon, juice, and feta
cheese.

Bacon and Caramelized Onion Beans

2 or 3 strips on bacon

1 small onion sliced thin

½ tsp salt

1 lb
green or yellow beans

In a large frying pan cook bacon until crispy and remove
from pan. Add onion to the pan and sauté, you may need to add a little olive
oil depending the amount of drippings in the pan. Reduce the heat to medium and
add salt. Cook the onion, stirring occasionally until it begins to brown and caramelize.
Add the bacon back into the pan, along with the beans, cooking for an
additional 1-2 minutes, and serve.

Beans with Harrissa Oil & Tomatoes

1 tbsp Harrisa Condiment (available at specialty stores)

2 tbsp extra virgin olive oil

1 lb
green or yellow beans

1 handful cherry tomatoes, halved

In a large frying pan heat oil and harrissa over medium high
heat for 1-2 minutes, add beans and tomatoes to the pan and cook for an
additional 1-2 minutes, tossing to coat. Serve immediately.

Now here are just 4 of our favorites, but there’s so many more that include eggs, sundried tomatoes,
and different cooking procedures.

What’s your favorite bean recipe?

August 16, 2013 December 4, 2017 Filed Under: Recipe, Side Dish

  • « Go to Previous Page
  • Page 1
  • Interim pages omitted …
  • Page 5
  • Page 6
  • Page 7

Primary Sidebar

  • Facebook
  • Instagram
  • Pinterest
  • Twitter
  • YouTube
Hi, I'm Jessica. I'm an herbalist living in the great northeast with my husband Chuck, our two little boys, our dog Brody and a flock of chickens. I'm all about real, good food and good times with awesome people. I spend a lot of time outside, in my garden, and concocting potions and helping people feel their best. I also like tea, reading, and about a million other hobbies. I'm so happy your here on this adventure with me.

Footer

Copyright © 2025 · Foodie Pro Theme On Genesis Framework · WordPress · Log in