• Skip to primary navigation
  • Skip to main content
  • Skip to primary sidebar
  • Skip to footer

Sweet Love and Ginger

  • Home
  • About
  • Recipes
  • Garden
  • Work With Me

Seafood

Mahi Mahi Fish Tacos with Easy Chipotle Mayo

By Jessica

This post may contain affiliate links. I may receive commissions for purchases made through links in this post.

Mahi Mahi Fish Tacos with Easy Chipotle Mayo


I always thought fish tacos were kind of weird. In my house growing up tacos contained ground beef, and a spicy sauce that came out of a packet and magically made the meat sauce thick and creamy. Sure we had fajitas, or the chicken version of a taco (in my mind), but fish? That’s not right.

Then this summer we were vacationing on the beach and one of the restaurants we went to had a mahi mahi fish taco special, and it came with chipotle mayo. I LOVE mahi mahi and am completely head over heels for chipotle anything, and typically keep chipotle mayo around out house on a regular basis. So I took the dive and tried this thing that I have been seeing around the internet for a while, and always thought was just so wrong.
Guys I was the one that was wrong. So very wrong.
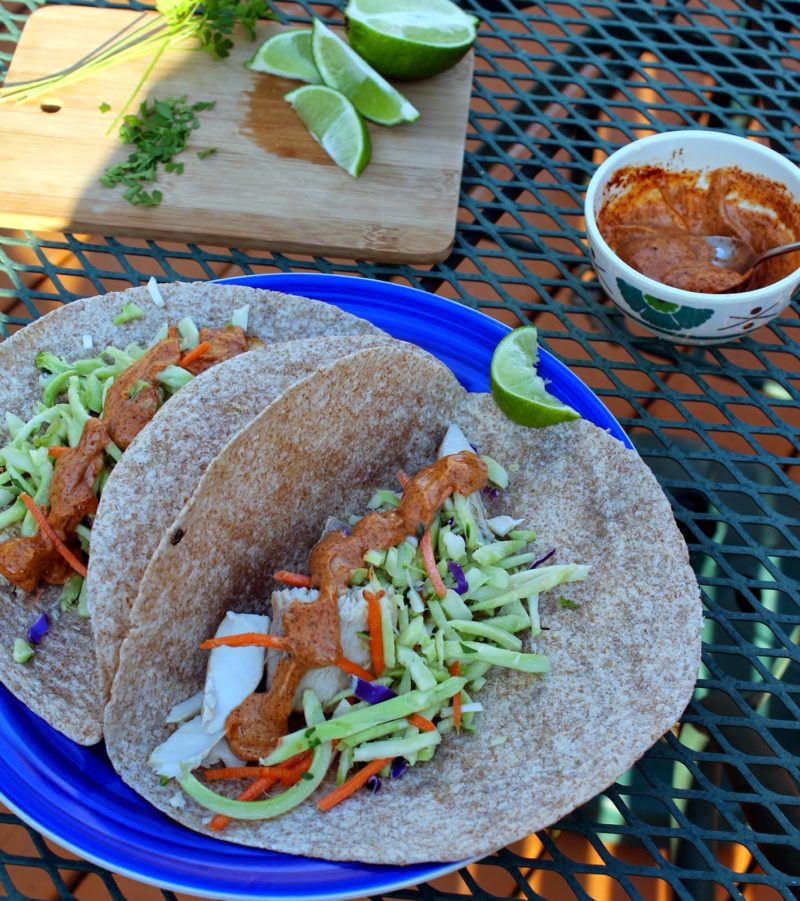
They were and explosion of deliciousness in my mouth that I just couldn’t comprehend. The texture wasn’t at all as mushy as my mind had envisioned, in fact the slaw on top made it crunchy while also balancing the heat from the mayo.

I knew that when I got home I was going to recreate it. It took me some time to get the measurements just right but I think I have them. I made the mayo with chipotle powder in order to keep the recipe simple, since not everyone wants to fool around with blending up chilies and all that jazz. It still tastes amazing, I mean how could it not?

Mahi Mahi Fish Tacos with Easy Chipotle Mayo


Also if I can make the suggestion to serve this with something that is chipotle mayo scoop-able. Something such as chips or fries, something you want to dip into the fish-juicy mayo-y mixture that will inevitably squirt all over your plate, it’s so good you don’t want it to go to waste. These fries are a great option for that.
Mahi Mahi Fish Tacos with Easy Chipotle Mayo
Prep time: 5 mins
Cook time: 10 mins
Total time: 15 mins
Serves: 4 Servings
Ingredients
  • 1 pound wild caught, mahi mahi
  • 2 tablespoons olive oil, divided
  • 1 ½ teaspoon paprika
  • ½ teaspoon chipotle Chile powder
  • ¾ teaspoon garlic powder
  • ½ teaspoon onion powder
  • ¼ tsp salt
  • 1/3 cup plain mayonnaise
  • 2-3 teaspoons chipotle powder
  • 1 tsp lime juice
  • Flour or corn tortillas
  • 1 cup prepared broccoli slaw
  • 1 spring of cilantro for garnish
Instructions
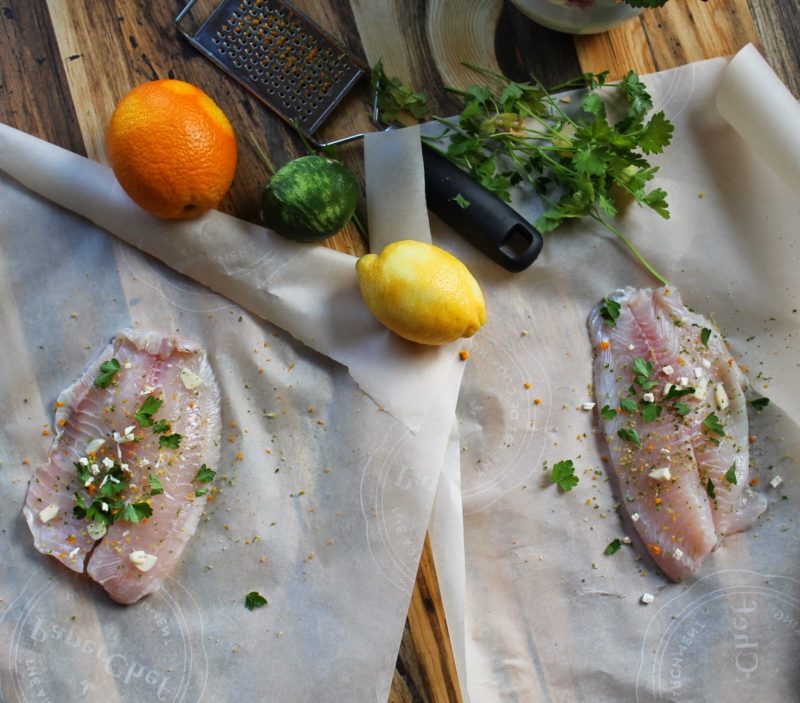
  1. In a small bowl whisk together the oil, paprika, chipotle chile powder, garlic powder, onion powder, oregano and a pinch of salt and pepper.
  2. Rub the Mahi Mahi all over with this combination and set aside.
  3. Prepare the Chipotle Mayo by whisking chipotle powder with mayo
  4. and lime.
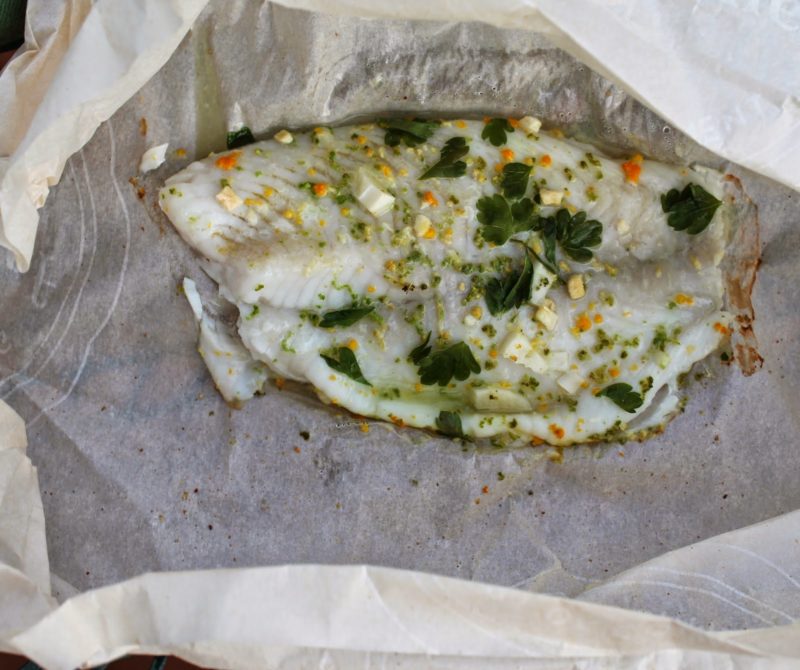
  5. Heat a skillet over medium high heat. Add the marinated mahi mahi, and cook for about 4-5 minutes. Flip and cook another 4-5 minutes. The fish should be crisp and cooked through. Remove from heat and with a fork or
  6. chop into chunks.
  7. Assemble the tacos with fish, slaw, mayo and clitantro to taste.
3.3.3077

and

Maple Chipotle Veggie, Bacon Quesadillas

Maple Chipotle Veggie, Bacon Quesadillas

Fajita Spice Mix

Fajita Spice Mix

Thai Glazed Salmon

April 15, 2015 October 15, 2019 Filed Under: Main Dish, Recipe, Seafood Tagged With: Condiment, Quick & Easy, Seafood, Weeknight Meals

Summery Citrus Tilapia

By Jessica

This post may contain affiliate links. I may receive commissions for purchases made through links in this post.

Summery Citrus Tilapia
The thing about the summer is that it’s hot. Sometimes it’s so hot that the idea of eating food actually makes my stomach flip. How could I possibly be hungry when the rest of my body feels all floppy and in coherent?
But then hungry and floppy almost instantly becomes hangry, like seriously hangry. When you are already uncomfortable little things seem 10 times worse than they actually are.
This was one of those days.
Luckily for me we can’t open our freezer without a landslide of food falling on us. I like to keep stocked up on good sales, and quickly defrosting stuff to help curb out Chinese takeout addiction. Tilapia is one of those things that defrosts pretty quickly, and cooks just as fast, saving time away from the super hot oven.
I basically tossed the fillets into parchment with some herbs, and citrus zest from whatever we happened to have on hand. Did I mention it was hot? I wanted fresh and bright flavor, and very little work. My plan  worked because the tilapia came out moist and bright, and in only 20 minutes. I paired it with some leftover wild rice pilaf, and raw broccoli. Our veggies tend to be raw when I am feeling lazy. I’m told they are better for us that way, which is just an added bonus to the energy I’m saving, and dishes we don’t have to wash.
At least this is what I tell people instead of just “yeah I was lazy”. I’m sure they totally buy it. At least Chuck likes most vegetables raw anyway, sans dip.
He is weird I know.
Summery Citrus Tilapia
This recipe is super easy and perfect for summer, or in winter when you are dreaming of summery beach days.
Summery Citrus Tilapia
Prep time: 10 mins
Cook time: 15 mins
Total time: 25 mins
Serves: 4 servings
Ingredients
  • 3 tilapia fillets (about 1 lb)
  • 1 clove of garlic, minced
  • Zest from one orange
  • Zest from one lemon
  • Zest from one lime
  • 1 tablespoon fresh parsley coarsely chopped
  • Slat & pepper to taste
Instructions
  1. Preheat the oven to 450 degrees.
  2. Place 1 tilapia fillet on a large piece of parchment paper and top with 1/3 of the garlic, zests, parsley, salt & Pepper. Repeat with the remaining fillets. Fold up the sides of the parchment to create a pouch and seal in the fish.
  3. Place in the oven on a baking sheet and cook for 12-15 minutes or until the fish flakes easily with a fork.
  4. Carefully remove from the oven and open the packets slightly. Let cool for 3-5 minutes and serve.
3.3.3077

July 16, 2014 April 29, 2016 Filed Under: Recipe Tagged With: Clean, Seafood

D4One: Shrimp Fried Rice

By Jessica

This post may contain affiliate links. I may receive commissions for purchases made through links in this post.

Shrimp Fried Rice
Fried rice is probably one of the easiest recipes ever, and shrimp fried rice is only about 1/8 of a degree more difficult. It’s also something that can be made pretty easily from pantry staples, so no additional shopping is needed.  I made this recipe the easiest I possibly could, even cutting out a lot of chopping and shucking by using frozen peas and carrots. Of course you can also use fresh veggies, I do suggest cutting them up pretty small, and at least tossing the carrots in the pan at the same time as the onion so that it cooks all the way through, and otherwise it’s basically all the same.
Shrimp Fried Rice

This recipe, though suited for one is pretty easy to double, triple, or even quadruple to feed a crowd. I was able to stretch this recipe for one to feed both me and Chuck by steaming up a large batch of Asian style veggies. We are trying to keep it a little healthy over here.

PS. This one is clean too.

Shrimp Fried Rice
Shrimp Fried Rice
Prep time: 5 mins
Cook time: 20 mins
Total time: 25 mins
Serves: 1 serving
Ingredients
  • 4 oz. of Shrimp (about 9 medium shrimp), peeled & deveined
  • 1 tbsp low sodium soy sauce
  • 1 tbsp low sodium teriyaki sauce
  • 1 tsp ground ginger
  • 1 tbsp extra virgin olive oil
  • ½ a small onion, peeled and chopped
  • 1 egg
  • ½ cup of frozen peas and carrots
  • ½ cup of cooked brown rice
  • handfull of green onions, chopped (optional)
Instructions
  1. In a small bowl combine soy sauce, teriyaki sauce and ginger then add shrimp and toss. Allow them to marinate at room temperature for about 10 minutes.
  2. Preheat a large sauté pan with oil over medium high heat. Add the shrimp and sauté for about 30 seconds a side, or until they begin to turn pink. Remove from heat and set aside.
  3. Reduce the heat to medium (you may need to add some more oil) and add onion to the pan cooking for 2-3 minutes, or until they begin to turn translucent.
  4. Add the egg right into the pan and using a spatula mix well, breaking the yolk and cooking through.
  5. Then add the vegetables, and rice tossing well to mix and heat through.
  6. Stir in the shrimp, and green onion to the pan and again mix well.
  7. Serve immediately with an extra drizzle of soy sauce.
3.5.3226

April 21, 2014 January 23, 2017 Filed Under: Recipe Tagged With: Clean, Dinner 4 1, Quick & Easy, Seafood, Weeknight Meals

Corn Chowder with Crab & Red Pepper Crostini

By Jessica

This post may contain affiliate links. I may receive commissions for purchases made through links in this post.


Corn Chowder with Crab & Red Pepper Crostini

Corn chowder is probably one of the easiest things to make, but it’s so delicious, and a perfect ode to the end of summer, with fresh corn from the local stand, some fresh red pepper to brighten it up, and a cool glass white wine, and it’s pretty much heaven. Then as I was sitting at my desk at work daydreaming about this combination I thought that some crostini might just
make it that much better, I thought about things like caprese, French onion, cucumber and dill, and even ham and cheese, which all sounded delectable, then as always my mind turned to seafood. You probably know by now I have an undying love of seafood. Remembering I had a can of crab meat waiting to be used inspired a whole other idea.

It sounds do decadent, and looks like restaurant quality, but it only took 20 minutes to whip up and only costs $2.64 a serving, so $5.28 for the entire dinner for the two of us. The recipe actually serves 3-4, since I took the leftovers for lunch the next day, at a total cost then of $7.88.

Sometimes I love how things work out.

Here’s to the end of august, and fresh farm stand corn!

Clean Corn Chowder
Clean Corn Chowder with Crab & Red Pepper Crostini
Prep time: 5 mins
Cook time: 20 mins
Total time: 25 mins
Serves: 4 servings
Ingredients
  • 1 tbsp oil
  • 1 small onion, chopped
  • 1 spring of fresh thyme (1 tbsp dried)
  • 1 tsp paprika
  • 1 tsp fresh cracked pepper
  • 1 lb Fozen or Fresh Corn
  • 1 1/5 cups vegetable or chicken broth
  • 2 tbsp low fat milk
  • ½ a medium red pepper chopped
  • 1-2 fresh chives, chopped
Instructions
  1. In a thick bottom sauce pan heat oil, over medium high heat and sauté onion for 3-4 minutes, or until it begins to turn translucent.
  2. Stir in thyme, paprika, pepper and corn. Continue to cook for 2-3 minutes, stirring
  3. continuously.
  4. Add broth and allow the combination to simmer for 6-8 minutes.
  5. Using a ladle spoon out about ¾ of the mixture into a blender and blend until
  6. smooth before returning it to the pan.
  7. Reduce the heat to low and stir in milk.
  8. Serve in bowls topped with red pepper and chives.
3.3.3077

Crab & Red Pepper Crostini

½ a loaf of crusty whole wheat bread

1 tbsp extra virgin olive oil

1 can crab meat, drained

½ a red pepper, chopped

1 tbsp Dijon mustard

2 tsp lemon juice

2-3 fresh chives, chopped

Sprinkle of shredded Monterey jack cheese

Slice the bread, and place on a baking sheet and drizzle lightly with olive oil. Place in a preheated oven at 475 degress, for 5-10 minutes, or until toasted, meanwhile combine all other ingredients, except cheese in a small bowl. Once the bread is toasted place a clump of the crab mixture on each piece of toasted bread, and sprinkle with cheese. Then place back in the oven for 2-3 minutes, or until the cheese has melted. Serve immediately.
A small side note: the crab mixture is also good in the soup, so don’t feel shy about skipping the spoon using the crostini as a utensil instead. In fact I strongly suggest that this is how it should be eaten.

August 26, 2013 January 8, 2016 Filed Under: Recipe Tagged With: appetizer, Clean, Seafood, Soup/Stew, Vegetarian

Dinner 4 One: Linguine with White Clam Sauce

By Jessica

This post may contain affiliate links. I may receive commissions for purchases made through links in this post.

Some days you just need a little loving.
Or maybe you just need to love yourself.
I firmly believe that good food feeds your heart, mind, and soul.
Last Minute Linguine with White Clam Sauce
I take so many comforts in the food that I make; Chicken and Dumplings when I’m sick, tea, for just about anything, and homemade chicken parmesan or pizza melts my heart every time. Out of the box mac & Cheese is the best thing ever for hangovers, especially when its topped with taco meat, tomatoes, and shredded cheddar cheese, or chili. Seafood lifts my spirits, and aids with my celebrations.
It’s truly shocking that I have never learned to make  with clam sauce. I mean if you were to ask Chuck what my favorite food was he would probably say that because I order it every single time we go anywhere it is offered.
I don’t know why but in my mind it was far beyond my capabilities, and to be honest to make it good from scratch with whole real clams can be quite a big undertaking, but from a can on the other hand, that’s definitely possible.
 Last Minute Linguine with White Clam Sauce
You probably know cooking anything (aside from beans or tomatoes) out of a can for me is a little unnerving, but I saw a can of clams in clam juice at the store next to the tuna, and I’m pretty sure my heart stopped. They actually can this sh!t!? Hell Yes they do. I brought them home that night and after reading through the classic recipe for Linguine with clam sauce that I had I decided to make a similar version using the canned clams.
After the rough and hectic day that I had this was just what my soul required, and now you will always find a can of clams hanging around the house, for those days when I need a little loving.
Last Minute Linguine with White Clam Sauce
Prep time: 5 mins
Cook time: 20 mins
Total time: 25 mins
Serves: Serves 1
Ingredients
  • 1-2 tablespoons of Extra Virgin Olive Oil
  • 2-3 cloves of garlic, smashed
  • 1 tablespoons unsalted butter
  • 2-3 clovs of garlic, sliced
  • ½ teaspoon red pepper flakes
  • 1 teaspoon pepper
  • 1 can clams, with juice
  • 2 oz linguine, cooked aldente
  • ¼ cup parmesan cheese
  • 1 tablespoon chopped parsley
  • 1 tablespoon chopped oregano
Instructions
  1. Coat the bottom of a skillet with garlic, and sauté the smashed garlic cloves over medium-high heat.
  2. When the garlic becomes golden and aromatic, about 3-5 minutes, remove it from the pan and discard.
  3. Add the sliced garlic, butter, pepper and red pepper flakes to the pan, also add additional oil if necessary. Sauté for 2-3 minutes or until the garlic just begins to brown.
  4. Stir in the canned clams with juice, and cook for 5-6 minutes, allowing the liquid to reduce slightly, and the clams to cook.
  5. Add the cooked pasta and toss, while still over the heat, this will help the sauce adhere to the pasta.
  6. Remove from heat and top with parmesan cheese, oregano and Parsley.
3.3.3077
For those of you who may not like the “green things” on top of the dish, in this case I strongly suggest that you give them a shot; mix them in with the cheese and the pasta, they give it another dimension of
flavor. I’m telling you!!

Related Recipes:

Scallop Carbonara

Scallop Carbonara

Tomato Sauce From Scratch

Tomato Sauce From Scratch

Shrimp & Sun Dried Tomato Cream Sauce

Shrimp & Sun Dried Tomato Cream Sauce

May 30, 2013 January 4, 2017 Filed Under: Recipe Tagged With: Dinner 4 1, Pasta, Quick & Easy, Seafood

  • « Go to Previous Page
  • Page 1
  • Page 2
  • Page 3
  • Page 4
  • Page 5
  • Go to Next Page »

Primary Sidebar

  • Facebook
  • Instagram
  • Pinterest
  • Twitter
  • YouTube
Hi, I'm Jessica. I'm an herbalist living in the great northeast with my husband Chuck, our two little boys, our dog Brody and a flock of chickens. I'm all about real, good food and good times with awesome people. I spend a lot of time outside, in my garden, and concocting potions and helping people feel their best. I also like tea, reading, and about a million other hobbies. I'm so happy your here on this adventure with me.

Footer

Copyright © 2025 · Foodie Pro Theme On Genesis Framework · WordPress · Log in